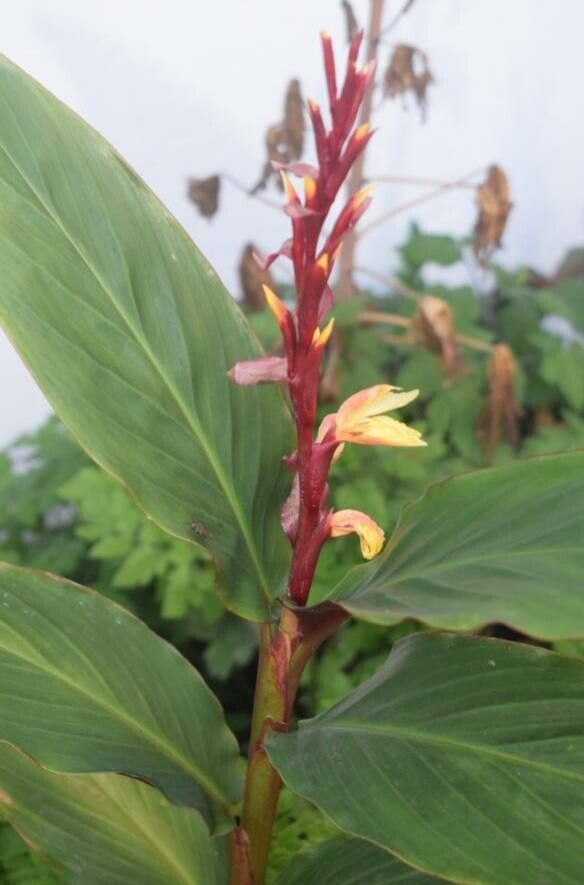
Hey there, fellow plant lovers! Gather ’round, because today we’re diving into the wonderful world of propagating Cautleya gracilis. If you’ve ever admired those elegant, arching stems and exotic, ginger-like flowers that add such a touch of the tropics to a garden or greenhouse, you’re in for a treat.
There’s something incredibly satisfying about taking a piece of a beloved plant and coaxing it into a whole new life. It’s like nature’s little miracle, and Cautleya gracilis, while not the absolute easiest, is wonderfully rewarding to multiply. Don’t be intimidated; we’ll walk through it together!
The Best Time to Start
For the highest success rate with Cautleya gracilis, the sweet spot is late spring to early summer. This is when the plant is actively growing and has plenty of energy to put into new root development. Think of it as getting a head start before the really hot weather hits, allowing the new cuttings to establish themselves nicely.
Supplies You’ll Need
To get your propagation station set up, here’s what will make your life easier:
- Sharp Pruning Shears or a Clean Knife: For making clean cuts.
- Potting Mix: A well-draining mix is crucial. I like to use a blend of perlite and peat moss, or a good quality seed-starting mix. Something that won’t hold too much moisture is key.
- Small Pots or Trays: Clean, with drainage holes, of course!
- Rooting Hormone (Optional, but Recommended): This can give your cuttings a helpful boost.
- Watering Can or Spray Bottle: For gentle watering.
- Clear Plastic Bags or Domes: To create a humid environment for your cuttings.
Propagation Methods
The most common and effective way to propagate Cautleya gracilis is through division. These plants naturally form fleshy rhizomes, which are perfect for splitting.
Division (The Go-To Method):
- Gently Unpot: Carefully remove your Cautleya gracilis from its pot. If it’s in the ground, you’ll need to dig it up, taking care not to damage the roots.
- Inspect the Rhizomes: You’ll see thick, fleshy underground stems – these are the rhizomes. Look for sections that have at least one eye or bud and a portion of the root system attached.
- Divide with Care: Using your sharp shears or knife, carefully divide the rhizome. For tougher sections, you might need to gently twist and pull them apart. Make sure each piece has some roots and at least one healthy-looking bud.
- Trim if Necessary: If any roots look damaged or too long, you can trim them back a bit.
- Pot Up: Plant each divided section into its own pot filled with your prepared well-draining potting mix. Ensure the rhizome is just barely covered with soil, with the eye pointing upwards.
- Water Lightly: Give the freshly potted divisions a gentle watering to settle the soil.
- Create Humidity: Cover the pot with a clear plastic bag or a humidity dome. This will help keep the moisture levels high, which is essential for the plant to start growing new roots.
The “Secret Sauce” (Pro Tips)
Here are a few things I’ve learned over the years that make a big difference:
- Don’t Drown Your Roots: When watering, err on the side of caution. Overwatering is one of the fastest ways to lose a new division to rot. Let the top inch of soil dry out slightly between waterings.
- Embrace the Heat: Cautleya gracilis loves a bit of warmth to get going. Placing your pots in a spot with gentle bottom heat (like a heat mat designed for seedlings) can significantly speed up root development. It mimics that lovely, warm tropical soil they crave.
- Patience is Key with Division: Sometimes, a divided section will look dormant for a little while. Don’t despair! As long as the rhizome isn’t showing signs of rot, it’s likely working on establishing its roots below the surface. Keep it lightly moist and warm.
Aftercare & Troubleshooting
Once you see new shoots emerging, this is a fantastic sign your division is taking off!
- Gradually Acclimate: Begin to remove the plastic bag or dome for increasing periods each day to let the new plant adjust to drier air. This prevents shock.
- Continue Gentle Watering: Keep the soil consistently lightly moist, but never waterlogged.
- Bright, Indirect Light: Place your new plant in a location with bright, indirect light. Direct sun can scorch tender new growth.
The most common issue you might encounter is rot. If you see your rhizome turning black and mushy, it’s usually a sign of too much moisture. If caught early, you might be able to salvage a healthy section by cutting away the rotten bits and repotting in fresh, dry soil. However, sometimes it’s best to accept the loss and try again.
A Little Encouragement
Propagating Cautleya gracilis through division is a rewarding journey. Take your time, observe your new plants, and don’t be afraid to reach out if you have questions. Enjoy the process of nurturing new life – it’s one of the most fulfilling aspects of gardening, wouldn’t you agree? Happy propagating!
Resource:
https://identify.plantnet.org/k-world-flora/species/Cautleya%20gracilis%20(Sm.)%20Dandy/data