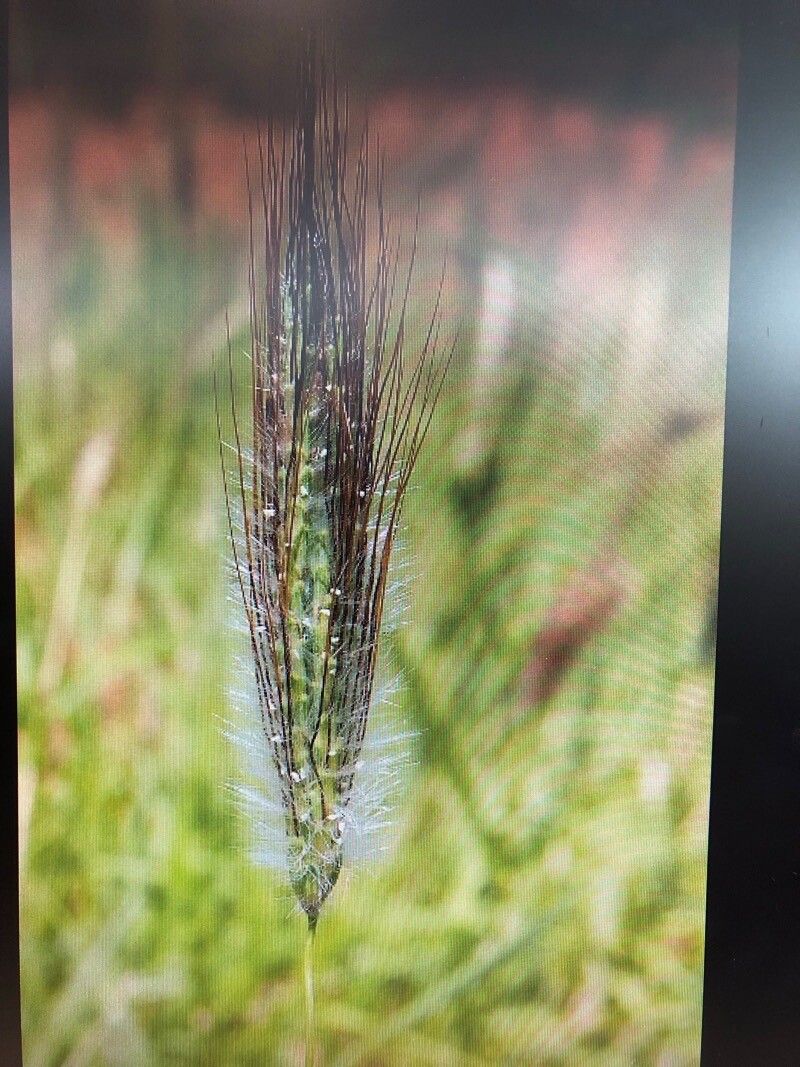
Hey there, fellow plant lovers! My name is [Your Name], and I’ve been elbow-deep in soil for about two decades now. It’s been a delicious journey, filled with learning, a few spectacular failures (we all have them!), and a whole lot of joy. Today, I want to talk about a grass that’s stolen my heart: Dichanthium sericeum, or as it’s often called, Silky Bluegrass.
The appeal of Silky Bluegrass is easy to spot. Its soft, silvery-blue foliage has this incredible shimmer that moves with the slightest breeze. It brings a delicate, almost ethereal beauty to any garden space. And the best part? Propagating it is surprisingly rewarding, and I’m going to walk you through it. Don’t worry, even if you’re just dipping your toes into the world of propagation, this is a lovely one to start with.
The Best Time to Start
For Dichanthium sericeum, the sweet spot for propagation is typically late spring to early summer. This is when the plant is in its most vigorous growth phase. You’ll find it’s producing fresh, healthy shoots after the cooler months, and these new growths are far more likely to root successfully. Think of it as capturing the plant at its most energized and ready to embrace new beginnings.
Supplies You’ll Need
Before we get our hands dirty, let’s gather our trusty tools:
- Sharp Pruning Shears or a Craft Knife: Clean cuts are crucial for healthy new plants.
- Well-Draining Potting Mix: A seed-starting mix or a blend of equal parts peat moss and perlite works beautifully.
- Small Pots or Trays: Whatever you have will do, as long as they have drainage holes.
- Rooting Hormone (Optional but Recommended): This gives cuttings a little boost. Happy Dance root stimulator is my personal favorite.
- Watering Can or Spray Bottle: For gentle hydration.
- Plastic Bags or a Clear Dome: To create a humid environment.
Propagation Methods
Silky Bluegrass is quite obliging when it comes to starting new plants. I find stem cuttings to be the most effective and straightforward method.
Here’s how we do it:
-
Select Your Cuttings: Head to your healthy Dichanthium sericeum plant. Look for new, non-flowering shoots that are about 4-6 inches long. These should be firm but still a bit flexible. Carefully use your sharp shears or knife to make a clean cut just below a leaf node (that’s the little bump where a leaf attaches to the stem).
-
Prepare the Cuttings: Gently remove the lower leaves from your cutting, leaving just a couple of leaves at the very top. This prevents the submerged leaves from rotting. If your cutting is particularly long, you can even cut the remaining top leaves in half lengthwise. This reduces water loss through transpiration.
-
Apply Rooting Hormone (If Using): Dip the cut end of the stem into your rooting hormone powder or gel. Tap off any excess. This step is optional, but it can really speed up the rooting process and increase your success rate.
-
Plant Your Cuttings: Fill your small pots with your well-draining potting mix. Make a small hole in the center with your finger or a pencil. Gently insert the prepared cutting into the hole, ensuring the leaf nodes you cleared are below the soil surface. Firm the soil gently around the base of the cutting.
-
Provide Humidity: Water the soil thoroughly until it’s evenly moist. Then, cover the pot with a clear plastic bag or a propagation dome. This creates a mini-greenhouse effect, keeping the humidity high, which is vital for cuttings to develop roots before they can take up water from the soil.
The “Secret Sauce” (Pro Tips)
After years of this plant and others, I’ve picked up a few tricks that really make a difference:
- Bottom Heat is Your Friend: If you have a heat mat designed for seedlings, pop your pots on it. Gentle bottom warmth mimics spring soil temperatures and can significantly encourage root development. It’s like a cozy foot spa for your cuttings!
- Don’t Let Those Leaves Touch the Water: I know, it sounds simple, but if you’re tempted to try water propagation (which I find less reliable for this grass), make sure absolutely no leaves are submerged. They’ll just rot and take the whole cutting down with them. Stick to soil for this beauty!
- Sterilize Everything: Before you make any cuts, give your shears or knife a quick wipe down with rubbing alcohol. This sterile approach is like giving your cuttings the cleanest possible start, reducing the risk of passing on any pesky diseases.
Aftercare & Troubleshooting
Once your cuttings are nestled in their pots and covered, place them in a spot that receives bright, indirect light. Avoid direct sun, which can scorch those delicate new shoots. Check the moisture of the soil regularly. It should always feel evenly moist, but not waterlogged. You can gently lift the plastic bag to vent for a few minutes to prevent mold.
You’ll know your cutting has rooted when you see new growth emerging from the top. This is the most exciting part! It usually takes anywhere from 3 to 6 weeks. Once you see that new growth, you can gradually remove the plastic covering over a few days, allowing the plant to acclimate to normal humidity. Continue to water gently as needed.
What if things aren’t going as planned?
- Wilting or Yellowing: This can be a sign of too much or too little water, or insufficient light. Adjust accordingly.
- Rotting at the Base: This is usually due to overwatering and poor drainage. Unfortunately, a rotten cutting can’t be saved. It’s a good cue to try again, ensuring better watering practices and a well-draining mix.
A Little Encouragement to Finish
Watching a new plant emerge from a tiny cutting is a truly magical experience. It’s a testament to nature’s resilience and your own green thumb! Be patient with your Dichanthium sericeum cuttings. Some might take longer than others, and that’s perfectly okay. Enjoy the process, learn from each one, and soon you’ll have a whole collection of your own Silky Bluegrass to admire. Happy gardening!
Resource:
https://identify.plantnet.org/k-world-flora/species/Dichanthium%20sericeum%20(R.Br.)%20A.Camus/data