Hello fellow plant lovers!
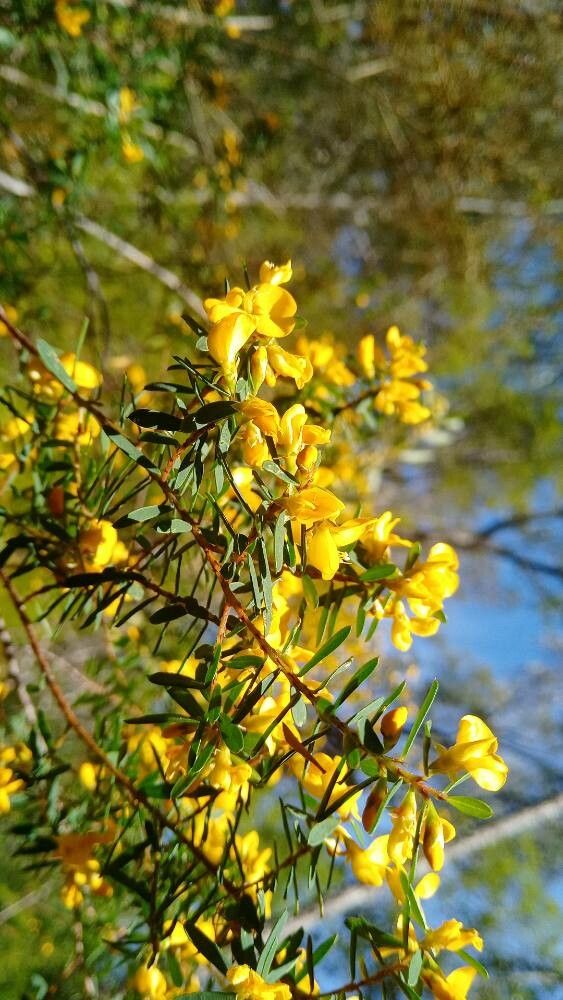
Today, we’re diving into the delightful world of Pultenaea retusa. If you haven’t met this little gem before, imagine clusters of charming pea-like flowers, often in vibrant yellows and oranges, gracing a lovely, often bushy shrub. I’ve always found them to be such cheerful additions to a garden, especially those natives amongst us in Australia. And the best part? You can easily multiply them yourself!
Propagating Pultenaea retusa is incredibly rewarding. There’s a special kind of joy in nurturing a tiny cutting into a mature plant, a cycle of life you’ve personally facilitated. For beginners, I’d say this plant falls into the moderately easy category. With a little patience and the right approach, you’ll be well on your way to success.
The Best Time to Start
For the highest success rate with Pultenaea retusa, you want to work with semi-hardwood cuttings. This means the growth is no longer soft and floppy, but not yet woody and stiff. The ideal time for this is usually in late spring or early summer, after the main flush of flowering is over. The plant is actively growing, and the stems have developed enough strength to strike root. Alternatively, you can try with softwood cuttings in spring, but these are a bit more delicate.
Supplies You’ll Need
Here’s what you’ll want to have on hand for your propagation adventure:
- Sharp pruning shears or a clean, sharp knife: For taking your cuttings. Sterilize them first!
- Potting mix: A well-draining mix is crucial. I often use a blend of propagation mix or seed-starting mix combined with perlite or coarse sand – roughly a 50/50 ratio. This prevents waterlogging.
- Small pots or seed trays: Clean pots with drainage holes are essential.
- Rooting hormone (optional but recommended): This really gives your cuttings a helpful boost. Look for one formulated for cuttings.
- Plastic bags or a propagator: To create a humid environment around your cuttings.
- Watering can with a fine rose: For gentle watering.
- Gravel or small stones: For the bottom of pots if you’re not using propagation mix.
Propagation Methods
I find stem cuttings to be the most reliable and rewarding method for Pultenaea retusa. Here’s how I do it:
- Select your stems: Look for healthy, non-flowering stems on your mature plant. As mentioned, semi-hardwood is your target.
- Take your cuttings: Using your sterile shears or knife, cut lengths of stem that are about 10-15 cm long. Make your cut just below a leaf node (where a leaf attaches to the stem).
- Prepare the cuttings: Gently remove the lower leaves, leaving just a couple at the very top. This reduces water loss and prevents leaves from rotting in the soil. If your cuttings are a bit long or have large top leaves, you can even trim the top leaves in half to further reduce transpiration.
- Apply rooting hormone: Dip the cut end of each stem into your rooting hormone powder or gel. Tap off any excess.
- Pot them up: Fill your clean pots with your prepared potting mix. Make a small hole in the center of the mix with your finger or a pencil. Gently insert the prepared cutting into the hole, ensuring the leaf nodes are below the soil surface. Firm the soil gently around the stem.
- Water them in: Water thoroughly but gently until water runs out of the drainage holes.
- Create humidity: Cover the pots with a clear plastic bag or place them in a propagator. Ensure the plastic doesn’t touch the cuttings directly – you can use stakes or toothpicks to prop it up. This creates a mini-greenhouse effect, keeping the humidity high, which is vital for cuttings to root without drying out.
The “Secret Sauce” (Pro Tips)
Here are a couple of things I’ve learned over the years that make a difference:
- Bottom Heat is your Friend: If you can, place your pots on a gentle heat mat designed for seedlings. This warmth encourages root development from below without overheating the foliage. It’s like giving your little cuttings a cozy warm bed to grow roots in.
- Cleanliness is Key: I can’t stress this enough. Sterilize everything! Your tools, your pots, your hands. Fungal infections or rot can quickly decimate a batch of cuttings, and hygiene is your first line of defense.
Aftercare & Troubleshooting
Once your cuttings are potted, place them in a bright, indirect light location. Avoid direct hot sun, which can scorch them or dry them out too quickly. Keep the soil consistently moist but not waterlogged. You’ll know when they’ve rooted when you see new growth appearing or feel a slight resistance when you gently tug on the stem. This can take anywhere from 4 to 8 weeks, sometimes longer.
The most common issue you’ll encounter is rot, usually indicated by stems turning mushy and blackening, especially at the soil line. This is almost always due to too much moisture and poor air circulation. If you see this, remove the affected cuttings immediately to prevent it from spreading. You might also notice cuttings simply wilting and never perking up – this can happen if they dried out too much or if they just weren’t viable cuttings to begin with. It’s the nature of the game, and sometimes propagation just doesn’t work out for every single one.
A Little Patience Goes a Long Way
So there you have it! Propagating Pultenaea retusa is a wonderfully satisfying process. Be patient, keep an eye on those little ones, and don’t be discouraged if not every cutting takes. Each attempt is a learning experience. Enjoy the journey of coaxing new life from your beloved plants! Happy propagating!
Resource:
https://identify.plantnet.org/k-world-flora/species/Pultenaea%20retusa%20Sm./data