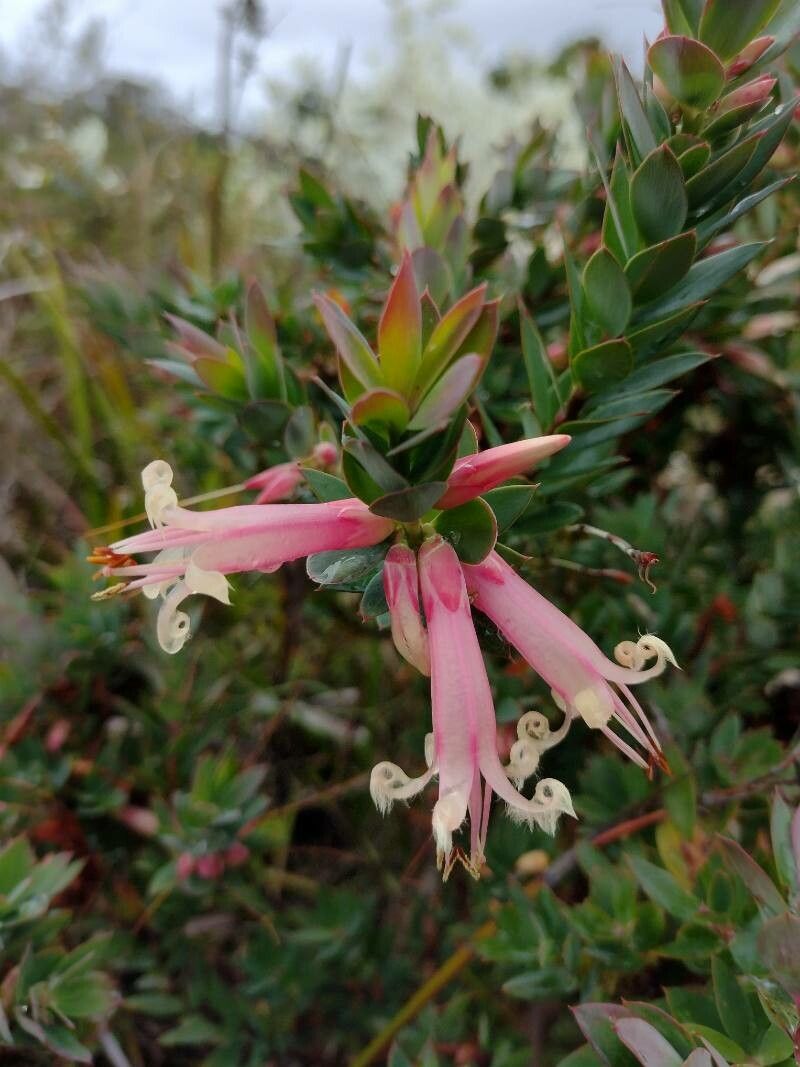
You know, I’ve always had a soft spot for Styphelia triflora. Those delicate, bell-shaped flowers, often a vibrant pink or red, bring such a lovely touch to any garden. They smell heavenly too, a subtle yet sweet perfume that just sings of summer. And the best part? You can easily multiply these beauties yourself! Propagation isn’t just about creating more plants; it’s about understanding your plants on a deeper level and frankly, it’s incredibly rewarding. For Styphelia triflora, I’d say it’s moderately easy – a rewarding challenge for those who are willing to give it a little attention.
The Best Time to Start
Timing is everything, isn’t it? For us gardeners, the sweet spot for propagating Styphelia triflora is in late spring or early summer. This is when the plant is actively growing, and the young stems are still soft and pliable, making them more receptive to rooting. Think of it as capturing that youthful energy!
Supplies You’ll Need
Here’s what you’ll want to have on hand before you dive in:
- Sharp, clean pruning shears or a sharp knife: Crucial for making clean cuts.
- Rooting hormone (powder or gel): This isn’t strictly essential, but it can give your cuttings a significant boost.
- Small pots or seed trays: With drainage holes, of course!
- A well-draining potting mix: I like to use a 50/50 mix of good quality potting soil and perlite or coarse sand. This prevents waterlogging, which can be the bane of a propagated cutting.
- Plastic bags or a propagator lid: To create a humid microclimate.
- Watering can or spray bottle: For gentle watering.
Propagation Methods
I find stem cuttings to be the most reliable and straightforward method for Styphelia triflora.
- Select your cuttings: Look for healthy, non-flowering shoots from your mature plant. Aim for stems that are about 10-15 cm long.
- Make the cut: Using your sharp shears, make a clean cut just below a leaf node (where a leaf attaches to the stem). This is where the magic happens for root formation.
- Prepare the cutting: Gently remove the lower leaves, leaving just a few at the top. This prevents them from rotting in the soil. If your cutting is particularly long, you can even take a few leaf cuttings from the bottom part to potentially get multiple plants from one stem.
- Apply rooting hormone: Dip the cut end of the stem into your rooting hormone, ensuring it’s coated. Tap off any excess.
- Plant the cuttings: Fill your pots with the prepared potting mix. Make a small hole with a pencil or your finger and carefully insert the cutting. Gently firm the soil around the base.
- Water and cover: Water the soil thoroughly but gently. Then, cover the pot with a plastic bag or pop on a propagator lid. This creates a mini greenhouse, keeping the humidity high, which is vital for preventing the cuttings from drying out.
The “Secret Sauce” (Pro Tips)
Here are a few things I’ve learned over the years that can really make a difference:
- Cleanliness is next to godliness: Always use sterilized tools and pots. This might sound tedious, but it dramatically reduces the risk of fungal infections and disease, which are common culprits for failed cuttings. A quick wipe with rubbing alcohol does wonders.
- Air flow is key: While you want to maintain humidity, don’t let the plastic completely seal the pot. I usually poke a few small holes in the bag or lift the lid for a few minutes each day to allow for some air exchange. This helps prevent mold.
- Consider bottom heat: If you have a heated propagator or can place your pots on a heat mat, this can significantly speed up root development. The gentle warmth encourages the plant to send out roots more actively.
Aftercare & Troubleshooting
Once your cuttings are planted, place them in a bright spot out of direct sunlight. They like warmth and indirect light. Keep the soil consistently moist but never soggy.
You’ll know your cuttings are rooting when you see new growth appearing, or you can give them a gentle tug – if there’s resistance, roots have formed! This can take anywhere from 4 to 8 weeks, sometimes longer, so patience is your best friend.
The most common sign of failure is wilting and then rotting. If a cutting goes limp and the stem turns mushy and black, it’s likely due to overwatering and poor drainage. If this happens, sadly, that cutting is likely lost, but don’t be discouraged! Just pull it out and try again, perhaps with a bit more perlite in your mix next time.
A Closing Thought
Propagating plants is a journey, and each little cutting is a chance to learn and grow alongside your garden. Don’t be afraid to experiment and enjoy the process of nurturing these new lives. Happy propagating!
Resource:
https://identify.plantnet.org/k-world-flora/species/Styphelia%20triflora%20Andrews/data