Oh, hello there! It’s so lovely to have you join me. Today, we’re diving into the wonderful world of Allophylus edulis, a plant that truly deserves more love in our gardens. You might know it as “cuamitá,” “chirimoya,” or just by its scientific name. I’ve been growing these beauties for years, and honestly, the sheer joy of nurturing a new plant from a tiny cutting or a seed is one of the most rewarding parts of gardening.
Why Allophylus edulis?
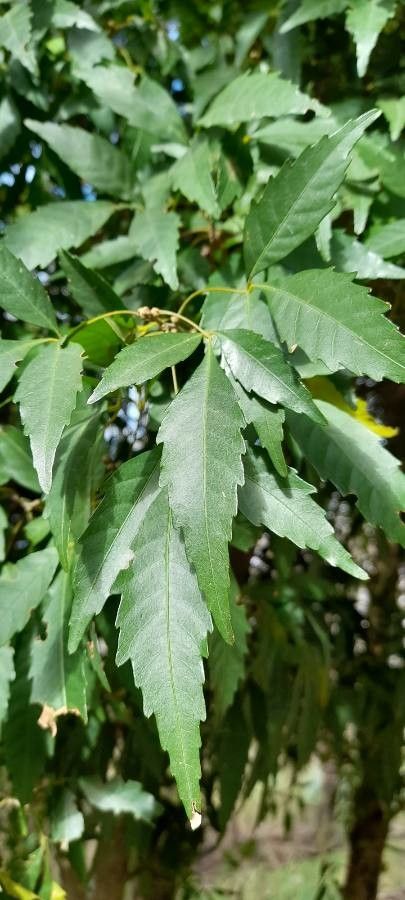
What makes Allophylus edulis so special? Well, for starters, it’s a fantastic choice for its beautiful foliage and, in some climates, it even offers delicious, edible fruits! That’s a huge bonus, right? Propagating it is also a clever way to share this plant with friends or simply expand your own collection without breaking the bank. For beginners, I’d say it’s moderately easy to propagate, especially with a few key tricks up your sleeve. It’s not as finicky as some delicate orchids, but it does appreciate a bit of thoughtful care.
The Best Time to Start
My experience tells me that the sweet spot for propagating Allophylus edulis is during its active growing season. For most of us, that means late spring through early to mid-summer. This is when the plant has plenty of energy to dedicate to rooting new growth. You’ll want to select cuttings that are firm but not woody – think of a pencil-thick stem that bends slightly without snapping.
Supplies You’ll Need
Before we get our hands dirty, let’s gather our tools:
- Sharp pruning shears or a clean, sharp knife: Essential for making clean cuts.
- Rooting hormone powder or gel: This isn’t strictly necessary for Allophylus edulis, but it can give your cuttings a real boost.
- Well-draining potting mix: I like a blend of equal parts perlite and peat moss, or a good quality seed-starting mix.
- Small pots or trays: Clean ones, please! Plastic pots with drainage holes are perfect.
- A clear plastic bag or a propagation dome: To create a humid environment for your cuttings.
- Watering can with a fine rose: For gentle watering.
- Optional: A heat mat: This can significantly speed up the rooting process.
Propagation Methods: Stepping Our Way to Success
Let’s get down to the nitty-gritty. The most reliable method I’ve found for Allophylus edulis is through stem cuttings.
Stem Cuttings:
- Take Your Cuttings: Early in the morning, when the plant is most hydrated, use your clean shears to snip off pieces of stem that are about 4-6 inches long. Make your cut just below a leaf node (where a leaf attaches to the stem).
- Prepare the Cuttings: Remove the lower leaves. This is important because any leaves left below the soil line will likely rot. You can leave just one or two sets of leaves at the top to help with photosynthesis. If your leaves are large, I recommend cutting them in half horizontally. This reduces water loss through transpiration.
- Apply Rooting Hormone (Optional but Recommended): Dip the cut end of the stem into your rooting hormone, tapping off any excess.
- Plant Your Cuttings: Fill your small pots with your pre-moistened potting mix. Make a small hole with a pencil or your finger, and gently insert the cutting. Firm the soil gently around the base of the cutting to ensure good contact.
- Create a Humid Environment: Water the soil lightly. Then, cover the pot with a clear plastic bag, securing it with a rubber band, or place it under a propagation dome. This mini-greenhouse traps moisture, which is crucial for the cuttings.
Water Propagation (A Surprising Alternative):
While stem cuttings in soil are my go-to, I’ve had some success with water propagation too.
- Prepare and Plant: Follow steps 1 and 2 above for preparing your cuttings.
- Place in Water: Fill a small jar or glass with room-temperature water. Submerge the cut end of the stem, making sure no leaves are touching the water.
- Change Water Regularly: Change the water every few days to keep it fresh and prevent bacterial growth.
- Watch for Roots: You’ll see tiny white roots emerge from the nodes. Once the roots are about an inch long, you can carefully transplant them into your potting mix. Be gentle; baby roots are delicate!
The “Secret Sauce” (Pro Tips)
Over the years, I’ve learned a few tricks that make a big difference with Allophylus edulis:
- Bottom Heat is Your Friend: If you can, set your pots on a propagation mat or a warm windowsill. Consistent, gentle warmth from below encourages root development much faster than relying solely on ambient air temperature.
- Don’t Disturb Too Soon: Resist the urge to pull out your cuttings to check for roots! They are developing underground, and unnecessary disturbance can break those fragile new connections. Give them at least 4-6 weeks. You’ll know they’ve rooted when you see new leaf growth and they resist gently tugging.
- Patience with the Parent Plant: When taking cuttings, don’t strip the parent plant bare. Take cuttings from healthy, vigorous growth, and leave plenty of foliage on the mother plant to keep it happy.
Aftercare & Troubleshooting
Once your cuttings have developed a good root system (you’ll see roots poking out the drainage holes or feel resistance when you gently tug), it’s time to treat them like young plants.
- Acclimatize: Gradually remove the plastic bag or dome over a few days. Start by opening it for a few hours each day, then leaving it off entirely. This helps them adjust to your home’s humidity.
- Watering: Water them thoroughly whenever the top inch of soil feels dry. Avoid overwatering, as this is the quickest way to invite root rot.
- Light: Place them in bright, indirect light. Direct sun, especially hot afternoon sun, can scorch their delicate new leaves.
What if things go wrong?
The most common issue is rot. If your cutting turns black and mushy, it’s likely rotted. This usually happens due to too much moisture and insufficient airflow. If you catch it early, you might be able to salvage a healthy portion higher up the stem. Sometimes, a cutting just doesn’t take. Don’t beat yourself up – it happens! Gardening is a journey of learning and experimentation.
Embrace the Green Thumb Journey
So there you have it! Propagating Allophylus edulis is a very achievable and incredibly satisfying endeavor. Be patient with your little green charges, give them the right conditions, and enjoy the process of watching them grow. Each new plant is a testament to nature’s resilience and your own nurturing hand. Happy propagating!
Resource: