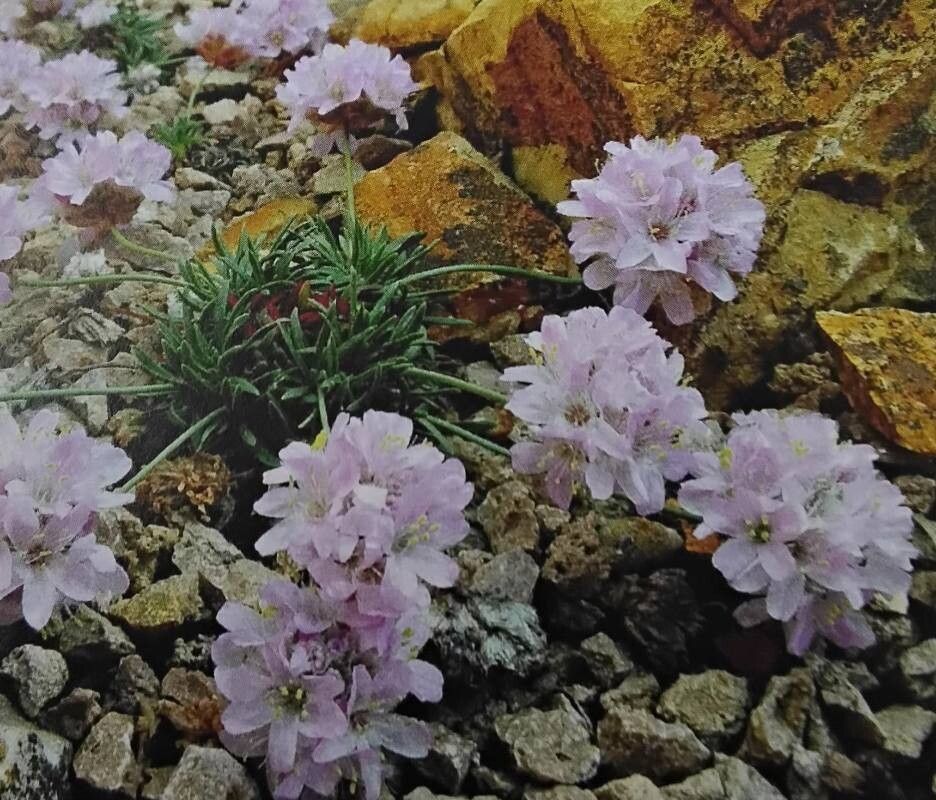
Oh, hello there! It’s so lovely to have you stopping by my little corner of the garden. Today, we’re diving into the wonderful world of Armeria trojana, a truly charming plant that often gets overlooked. You know, those little cushiony mounds, erupting with delicate pink blooms? They just sing a song of summer to me, and I find myself drawn to them year after year.
Propagating Armeria trojana is a deeply rewarding experience. It’s like giving your favorite things a chance to spread their joy, and honestly, it’s not as daunting as you might think. For beginners? I’d say it’s moderately easy, with a bit of patience and the right approach. You’ll get the hang of it quickly.
The Best Time to Start
My go-to time for propagating Armeria trojana is late spring to early summer. This is when the plant is actively growing after its main flowering flush. The new growth is usually vigorous and has a good amount of energy, making it more receptive to rooting. Giving yourself a good window before the heat of mid-summer really helps those young plants establish themselves.
Supplies You’ll Need
Here’s what I usually have on hand when I embark on an Armeria propagation adventure:
- Sharp, clean pruning shears or a sharp knife: For making those precise cuts.
- Rooting hormone powder or gel: This isn’t strictly necessary, but it can give your cuttings a real boost.
- A good quality potting mix: I like a well-draining blend, often incorporating perlite or coarse sand. Something that won’t hold too much moisture.
- Small pots or seed trays: Clean ones are crucial to prevent disease.
- A fine mister spray bottle: For keeping humidity levels up without waterlogging.
- A sunny windowsill or bright indirect light: Where your new charges will be happy.
- Labels and a marker: To keep track of what’s what, especially if you’re propagating multiple things.
Propagation Methods
I’ve found that division is by far the most successful and straightforward method for Armeria trojana. Stem cuttings can work, but they can be a bit more finicky. Let’s focus on what usually yields the best results.
Division:
- Gentle Excavation: First, water your Armeria a day or two before you plan to divide it. This helps the soil cling to the roots, making the process easier. Carefully dig around the plant with a spade or trowel, lifting the entire clump as gently as possible.
- The Big Split: Once you have the clump out, you’ll usually see distinct sections or rosettes. Gently pull these apart with your hands. If the roots are tightly bound, you might need to use a clean, sharp knife or even two trowels to carefully separate them. Aim to get pieces that have a good amount of roots attached.
- Trimming (Optional but Recommended): If there are any overly long or damaged roots, you can trim them back slightly. This encourages new root growth. I’ll sometimes also lightly trim back the leafy green tops if they are very dense, to reduce water loss.
- Replanting: Now, it’s time to get your new divisions into their own homes. Fill your clean pots with your well-draining potting mix. Make a small hole in the center and place a division in, ensuring the soil level is at the base of the leaves. Firm the soil gently around the roots.
- Water In: Water thoroughly to settle the soil, but avoid making it soggy.
The “Secret Sauce” (Pro Tips)
Here are a couple of things I’ve learned over the years that can really make a difference:
- Don’t Overcrowd Your Pots: When dividing, resist the urge to cram too many small pieces into one pot. Each division needs a little room to breathe and develop its root system without competing. Plus, overcrowding can lead to increased disease risk.
- Think Drainage, Drainage, Drainage! This is non-negotiable for Armeria. They despise “wet feet.” Even when you’re dividing, if your soil mix feels too heavy, add more perlite or grit. It’s always better to err on the side of too dry than too wet with these beauties.
Aftercare & Troubleshooting
Once your divisions are planted, keep them in a spot with bright, indirect light. Avoid direct, harsh sun right away, as they’re a bit stressed from the move. Misting them lightly every day or two can help keep the leaves hydrated while they establish new roots.
You’ll know they’re happy when you see new leaf growth appearing from the center of the rosette. Roots usually start to form within a few weeks. Gently tugging on a plant will reveal resistance if roots are present.
The biggest problem you’ll likely encounter is rot. This happens if the soil stays too wet. Signs include mushy, discolored stems or leaves that wilt despite being in moist soil. If you see this, act fast! You might be able to salvage a healthy-looking part of the plant if you catch it early, but usually, it means the entire division is lost. This is why that well-draining mix and careful watering are so important.
A Encouraging Closing
Propagating Armeria trojana is all about patience and observation. Don’t be discouraged if your first attempt isn’t perfect. Nature has its own rhythm, and we’re just working with it. Enjoy the process, celebrate every little sign of life, and soon you’ll have a whole collection of these delightful little bloomers to enjoy! Happy gardening!
Resource:
https://identify.plantnet.org/k-world-flora/species/Armeria%20trojana%20Bokhari%20&%20Quézel/data