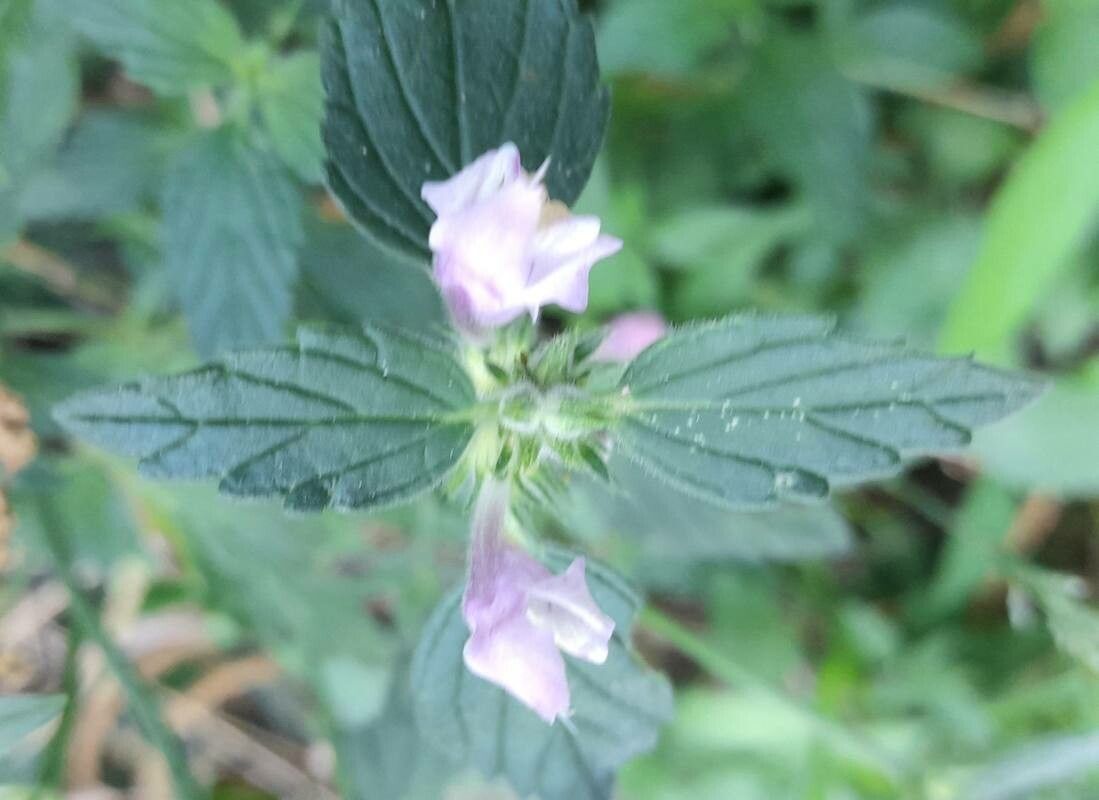
Hello fellow plant lovers! Are you drawn to the charming, often overlooked beauty of Galeopsis ladanum? I certainly am! This little native beauty, sometimes called “red hemp-nettle” for its reddish stems and unassuming flowers, brings a touch of wild grace to the garden. Propagating it is a wonderfully rewarding endeavor, allowing you to share its gentle presence or simply expand your own patch of this delightful plant. And the good news? For those of you just starting out in the world of propagation, Galeopsis ladanum is quite forgiving. You’ll find success here!
The Best Time to Start
When I get my hands on Galeopsis ladanum for propagation, I’m always looking for softwood cuttings. The absolute best time for this is in late spring to early summer, just as the plant is actively growing but before it’s put all its energy into flowering. You want pieces that are flexible and green, not woody and mature. This vibrant growth stage is key for quick rooting.
Supplies You’ll Need
To get your propagation station set up, here’s what I always have on hand:
- Sharp, clean pruning shears or a sharp knife: For taking precise cuttings.
- Rooting hormone (optional but helpful): A powder or gel can give cuttings a good start.
- Small pots or trays: With drainage holes, of course!
- A well-draining potting mix: I like a blend of half peat moss and half perlite or sand. This ensures good aeration.
- A spray bottle: For misting cuttings and keeping humidity up.
- Clear plastic bags or a propagation dome: To create a humid environment.
- Labels: So you don’t forget what you’ve planted!
Propagation Methods
Galeopsis ladanum is quite amenable to several propagation techniques, but my favorite for its reliability is stem cuttings.
- Take Your Cuttings: Select healthy, non-flowering stems. Look for pieces that are about 4-6 inches long. Make a clean cut just below a leaf node (where a leaf attaches to the stem). This node is where new roots will emerge.
- Prepare the Cuttings: Gently remove the leaves from the lower half of the cutting. You want to expose the nodes where roots will form. If the leaves are very large, you can even snip them in half to reduce water loss.
- Dip in Rooting Hormone (Optional): If you’re using rooting hormone, lightly dip the cut end of each stem into the powder or gel. Tap off any excess.
- Plant Your Cuttings: Fill your small pots or trays with your prepared potting mix. Make a small hole with your finger or a pencil and gently insert the cut end of the stem. Tuck the soil in firmly around the stem so it stands upright.
- Water Gently: Water the potting mix thoroughly but gently. You don’t want to dislodge the cuttings.
- Create a Humid Environment: Cover the pots with a clear plastic bag or a propagation dome. This traps moisture around the cuttings, preventing them from drying out. If you don’t have a dome, you can use plastic bags, making sure they don’t touch the foliage too much.
- Place in Bright, Indirect Light: Find a spot that gets plenty of bright, indirect light. Avoid direct sun, which can scorch your precious cuttings.
The “Secret Sauce” (Pro Tips)
Here are a couple of things I’ve learned over the years that can make a big difference:
- Don’t let the leaves touch the water! If you’re doing water propagation or if your cuttings are in pots where excess water might collect in the leaf axils, this can lead to rot. It’s better to keep the leaves dry, hence the misting and humidity dome.
- Bottom heat is a game-changer. While not strictly necessary for Galeopsis ladanum, if you have a seedling heat mat, placing your propagation trays on it can significantly speed up root development. It mimics the warmth of the soil from its parent plant.
Aftercare & Troubleshooting
Once your cuttings have been planted, mist them regularly to keep the environment humid. You can gently tug on a cutting after about 3-4 weeks. If you feel resistance, it means roots have formed! At this point, you can gradually acclimate them to normal conditions by opening the plastic bag for longer periods each day. Once they seem sturdy, you can transplant them into their own small pots.
The main thing to watch out for is rot. This usually happens if the cuttings are too wet, there’s not enough air circulation, or they’re in too much direct sun. If you see a cutting turning black and mushy, it’s best to discard it and check your conditions for the others. Sometimes, a cutting just won’t take, and that’s okay too! Nature has its own rhythm.
A Gentle Encouragement
Propagating plants is a journey of patience and observation. Don’t be discouraged if not every cutting strikes a root. Celebrate the successes, learn from the challenges, and most importantly, enjoy the simple satisfaction of coaxing new life from your beloved Galeopsis ladanum. Happy propagating, and may your gardens continue to bloom!
Resource:
https://identify.plantnet.org/k-world-flora/species/Galeopsis%20ladanum%20L./data