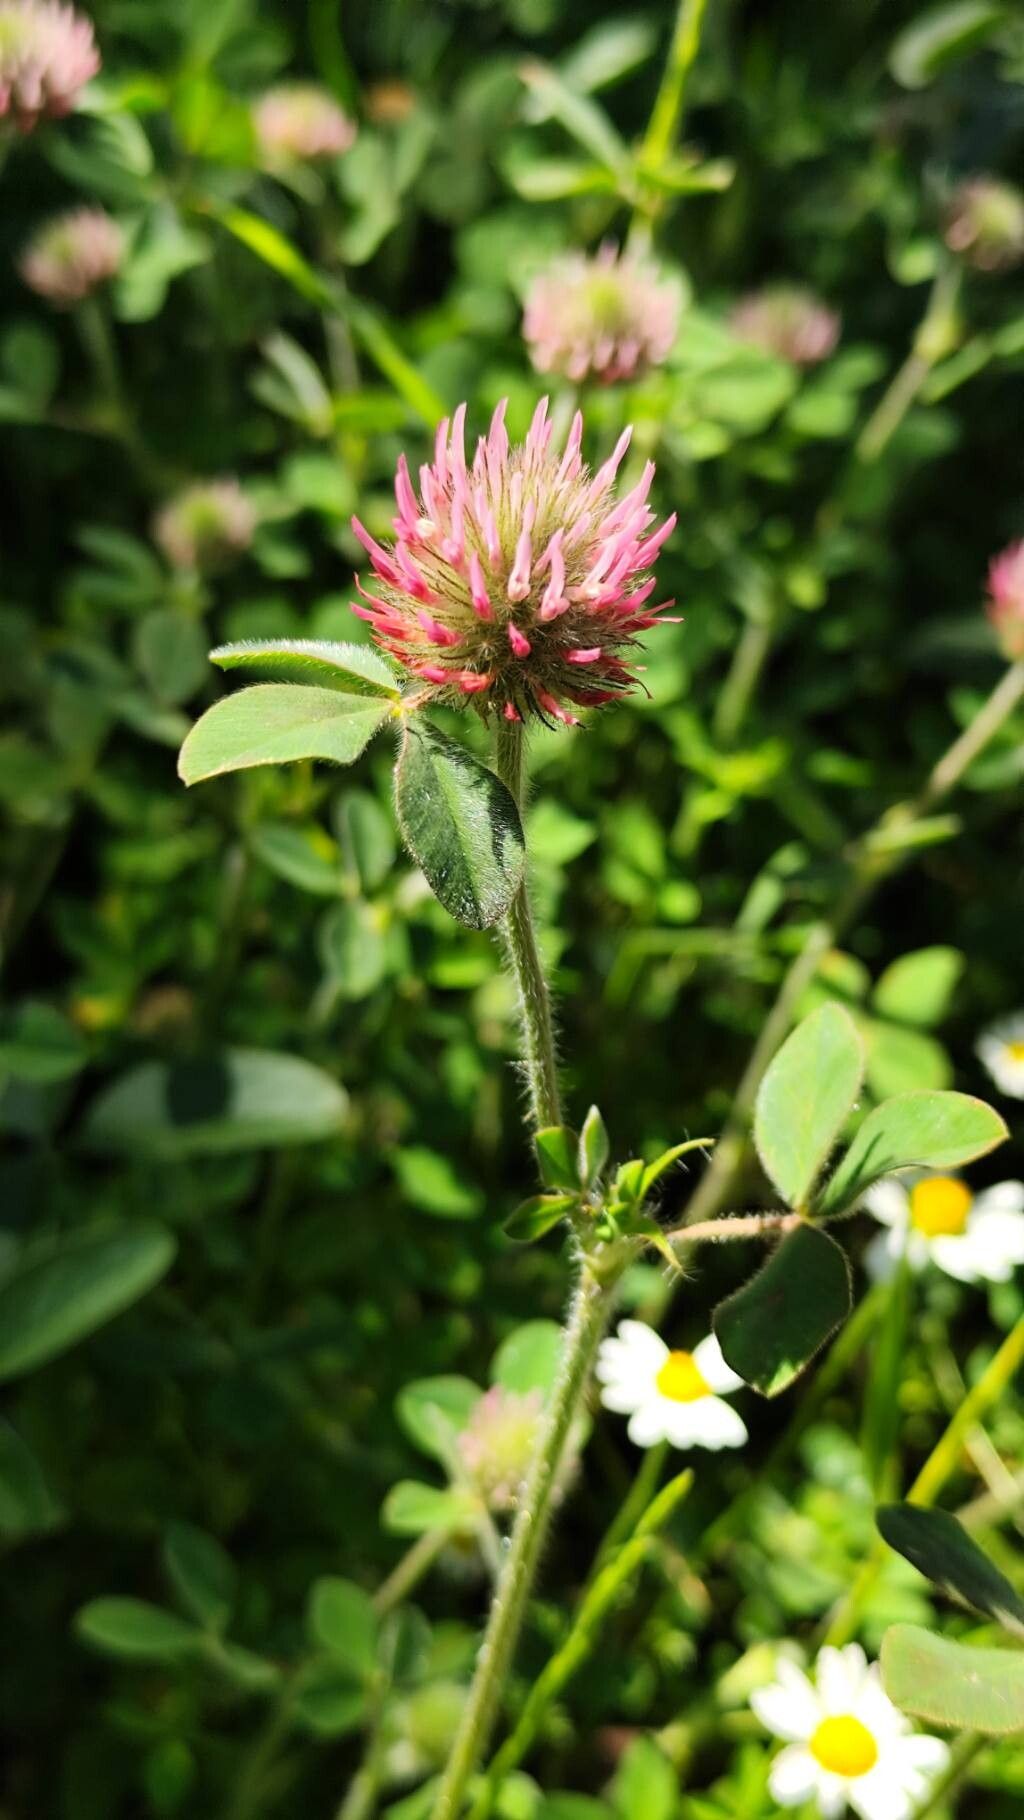
Hello fellow gardeners! It’s so lovely to have you here. Today, we’re going to talk about one of my absolute favorites: Trifolium hirtum, or what we commonly call Persian clover.
If you’re a fan of those charming pinkish-red clover blooms that look like little pom-poms, then you’ll adore this plant. Not only does it bring a delightful splash of color to the garden, but it’s also a fantastic nitrogen fixer, which is a real win for your soil. Plus, coaxing a new plant into existence from just a snippet of another is incredibly satisfying. For beginners? I’d say Trifolium hirtum is quite approachable, making it a wonderful plant to practice your propagation skills on!
The Best Time to Start
When it comes to getting the best results, I always aim for late spring or early summer. This is when the plant is actively growing and has plenty of energy to put into developing new roots. You’re looking for healthy, vigorous stems that aren’t flowering yet. Sometimes, I’ll even take cuttings just as the plant is winding down from its main bloom, but the success rate is usually higher when it’s in full swing of growth.
Supplies You’ll Need
To give your little clover babies the best start, gather these essentials:
- Sharp pruning shears or a clean, sharp knife: For making precise cuts.
- Rooting hormone (optional but recommended): A little boost can make a big difference.
- A well-draining potting mix: I like a simple blend of peat moss, perlite, and a little compost.
- Small pots or seed trays with drainage holes: Cleanliness is key here!
- A spray bottle: For gentle misting.
- A plastic bag or propagator lid: To create a humid environment.
- A sunny windowsill or bright, indirect light: To keep things cozy.
Propagation Methods
The most straightforward way I’ve found to multiply Trifolium hirtum is through stem cuttings. It’s wonderfully effective.
- Select Your Cuttings: Look for healthy, non-flowering stems that are about 4-6 inches long. Make your cut just below a leaf node – that little bump where a leaf meets the stem. This is often where the magic happens!
- Prepare the Cuttings: Gently remove the lower leaves, leaving just the top few to help the plant breathe. If you’re using rooting hormone, dip the cut end into it now, tapping off any excess.
- Plant Them Up: Fill your pots with your prepared potting mix. Make a small hole in the center with your finger or a pencil. Carefully insert the cut end of your Trifolium hirtum cutting into the hole, ensuring the nodes where you removed the leaves are buried in the soil. Gently firm the soil around the stem.
- Water Gently: Water thoroughly but carefully. You don’t want to dislodge your cuttings.
The “Secret Sauce” (Pro Tips)
After years of tinkering in the greenhouse, I’ve learned a few tricks that really help.
- My first secret? Don’t let the leaves touch the soil. Any leaves in direct contact with the potting mix are much more prone to rot. Pinch them off if necessary.
- Secondly, for cuttings, I always try to use bottom heat. A simple seedling heat mat placed under your pots can dramatically speed up root development. It creates a warm, cozy environment for those new roots to emerge.
- And a small but vital point: prune your parent plant regularly even outside of propagation. This encourages bushier growth and provides you with more (and healthier!) cuttings.
Aftercare & Troubleshooting
Once your cuttings are planted, give them a gentle misting with water and cover them with a plastic bag or a propagator lid. This creates a mini-greenhouse effect, keeping the humidity high, which is crucial for cuttings to form roots. Place them in a spot with bright, indirect light.
Keep the soil consistently moist but not waterlogged. You’ll know roots are forming when you see new leaf growth or feel a slight resistance when you gently tug on the stem. This usually takes a few weeks. Once they’ve got a good root system, you can remove the cover gradually and begin watering them as you would a mature plant.
The most common issue you’ll encounter is rot. If a cutting turns mushy and black, it’s usually a sign of too much moisture or not enough air circulation. If you notice this, remove the affected cutting immediately to prevent it from spreading. Wilting can also happen if the humidity drops too low or if the soil dries out completely. Keep an eye on them!
A Little Encouragement
So there you have it! Propagating Trifolium hirtum is a wonderful journey. Be patient with your little cuttings, celebrate every new leaf that unfurls, and don’t be discouraged if a few don’t make it. Every gardener experiences that! Enjoy the process, and soon you’ll have a whole patch of these lovely blooms to enjoy. Happy propagating!
Resource:
https://identify.plantnet.org/k-world-flora/species/Trifolium%20hirtum%20All./data