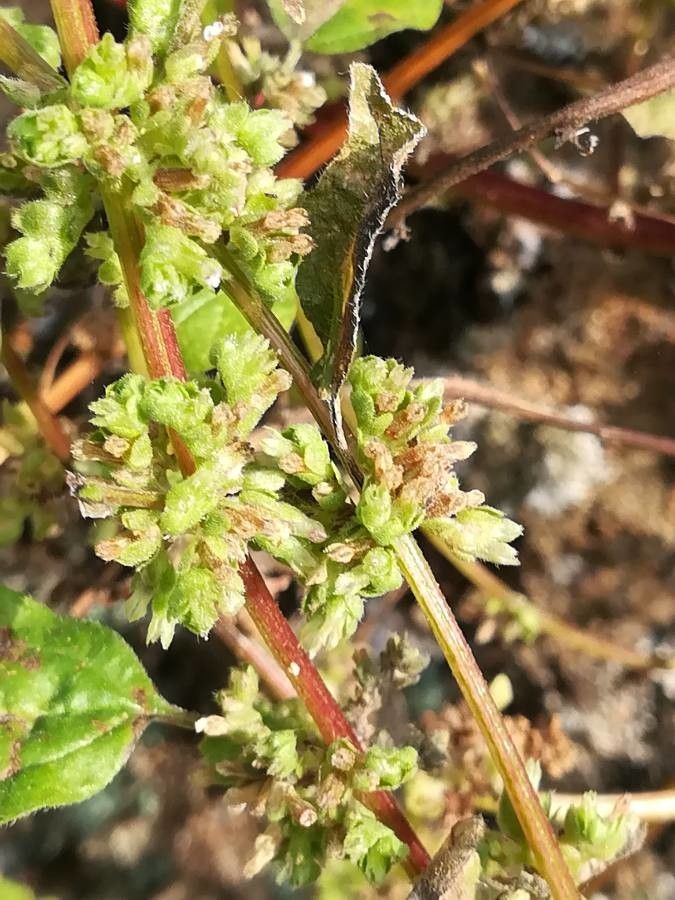
Hello, fellow garden enthusiasts! It’s so lovely to have you here. Today, we’re going to talk about a real gem for adding a touch of delicate, airy charm to your hanging baskets, window boxes, and trailing displays: Parietaria mauritanica. This darling little plant, often called wall pellitory or simply “Mauritanian pellitory,” creates a cascade of small, green leaves that are just beautiful in the right setting.
There’s something incredibly satisfying about growing your own collection of plants, isn’t there? Taking a healthy specimen and coaxing new life from it is a truly rewarding experience. And the good news? For this particular plant, you’ll find propagating it is surprisingly straightforward, even for those of you just starting your gardening journey.
The Best Time to Start
For the highest chance of success with Parietaria mauritanica, I always aim to start new plants in the late spring or early summer. This is when the plant is actively growing, full of vigor, and has the best energy reserves to put into developing new roots. Warm temperatures and good light are key allies.
Supplies You’ll Need
- Sharp pruning shears or a clean craft knife: For making clean cuts without crushing the stems.
- Rooting hormone (optional but recommended): A powder or gel that helps cuttings form roots faster.
- Well-draining potting mix: A mix of peat moss, perlite, and a little sandy loam works wonderfully. You can also use a good quality seed-starting mix.
- Small pots or trays: Clean containers with drainage holes are essential.
- A spray bottle: For gently misting your cuttings.
- Clear plastic bags or a propagator lid: To create a humid environment.
Propagation Methods
The easiest and most reliable way to multiply your Parietaria mauritanica is through stem cuttings. It’s a method that works like a charm practically every time, provided you follow a few simple steps.
- Take your cuttings: Select healthy, non-flowering stems. I look for stems that are about 4-6 inches long. Using your sharp shears or knife, make a clean cut just below a leaf node (that’s the little bump where a leaf attaches to the stem).
- Prepare the cuttings: Gently remove the lower leaves, leaving just a few at the top. This helps the cutting conserve energy and prevents leaves from rotting when planted.
- Apply rooting hormone (if using): Dip the cut end of the stem into your rooting hormone powder or gel. Tap off any excess.
- Plant the cuttings: Fill your small pots or trays with your well-draining potting mix. Make a small hole with a pencil or your finger. Insert the cut end of the stem into the hole, pushing it down about an inch. Gently firm the soil around the stem.
- Water and cover: Water the soil gently until it’s evenly moist but not soggy. Then, cover the pots with a clear plastic bag, securing it with a rubber band, or place them inside a propagator with a lid. This creates that crucial humid environment.
The “Secret Sauce”
Here are a couple of tricks gathered over the years that I’ve found make a real difference for delicate cuttings like these:
- Don’t let the leaves touch the water: If you opt for water propagation (which also works well for Parietaria mauritanica!), make sure none of the leaves are submerged. Submerged leaves will quickly rot and can kill your cutting before it even has a chance to root. Only the leaf nodes should be in the water.
- Bottom heat is your friend: For consistently faster rooting, especially if your home is a bit cooler, placing your pots on a heated propagator mat can be a game-changer. It encourages root development from below, giving your cuttings a real boost. It’s not strictly necessary for this plant, but it’s a nice-to-have if you have one.
Aftercare & Troubleshooting
Once your cuttings are potted, place them in a bright spot, but out of direct, harsh sunlight. Keep the soil consistently moist but never waterlogged. Mist the leaves occasionally if you aren’t using a plastic cover.
You should start to see signs of new growth within a few weeks. The tell-tale sign of successful rooting is when you gently tug on a cutting and feel a bit of resistance – it’s actively growing! Once you see good root development, you can start to gradually acclimate them to normal air by opening the plastic bag a little each day for a week before removing it entirely.
The most common problem you might encounter is rot. This usually happens if the soil is too wet and there isn’t enough air circulation. If a cutting turns mushy and black, it’s unfortunately a goner. Don’t be discouraged! It just means you might need to adjust your watering or ensure your potting mix is airy enough.
A Encouraging Closing
Growing new plants from cuttings is a wonderful way to fill your home and garden with more of what you love. Be patient with your little Parietaria mauritanica cuttings. They’re working hard behind the scenes! Enjoy the process, and soon you’ll have a whole cascade of these delightful trailing plants to share. Happy gardening!
Resource:
https://identify.plantnet.org/k-world-flora/species/Parietaria%20mauritanica%20Durieu/data