Growing More of Those Charming Little Chorizanthe Orcuttiana
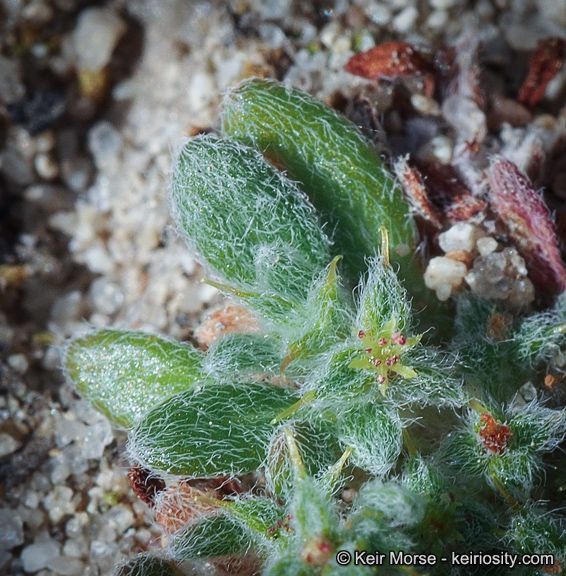
Oh, Chorizanthe orcuttiana! If you’re drawn to the subtle beauty of our native wildflowers, then this little gem is likely to capture your heart. With its delicate, papery bracts that often flush rose-pink and its charming, low-growing habit, it’s a delightful addition to rock gardens, sandy slopes, or even a sunny border where you want something truly special. Propagating it isn’t just about having more plants; it’s about understanding and sharing the magic of our local flora.
Now, I won’t pretend this is a plant you can whack a cutting from and expect miracles. Chorizanthe orcuttiana can be a little on the shy side when it comes to propagation. It takes a bit of finesse, but that’s part of what makes it so rewarding when you succeed! So, if you’re up for a gentle challenge, let’s dive in.
When to Get Your Hands Dirty
The sweet spot for propagating Chorizanthe is generally late spring to early summer. This is when the plant is actively growing after its winter and spring bloom. You’re looking for healthy, non-flowering stems. Starting too late in the season, when things are starting to dry out, can make root development a bit trickier.
What You’ll Need to Gather
A few bits and bobs will set you up for success:
- Small pots or seed trays: With good drainage holes, of course!
- Cuttings propagator or plastic bag: To create a humid environment.
- Sterile potting mix: A well-draining blend is crucial. I like to use about 2 parts coarse sand, 2 parts perlite, and 1 part peat moss or coco coir. You want excellent aeration.
- Sharp, clean pruning shears or a sharp knife: For making clean cuts.
- Rooting hormone (optional but recommended): A powder or gel can give your cuttings a helpful boost.
- Labeling stakes: Don’t forget to label your efforts!
Bringing New Life: Propagation Methods
For Chorizanthe orcuttiana, stem cuttings are usually the most reliable method for me. Division can be attempted, but these plants can be quite delicate once established, so handle with extreme care.
Stem Cuttings:
- Select your source plant: Look for healthy, actively growing stems that are about 3-4 inches long.
- Make the cut: Using your clean shears or knife, make a clean cut just below a leaf node. This is where roots are most likely to form.
- Prepare the cutting: Gently remove the lower leaves, leaving just 2-3 sets at the top. If the leaves are very large, you can even cut them in half horizontally to reduce water loss.
- Apply rooting hormone (if using): Dip the cut end of the stem into the rooting hormone, tapping off any excess.
- Plant your cutting: Make a small hole in your prepared potting mix with a pencil or your finger. Insert the cutting, ensuring the nodes where you removed leaves are below the soil surface. Gently firm the soil around it.
- Water gently: Water thoroughly but avoid making the soil soggy.
- Create humidity: Place the pot into a propagator or cover it loosely with a clear plastic bag. This is key to preventing the cuttings from drying out.
- Find a good spot: Place the propagator in a bright spot, but out of direct, hot sun.
The “Secret Sauce” from My Greenhouse
Here are a couple of things I’ve learned that make a difference:
- Don’t let those leaves touch the water! If you ever try water propagation (which is less reliable for Chorizanthe, but a general tip), waterlogged leaves are a fast track to rot. Keep them high and dry.
- Bottom heat is your friend. Chorizanthe often appreciates a little warmth from below, especially in cooler propagation environments. A gentle heating mat set on low can encourage root formation much faster. Just ensure it’s not too hot!
Aftercare and What to Watch For
Once you’ve got your cuttings potted up, patience is the name of the game.
- Check for moisture regularly: The potting mix should be consistently moist but never waterlogged. If you’re using a plastic bag, you might only need to water every week or two. Lift the bag to let in fresh air occasionally.
- Look for signs of life: After several weeks, you should start to see new growth at the tip of the cutting. This is a good indicator that roots have formed. You can also give a very gentle tug – if there’s resistance, roots are likely there.
- Be prepared for failures: Sometimes, cuttings just don’t take. The most common culprit is rot, which often shows up as a mushy, dark stem. This usually happens if the environment is too wet or not well-ventilated. Don’t be discouraged! Just pull out the failed cutting, discard it, and try again. Sometimes the timing or the specific stem wasn’t quite right.
Keep Nurturing Those Little Sprouts
Watching a new plant emerge from a tiny cutting is one of gardening’s greatest joys. Be patient with your Chorizanthe orcuttiana cuttings. It might take a good four to eight weeks, or even longer, for them to establish a decent root system. Once they show good new growth and you can feel that resistance when gently tugging, they’re ready to be transplanted into larger pots. Continue to keep them in bright, indirect light and gradually acclimate them to normal conditions before planting them out.
Happy propagating, and enjoy the satisfaction of growing more of these lovely native blooms!
Resource:
https://identify.plantnet.org/k-world-flora/species/Chorizanthe%20orcuttiana%20Parry/data