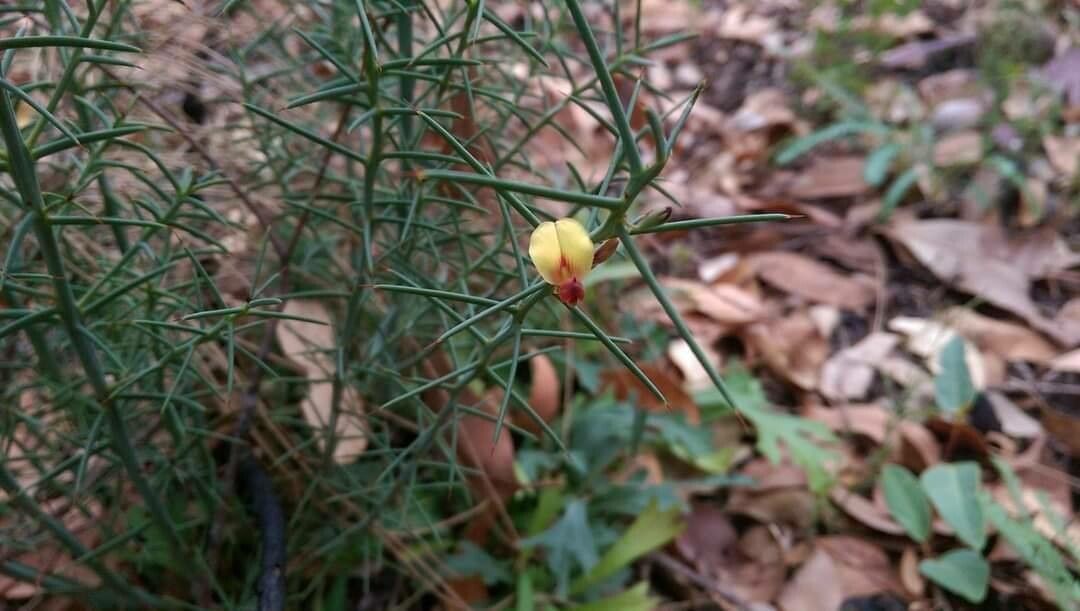
Well hello there, fellow plant enthusiasts! I’m so glad you’ve stopped by. Today, we’re diving into the wonderful world of Daviesia angulata, sometimes called Angular Billy Buttons. If you’re a fan of those cheerful, bright yellow flowers that pop up like little sunbeams in the late winter and spring, you’ll know exactly why this native Australian beauty is such a joy to have in the garden. Propagating them is a fantastic way to spread that sunshine around, and while it might seem a little daunting at first, I promise it’s a rewarding journey. For beginners, I’d say it’s a bit of a moderately challenging but absolutely achievable plant to tackle.
The Best Time to Start
For Daviesia angulata, the sweet spot for propagation is definitely late spring to early summer. This is when the plant has finished its blooming cycle and is actively putting on new growth. You’re looking for stems that are semi-hardened – not brand new and floppy, but not woody and old either. Think of it like a firm pencil, giving just a little when you bend it. Starting during this period gives your cuttings the best chance to establish themselves before the cooler weather arrives.
Supplies You’ll Need
Before we get our hands dirty, let’s gather our tools and materials. Having everything ready makes the whole process so much smoother:
- Sharp Pruning Shears or Snips: Cleanliness is key to prevent disease.
- Small Pots or Seed Trays: Make sure they have good drainage holes.
- Well-Draining Potting Mix: I like a blend of perlite, coarse sand, and a good quality potting soil. You want to avoid anything that holds too much moisture. A commercial succulent or cactus mix can also work well.
- Rooting Hormone (Optional but Recommended): This can significantly boost your success rate, especially with trickier plants.
- Plastic Bags or Dome Lids: To create a humid environment.
- Gravel or Small Stones (for drainage): Just a thin layer at the bottom of pots.
- Watering Can with a Fine Rose or Spray Bottle: Gentle watering is crucial.
Propagation Methods
Daviesia angulata is most successfully propagated by stem cuttings. Here’s how I like to do it:
- Take Your Cuttings: Choose a healthy, non-flowering stem from your established plant. Using your clean snips, cut a section about 10-15 cm (4-6 inches) long. Make sure your cut is just below a leaf node (where leaves grow from the stem).
- Prepare the Cuttings: Gently remove the lower leaves from the cutting. You want to expose at least two leaf nodes without leaves. This is where the roots will form.
- Apply Rooting Hormone (If Using): Dip the cut end of the stem into your rooting hormone powder, tapping off any excess.
- Plant Your Cuttings: Fill your prepared pots with your well-draining mix. Make a small hole in the center with your finger or a pencil. Insert the cutting into the hole, ensuring at least one leaf node is buried in the soil. Gently firm the soil around the base of the cutting.
- Water and Cover: Water the soil lightly until it’s evenly moist but not waterlogged. Then, place your pots inside a plastic bag or cover them with a dome lid to create a mini-greenhouse effect. This helps retain humidity, which is vital for cuttings to root.
The “Secret Sauce” (Pro Tips)
Now for a couple of little tricks I’ve picked up over the years that can make a real difference:
- When making your initial cut on the parent plant, try to take a cutting from a stem that has a slightly woody base, rather than a brand-new, sappy shoot. This gives the cutting a bit more stored energy to start with.
- Bottom heat is a game-changer! If you have a heat mat designed for seed starting, placing your pots on it can dramatically speed up root development. The warmth encourages the plant to initiate rooting, while the tops remain cooler.
Aftercare & Troubleshooting
Once your cuttings are planted and covered, place them in a spot with bright, indirect light. Direct sun can scorch them. Keep the soil consistently moist but not soggy. You can check for moisture by gently pressing your finger into the soil – it should feel cool and damp.
You’ll know your cuttings are rooting when you see new growth appearing at the tip of the stem. This can take anywhere from a few weeks to a couple of months, so patience is key! Once they’ve started showing signs of life, you can gradually acclimatise them to lower humidity by unzipping the bag or removing the lid for longer periods each day. After a week or so of this, remove the cover completely.
Now, what if things don’t go as planned? The most common issue is rot. If you see your cuttings turning dark and mushy, it’s usually a sign of too much moisture and poor air circulation. If this happens, remove the affected cuttings immediately to prevent it from spreading. Ensure your soil is draining well and that you’re not overwatering. If a cutting doesn’t seem to be doing anything after a good while, it might just be taking its sweet time, or unfortunately, it might not have taken. Don’t be discouraged!
A Encouraging Closing
So there you have it – a peek into propagating these delightful Daviesia angulata. Remember, gardening is a journey of learning and experimentation, and each plant is an opportunity to connect with nature. Be patient with your cuttings, offer them a little care and attention, and you’ll soon be rewarded with brand new plants to enjoy. Happy propagating!
Resource:
https://identify.plantnet.org/k-world-flora/species/Daviesia%20angulata%20Benth./data