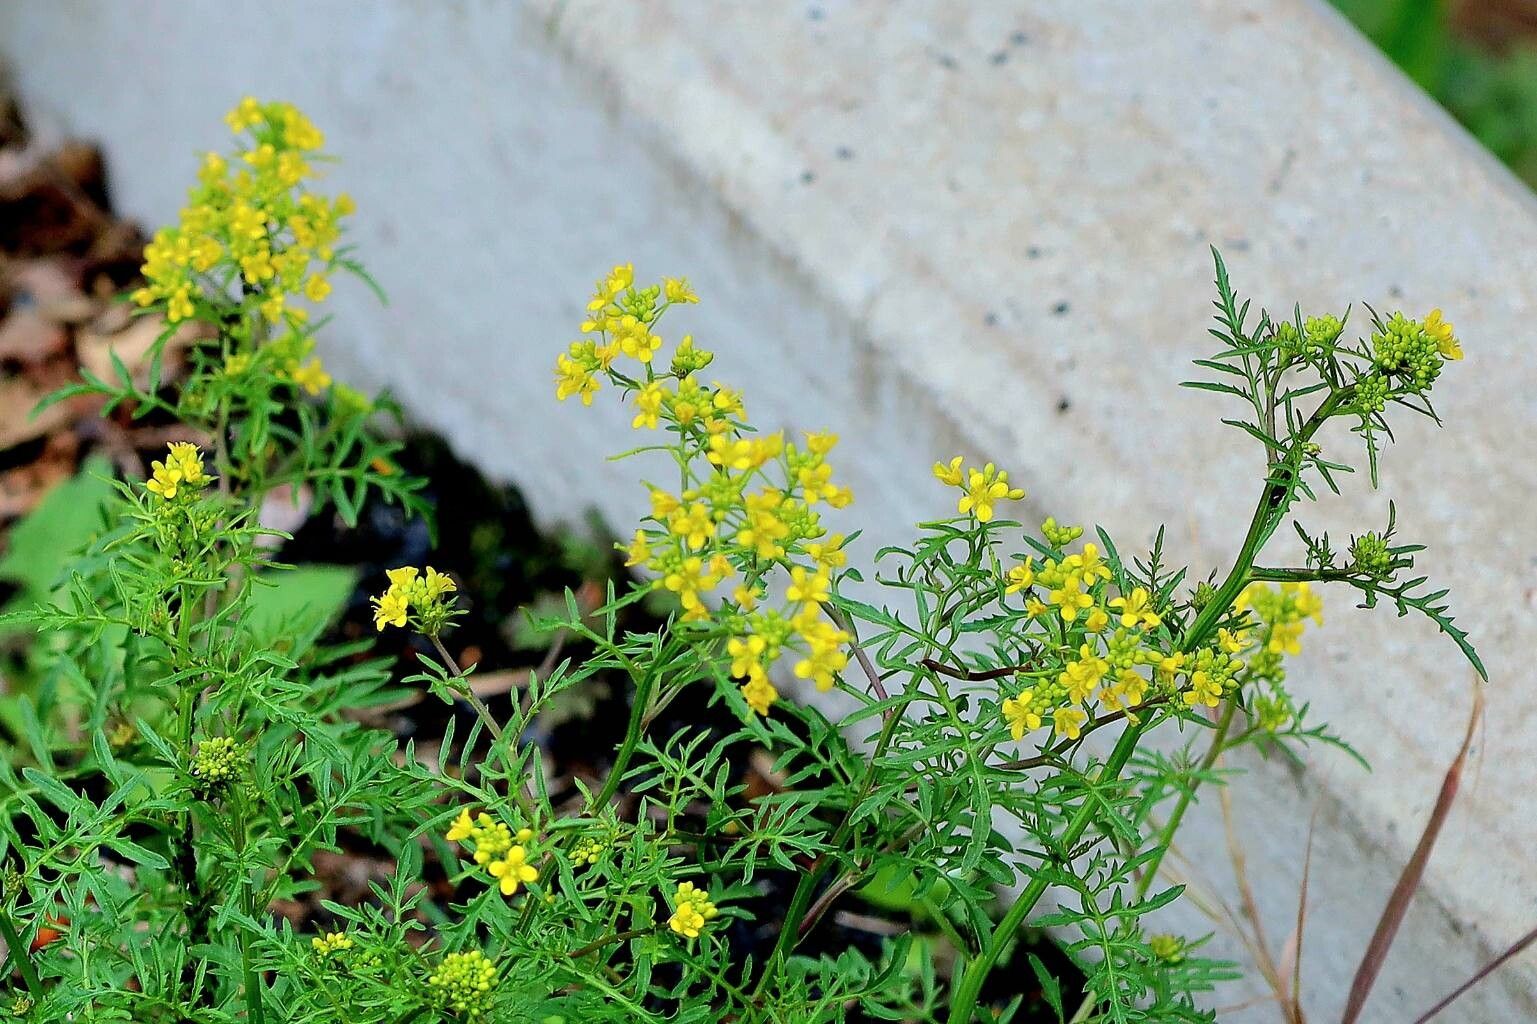
Hello there, fellow plant enthusiasts! I’m so delighted you’re interested in Rorippa sylvestris, or as some folks call it, woodland yellowcress. If you’re looking for a cheerful splash of sunny yellow in your garden, this is your plant. It’s a hardy perennial that naturalizes beautifully, forming lovely groundcover or naturalistic drifts. What I particularly love about it is its resilience and its ability to bring a bit of wild charm to even the most manicured spaces. And the best part? Propagating it is really quite satisfying, and surprisingly easy, even for those new to the plant propagation game.
The Best Time to Start
For Rorippa sylvestris, my sweet spot for propagation is usually late spring to early summer. This is when the plant is actively growing and has plenty of energy to put into developing new roots. You can also have good luck in early autumn, especially if you’re working with division. Just make sure to give any new divisions or cuttings enough time to establish before the harsh winter weather arrives.
Supplies You’ll Need
Gathering your tools beforehand makes the whole process much smoother. Here’s what I usually have on hand:
- Sharp pruning shears or a clean knife: For making precise cuts.
- Small pots or seed trays: With drainage holes, of course!
- A good potting mix: I like a blend of seed starting mix and perlite for excellent drainage and aeration. Some gardeners prefer a mix with a bit of compost.
- Rooting hormone (optional): While Rorippa sylvestris is pretty good at rooting on its own, a little dip can speed things up.
- Watering can with a fine rose attachment or a spray bottle: To avoid disturbing delicate cuttings.
- Labels and a marker: So you don’t forget what you planted where!
Propagation Methods
There are a few ways to get more Rorippa sylvestris plants, but here are my favorites.
1. Stem Cuttings: The Speedy Solution
This is my go-to method for a quick boost of new plants.
- Take your cuttings: In late spring or early summer, select healthy, non-flowering stems. Use your sharp shears to cut lengths of about 4-6 inches. Make your cuts just below a leaf node (where a leaf meets the stem).
- Prepare the cuttings: Gently remove the lower leaves, leaving just a few at the top. If you’re using rooting hormone, dip the cut end into it now.
- Plant them up: Fill your small pots with your prepared potting mix. Make a small hole in the center with your finger or a pencil. Insert the cutting into the hole, ensuring the leaf nodes you removed are buried. Gently firm the soil around the stem.
- Water gently: Give them a good, gentle watering to settle the soil.
2. Division: A Natural Multiplying Trick
Rorippa sylvestris is a clumping perennial that spreads naturally. Dividing it is very successful.
- Dig it up: In early spring or autumn, carefully dig up a clump of your Rorippa sylvestris. Try to get as much of the root ball as possible.
- Separate the roots: Gently tease apart the root ball with your hands. You can usually separate it into several smaller sections, each with some roots and shoots. If the roots are really tangled, a clean spade or trowel can help you cut through them.
- Replant immediately: Have your new planting spots or pots ready. Replant the divisions at the same depth they were growing before. Water them in well.
3. Water Propagation: Watching the Magic Happen
This is a fun one to do indoors, especially for kids!
- Take cuttings: Similar to stem cuttings, take 4-6 inch lengths of healthy stem.
- Place in water: Remove the lower leaves and place the cuttings in a clean jar or glass of water. Make sure no leaves are submerged in the water – they’ll just rot.
- Find a bright spot: Place the jar in bright, indirect light.
- Change the water: Change the water every few days to keep it fresh. You should see roots forming within a couple of weeks.
- Pot up when ready: Once the roots are about an inch long, you can carefully pot them into soil.
The “Secret Sauce” (Pro Tips)
Here are a couple of things I’ve learned over the years that really make a difference.
- When taking stem cuttings, don’t be afraid to pinch back the very tip of the cutting. This encourages more branching and therefore more potential rooting points.
- If you’re propagating a fair number of cuttings at once, consider using bottom heat. A simple propagation mat placed underneath your trays can significantly speed up root development. It’s like giving them a warm little hug from below!
Aftercare & Troubleshooting
Once your cuttings have rooted (you’ll see new growth or feel resistance when you gently tug on them), it’s time for a little extra TLC.
- Gradually introduce to new conditions: If your cuttings were indoors, harden them off by gradually exposing them to outdoor conditions over a week or two before planting them in their final spot.
- Keep them consistently moist: Young plants are thirsty! Keep the soil evenly moist but not waterlogged.
- Watch out for rot: The biggest enemy of new cuttings is rot. If you see mushy stems or leaves turning black and falling off, it’s often a sign of too much moisture and poor air circulation. Ensure good drainage and ease up on the watering. If you used too much rooting hormone, it can also cause rot, so a light dip is best.
Propagating plants is such a rewarding journey. It’s about patience, observation, and a little bit of hope. Don’t be discouraged if not every cutting takes; it’s all part of the learning process. Enjoy the satisfaction of creating new life for your garden! Happy propagating!
Resource:
https://identify.plantnet.org/k-world-flora/species/Rorippa%20sylvestris%20(L.)%20Besser/data