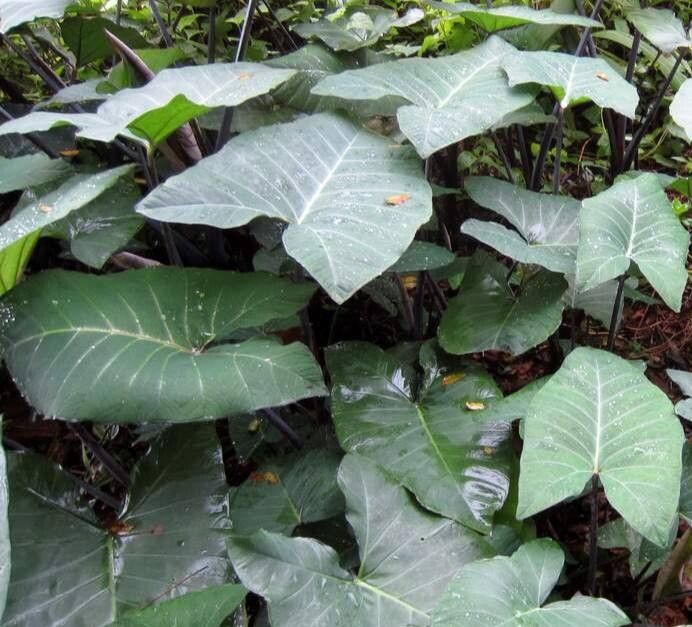
Hello there, fellow plant lovers! I’m so excited to chat with you today about a truly magnificent plant: Xanthosoma sagittifolium, often called Elephant Ear or Malanga. If you’ve ever seen one of these beauties with its enormous, arrowhead-shaped leaves, you know exactly what I mean. They bring such a tropical, lush feel to any space, whether you’re growing them in the ground or in pots.
And the best part? These impressive plants are surprisingly rewarding to propagate! It’s a wonderful way to expand your collection or share the green joy with friends and family. For beginners, I’d say propagating Xanthosoma is moderately easy. With a little attention to detail, you’ll be well on your way to success.
The Best Time to Start
My favorite time to get my hands dirty with propagating Xanthosoma is during the active growing season. Think late spring through summer. This is when the plant is really putting on a growth spurt, meaning it has plenty of energy to dedicate to developing new roots. You’ll often find the best propagation material when you’re pruning or dividing plants that have already grown a bit larger.
Supplies You’ll Need
Gathering your tools beforehand makes the whole process so much smoother. Here’s what I keep on hand:
- Sharp Pruning Shears or a Clean Knife: For making clean cuts. Disinfect them with rubbing alcohol between uses to prevent disease.
- Well-Draining Potting Mix: A good blend for me is a mix of potting soil, perlite, and a bit of coco coir. This ensures good aeration and prevents soggy roots.
- Small Pots or Trays: Clean containers are key. Yogurt cups with drainage holes work in a pinch!
- Rooting Hormone (Optional but Recommended): This little powder or gel can give your cuttings a significant boost in developing roots.
- Water: For those propagation methods that use it.
- Labels and a Marker: You’ll want to know what you planted and when!
Propagation Methods
Xanthosoma sagittifolium is primarily propagated through division of its corms or offsets. Think of them like little underground treasures waiting to grow!
Method: Division of Corms/Offsets
This is the most common and reliable method for Xanthosoma.
- Gently Excavate: If your plant is in a pot, carefully tip it out onto a protected surface. If it’s in the ground, gently dig around the base of the plant, being mindful of the roots. You’re looking for the main corm and any smaller corms or offsets that have sprouted from its sides.
- Identify the Divisions: You’ll see where new little bulbs (offsets or cormels) are attached to the parent corm. Sometimes they are quite distinct, while other times they might be more integrated.
- Make the Cut: Using your sharp, clean shears or knife, carefully separate the desired offsets or smaller corms from the parent plant. Try to get a piece that has at least one “eye” or bud on it, and ideally, a small portion of the root attached. If you’re dividing a large parent corm, you can cut it into sections, ensuring each section has an eye.
- Allow to Dry (Optional but Recommended): For a day or two, let these divisions sit in a dry, airy spot. This helps the cut surfaces callus over, which can prevent rot when you plant them. This step isn’t always strictly necessary, but I find it gives me extra peace of mind.
- Pot Them Up: Plant each division in its own small pot filled with your well-draining potting mix. Bury the corm so the top is just at or slightly below the soil surface, with the eye facing upwards if you can pinpoint it.
- Water Lightly: Give the soil a gentle watering to settle it around the corm.
Method: Water Propagation (Less Common but Possible for Cormels)
While division is king, sometimes very small cormels can be coaxed to root in water.
- Prepare the Cormel: Ensure your cormel has a small root nub or an eye.
- The Water Jar: Place the cormel in a jar or glass of water. The key here is to make sure only the very bottom of the cormel is touching the water. You don’t want it submerged! You can use toothpicks to suspend it if needed.
- Change Water Regularly: Change the water every few days to keep it fresh and prevent bacterial growth.
- Watch for Roots: With patience, you’ll see roots emerge, and then you can plant it in soil.
The “Secret Sauce” (Pro Tips)
Over the years, I’ve picked up a few tricks that seem to make a difference:
- Don’t Rush the Potting: Remember that drying period for the cut surfaces? It’s your little insurance policy against rot. Even a day makes a difference.
- Bottom Heat is Your Friend: If you’re propagating in a cooler environment or during a transitional season, placing your pots on a seedling heat mat can work wonders. Xanthosoma loves warmth, and this gentle warmth from below encourages root formation like nothing else.
- A Touch of Rooting Hormone: Seriously, a quick dip of your corm division into rooting hormone before planting is like giving it a super-powered start. It’s not essential, but it definitely speeds things up.
Aftercare & Troubleshooting
Once your divisions are planted, resist the urge to overwater! Keep the soil lightly moist, not soggy. You want it to feel like a wrung-out sponge. Place the pots in a warm, bright spot, but avoid direct, scorching sunlight until they’ve established themselves.
You should start to see new growth emerge from the soil in a few weeks to a couple of months. This is your signal that roots are forming!
Common Signs of Failure:
- Rotting: If your cormel or division turns mushy and smells foul, it’s likely succumbed to rot. This is usually due to overwatering or not letting the cut surface dry. Unfortunately, there’s usually no coming back from this.
- No Growth After a Long Time: If you’ve waited months and nothing is happening, it might be that the division was too small, didn’t have a viable eye, or the conditions weren’t warm enough. Don’t be too hard on yourself; sometimes it just doesn’t work out.
A Little Piece of Encouragement
Propagating plants is all about patience and observation. Each new plant you grow is a testament to the wonders of nature and your own green thumb. Even seasoned gardeners have their failures. The joy of seeing that first new leaf unfurl on a plant you’ve propagated yourself is truly special. So, go ahead, give it a try. I have a feeling you’ll do wonderfully!
Resource:
https://identify.plantnet.org/k-world-flora/species/Xanthosoma%20sagittifolium%20(L.)%20Schott/data