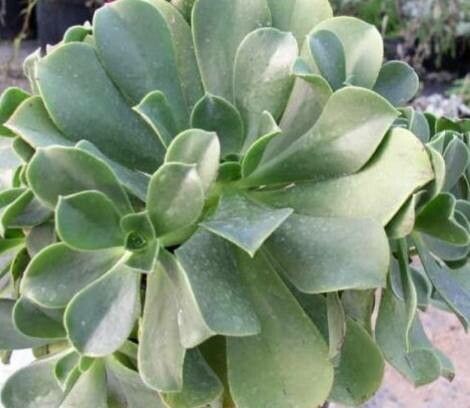
Hello green thumbs! Today, we’re diving into the wonderful world of Aeoniums, specifically the delightful Aeonium glutinosum. If you’ve ever seen these beauties with their sticky, glandular leaves and wonderfully architectural rosettes, you know they add a unique charm to any succulent collection. And the best part? Propagating them is incredibly rewarding, and I’m happy to share that for beginners, it’s actually quite achievable! Let’s get a few new plant babies started.
The Best Time to Start
For Aeonium glutinosum, the prime time to propagate is during its active growing season. This usually falls in spring and early fall. During these periods, the plant has plenty of energy to put into root development. Waiting until the weather is mild and consistent, avoiding extreme heat or cold, will give you the best shot at success.
Supplies You’ll Need
Gathering your tools beforehand makes the process so much smoother. Here’s what I always have on hand:
- Sharp, clean pruning shears or a craft knife: Essential for making clean cuts.
- Well-draining succulent or cactus potting mix: This is non-negotiable for preventing rot. You can buy it pre-mixed or create your own with potting soil, perlite, and pumice.
- Small pots or trays: Whatever you have handy, as long as they have drainage holes.
- Rooting hormone (optional but recommended): Helps speed up the rooting process.
- Watering can or spray bottle: For gentle watering.
- Gloves (optional): Though glutinosum isn’t terribly sticky, it can leave a slight residue.
Propagation Methods
My favorite and most successful method for Aeonium glutinosum is through stem cuttings. It’s straightforward and gives you excellent results.
Stem Cuttings:
- Select a healthy stem: Look for a mature stem that has at least a few leaves and is not actively flowering. Gently twist or snip it off the mother plant, leaving a few inches of stem below the lowest leaves.
- Prepare the cutting: Remove any lower leaves, exposing about an inch or two of the stem. This is where the roots will eventually emerge.
- Allow to callus: This is a crucial step! Let the cut end dry and callus over for 2-7 days in a dry, airy spot, out of direct sunlight. You’ll know it’s ready when the cut surface looks and feels dry and sealed.
- Apply rooting hormone (optional): If you’re using it, dip the callused end of the cutting into the rooting hormone powder. Tap off any excess.
- Plant the cutting: Fill your pots with the well-draining succulent mix. Make a small hole in the soil with your finger or a pencil, and gently insert the callused end of the cutting. Firm the soil around the base to provide support.
- Water very sparingly: I only give my cuttings a light watering after planting. You want the soil to be barely moist, not wet.
The “Secret Sauce” (Pro Tips)
After years of getting my hands dirty, I’ve picked up a few tricks.
- Don’t overwater, ever! This is the golden rule for succulents. For freshly planted cuttings, I wait about a week after the initial light watering before giving them another tiny drink. The callusing step already helps prevent drying out.
- A splash of bottom heat can work wonders. If you have a propagation mat, placing your pots on it (especially in cooler weather) can significantly speed up root development. It mimics the warmth of spring soil.
- Watch for air roots before soil roots. Sometimes you’ll see tiny white aerial roots start to form on the stem of your cutting before it even hits the soil. This is a great sign that it’s gearing up to establish!
Aftercare & Troubleshooting
Once your cuttings have started to show signs of rooting – usually a gentle tug resistance or the appearance of new leaf growth – you can begin to water them a bit more regularly. Still, err on the side of caution. Let the soil dry out completely between waterings.
The most common issue you’ll face is rot. If your cutting turns mushy, black, or smells unpleasant, it’s likely rotten. Unfortunately, there’s usually no coming back from this. Your best bet is to discard the rotten cutting to prevent it from spreading to others and try again, focusing on better drainage and less water. Yellowing leaves on a cutting can sometimes indicate it’s too wet, but can also just be a natural shedding of older leaves. Keep an eye on the overall health of the cutting.
A Encouraging Closing
Propagating Aeonium glutinosum is such a fulfilling gardening endeavor. You’re not just growing a plant; you’re creating a little piece of botanical magic with your own hands. Be patient, embrace the process, and don’t be discouraged if every cutting doesn’t make it. The joy of seeing those tiny roots emerge and a new rosette unfurl is absolutely worth the effort. Happy propagating!
Resource: