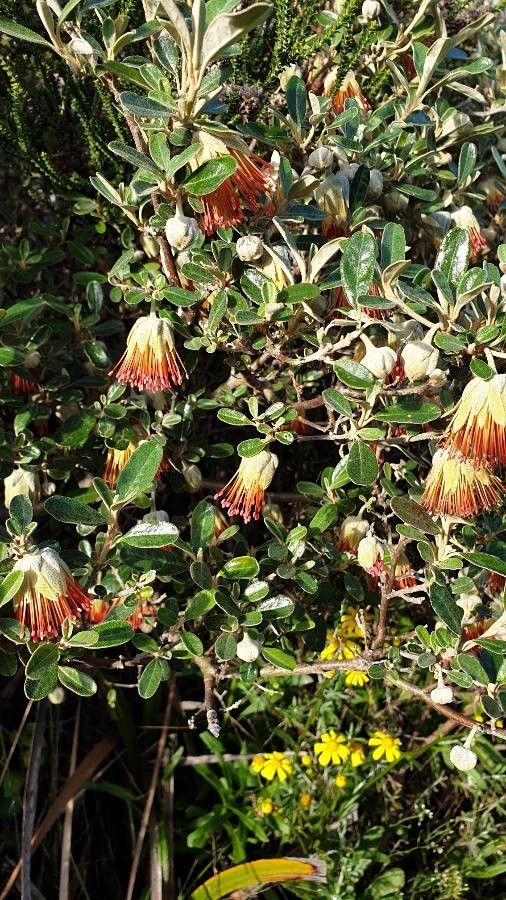
Oh, Diplolaena angustifolia! What a joy to talk about this beauty. You know, I’ve had these little Australian wonders gracing my garden for years, and they always bring a smile. Their delicate, star-shaped yellow flowers, often appearing in clusters, have this wonderful way of brightening up even the dullest spot. Plus, they’re wonderfully fragrant, especially after a bit of rain.
Propagating Diplolaena angustifolia isn’t for absolute beginners, I’ll admit, but it’s certainly achievable with a little care and attention. The reward of watching a tiny cutting transform into a flourishing new plant is just incredible, and it’s a fantastic way to share these beauties with friends.
The Best Time to Start
I find the sweet spot for propagating Diplolaena angustifolia is late spring through early summer. This is when the plant is actively growing, producing lovely new shoots that have a good chance of rooting. You’re looking for semi-hardwood cuttings – not brand new, flimsy growth, but not old, woody stems either. Think of it as just starting to firm up.
Supplies You’ll Need
Before we dive in, let’s gather our tools. Having everything ready makes the process so much smoother.
- Sharp Pruning Shears or a Craft Knife: For clean cuts that heal well.
- Rooting Hormone: A powder or gel will significantly boost your success rate.
- Small Pots or Seed Trays: With drainage holes, of course!
- Gritty, Well-Draining Potting Mix: I usually mix equal parts perlite and a good quality seed-starting mix. Sand can also be a great addition.
- Watering Can with a Fine Rose or a Spray Bottle: For gentle watering.
- Plastic Bags or a Propagation Dome: To create a humid environment.
- Optional: Heat Mat: For fussy cuttings, a little warmth can make all the difference.
Propagation Methods
For Diplolaena angustifolia, stem cuttings are my go-to method. It’s reliable and gives you the best chance of success.
Taking Stem Cuttings
- Select Your Cuttings: Look for healthy stems that are about 4-6 inches long. Gently bend a stem; if it snaps cleanly it’s likely ready.
- Make the Cut: Using your clean pruning shears or craft knife, make a clean cut just below a leaf node. This is where roots are most likely to form.
- Prepare the Cutting: Remove the lower leaves from the bottom half of the cutting, leaving just a few at the very top. This prevents them from rotting in the soil. If the remaining leaves are quite large, I often like to gently cut them in half horizontally. This reduces water loss without sacrificing too much of the plant’s energy-producing surface.
- Apply Rooting Hormone: Dip the cut end of the stem into a small amount of rooting hormone, tapping off any excess.
- Plant the Cuttings: Fill your small pots with your prepared gritty mix and moisten it. Make a small hole in the center of the pot with your finger or a pencil. Insert the cutting, ensuring the hormone-coated end is nestled in the soil. Gently firm the soil around the stem.
- Water Gently: Give the cuttings a light watering, just enough to settle the soil around the stem.
Creating a Humid Environment
- Cover Your Pots: Place the potted cuttings into a plastic bag or cover them with a propagation dome. Make sure the leaves don’t touch the inside of the bag. If you’re using a bag, you might need to prop it up with a few stakes so it doesn’t flatten the leaves.
- Provide Light: Place the pots in a bright spot, but out of direct sunlight. A windowsill that gets bright, indirect light is perfect.
- Maintain Humidity: Mist the cuttings lightly every few days or if the soil starts to dry out. The goal is to keep the leaves looking turgid.
The “Secret Sauce” (Pro Tips)
Here are a few little tricks that have worked wonders for me over the years:
- Bottom Heat is Your Friend: If you have a heat mat, place your pots on it. Diplolaena angustifolia seems to respond really well to that gentle warmth from below. It really encourages those roots to get going.
- Don’t Overwater: This is crucial! Wet, soggy soil is the enemy here. It leads to rot. The gritty mix is key, as is watering only when the top inch of soil feels dry to the touch.
- Be Patient with Leaf Drop: If a cutting loses a few leaves, don’t despair! Sometimes this happens as the plant conserves energy to focus on root development. As long as the stem remains firm and green, there’s still hope.
Aftercare & Troubleshooting
You’ll know your cuttings have rooted when you see new growth appearing at the top, or when you gently tug on the cutting and feel resistance. This usually takes anywhere from 4 to 8 weeks.
Once roots have formed, you can start to gradually acclimatize your new plants to normal conditions. This means slowly opening the bag or ventilation dome over a week or so. Then, you can pot them up into slightly larger pots with a more standard potting mix. Continue to keep them in bright, indirect light and water as needed.
The most common sign of failure is rotting. If your cuttings turn black and mushy, or if they simply won’t root and eventually wither, it’s usually a sign of too much moisture or insufficient drainage. Don’t be disheartened if some don’t make it; it’s all part of the learning process.
A Encouraging Closing
Growing new plants from cuttings is such a rewarding part of gardening. It takes a bit of patience, a keen eye, and a little bit of luck, but watching those tiny stems transform is truly magical. So grab your secateurs, get your hands dirty, and enjoy the delightful journey of propagating your own Diplolaena angustifolia. Happy gardening!
Resource:
https://identify.plantnet.org/k-world-flora/species/Diplolaena%20angustifolia%20Hook./data