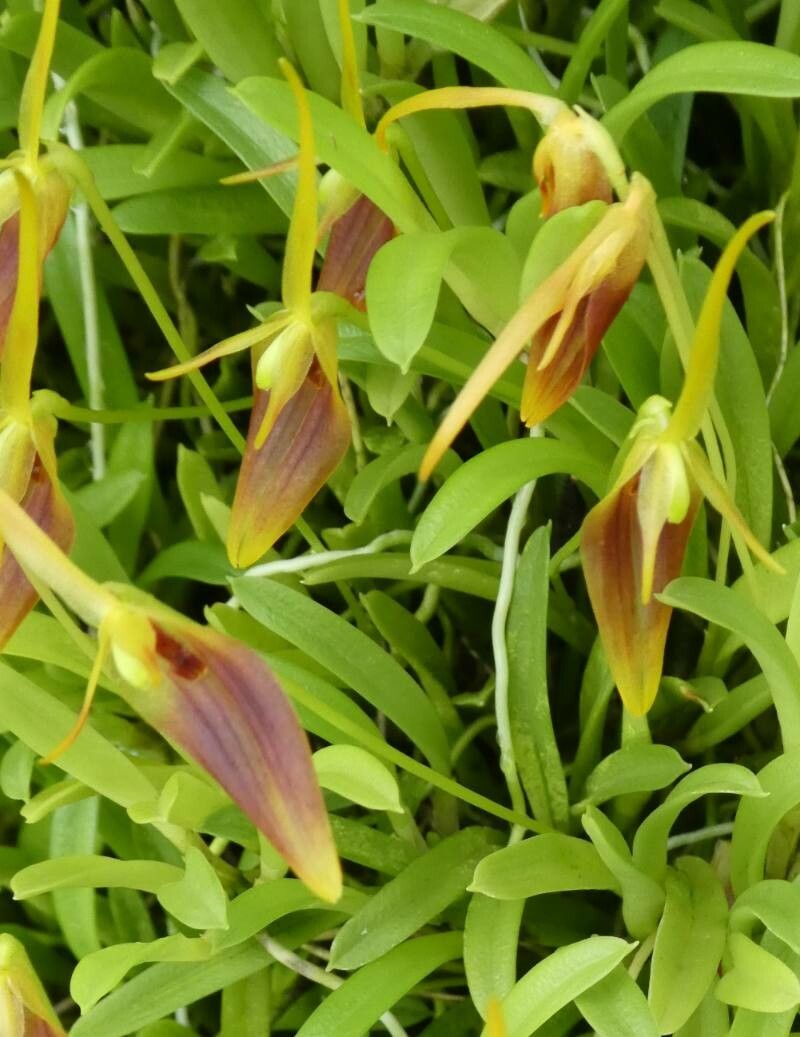
Hello there, fellow plant lovers! Today, we’re diving into the charming world of Barbosella dolichorhiza. If you haven’t met this little gem, imagine delicate, often tiny orchids with a unique, almost whimsical appearance. They’re a delight to behold, and getting more of them to grace your home is a truly satisfying endeavor. Now, I have to be honest, Barbosella dolichorhiza isn’t the absolute easiest plant for a complete beginner to propagate. They can be a bit particular, but with a little care and attention, it’s absolutely achievable. Think of it as a rewarding challenge that will deepen your connection with your plants!
The Best Time to Start
My experience tells me that the late spring to early summer is generally the sweet spot for propagating Barbosella dolichorhiza. This is when the plant is actively growing after its cooler resting period and has plenty of energy to put into new development. You’ll want to look for the plant to be showing signs of robust new growth – healthy leaves and perhaps even a developing pseudobulb.
Supplies You’ll Need
Gathering your tools before you begin makes the whole process much smoother. Here’s what I always have on hand:
- Sharp, sterilized pruning shears or a hobby knife: For clean cuts that minimize damage.
- Sphagnum moss: High-quality, long-fibered sphagnum moss is your best friend here.
- Small pots or trays: Clean ones are a must to prevent disease.
- Rooting hormone (optional, but recommended): A powder or gel can give extra encouragement.
- Perlite or orchid bark: For a bit of aeration in your potting mix.
- A spray bottle: For gentle misting.
- Clear plastic bags or a propagation dome: To create a humid environment.
- A heat mat (strongly recommended): Especially for encouraging root development.
Propagation Methods
For Barbosella dolichorhiza, the most successful method I’ve found is division. These orchids tend to grow in clumps, and gently separating them is the way to go.
- Prepare Your Workspace: Make sure everything is clean. This is crucial for preventing fungal infections that these delicate plants are prone to.
- Gently Remove from Pot: Carefully take your Barbosella out of its current pot. You might need to gently loosen the edges with a knife if it’s tightly bound.
- Inspect the Roots: Gently tease away some of the old potting mix to get a good look at the root system and the pseudobulbs (those swollen stem-like structures at the base of the leaves). You’re looking for sections with healthy roots and at least one or two pseudobulbs.
- The Cut: Using your sterilized shears or knife, carefully cut the rhizome (the creeping stem connecting the pseudobulbs) to separate a section. Aim for divisions that have a couple of healthy pseudobulbs and a decent root system. Don’t be afraid to make a clean cut; ragged edges are more prone to rot.
- Treat the Wounds (Optional): If you’re using rooting hormone, lightly dust the cut end of the rhizome. Some growers also like to dust with a fungicide at this stage as an added precaution. Let the cut surface air dry for a few hours, or even overnight, if possible.
- Repotting: Plant your division in a small pot filled with your chosen orchid mix. I like a blend of mostly long-fibered sphagnum moss with a little perlite for good drainage and moisture retention. Place the division so the base of the pseudobulbs are at or just slightly above the surface.
The “Secret Sauce” (Pro Tips)
Here are a couple of things I’ve learned over the years that make a real difference:
- Don’t Drown Your Baby: While Barbosellas love humidity, it’s vital that the crown of the plant (where the leaves emerge) doesn’t sit in stagnant water. This is a sure way to invite crown rot. When you water, aim to keep the potting medium moist but not waterlogged.
- Bottom Heat is a Game Changer: For encouraging root development, placing your newly divided Barbosellas on a gentle heat mat set to around 70-75°F (21-24°C) can significantly speed up the process. It mimics the warm, humid conditions they thrive in.
Aftercare & Troubleshooting
Once your division is potted, provide it with high humidity and indirect light. I usually place mine in a clear plastic bag or under a propagation dome to keep the environment moist. Mist gently when the moss starts to look a bit dry.
The first sign of success will be new leaf growth or the development of tiny root tips. Be patient; this can take a few weeks.
The most common pitfalls are rot and dehydration. If you see leaves turning yellow or mushy, or the pseudobulbs shriveling, it could be a sign of too much water or not enough humidity. If you notice rot, try to remove the affected parts with your sterilized knife and perhaps treat with a fungicide. If the plant seems too dry, increase the humidity and watering frequency.
A Encouraging Closing
Propagating Barbosella dolichorhiza might take a little patience, but witnessing that first sign of new growth is one of the most rewarding experiences in gardening. Don’t be discouraged if your first attempt isn’t perfect. Each plant is an individual, and the learning process is part of the joy. Happy propagating!
Resource:
https://identify.plantnet.org/k-world-flora/species/Barbosella%20dolichorhiza%20Schltr./data