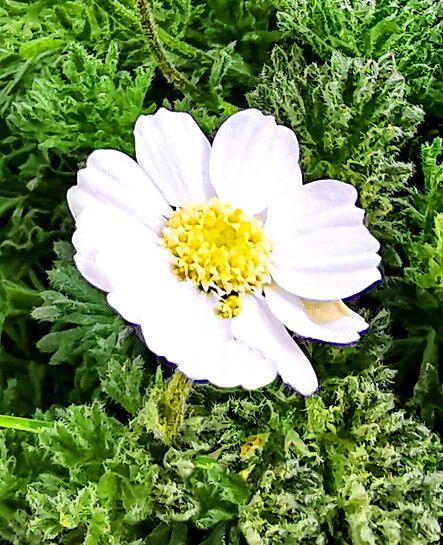
Ah, Achillea barrelieri! If you’ve ever admired those delicate, feathery plumes cascading over the garden edge, you’re in good company. This lovely yarrow relative offers such a gorgeous, cottage-garden charm with its soft gray-green foliage and clusters of small, white flowers. And the best part? It’s quite satisfying to share this beauty by propagating it yourself. Don’t you worry, though. If you’re new to propagating plants, Achillea barrelieri is a kind and forgiving friend to start with. You’ll find the process quite approachable.
The Best Time to Start
For the highest success rate, I always reach for my tools in late spring or early summer. This is when the plant is actively growing and has plenty of energy to put into developing new roots. You’re looking for soft, new growth, not the woody stems that have been around all winter.
Supplies You’ll Need
Here’s what I usually gather for my propagation projects:
- Sharp pruning shears or a clean knife: For making clean cuts.
- A well-draining potting mix: I often use a mix of equal parts seed starting mix and perlite or coarse sand. This prevents the cuttings from sitting in soggy soil.
- Small pots or seedling trays: Clean ones are essential!
- Rooting hormone (optional but recommended): A little dip can really speed things up.
- A spray bottle: For misting.
- A plastic bag or propagation dome: To create a mini-greenhouse.
- Labels and a marker: So you remember what you planted where!
Propagation Methods
Achillea barrelieri is wonderfully versatile, and you can have success with a couple of different methods.
Stem Cuttings: My Go-To
This is my favorite method for Achillea barrelieri, and it’s quite straightforward.
- Select your cuttings: Find healthy, non-flowering shoots that are about 4-6 inches long. Gently bend one. If it snaps cleanly, it’s likely a good candidate.
- Make the cut: Using your clean shears or knife, take a cutting just below a leaf node. A leaf node is where a leaf attaches to the stem.
- Prepare the cutting: Remove the lower leaves from the bottom two-thirds of the stem. You want to expose some leaf nodes, as this is where roots will emerge.
- Dip in rooting hormone: If you’re using it, dip the cut end into the rooting hormone powder, tapping off any excess.
- Plant the cuttings: Fill your small pots with your prepared potting mix. Make a small hole with your finger or a pencil and insert the cutting, ensuring the leaf nodes are buried. Gently firm the soil around it.
- Water and cover: Water the soil thoroughly but gently. Then, cover the pot with a plastic bag or propagation dome to keep humidity high. Secure it so it doesn’t fall off. Place the pot in a bright spot, but out of direct sunlight.
Division: Simple and Effective
If you have an established clump of Achillea barrelieri, dividing it is a fantastic way to get new plants and invigorate the parent.
- Dig up the plant: In the early spring or fall, when the plant is dormant, gently dig up the entire clump.
- Separate the sections: You can usually pull the root ball apart by hand. If it’s stubborn, use a clean trowel or even two forks, back to back, to tease the roots apart.
- Ensure each section has roots and shoots: Aim for sections that have a good amount of healthy roots and at least a couple of stems or buds.
- Replant immediately: Plant your new divisions into their prepared spots in the garden or into pots, watering them well.
The “Secret Sauce” (Pro Tips)
Here are a couple of things I’ve learned over the years that make a big difference:
- Don’t crowd your cuttings: Give them a little space in their pots. Overcrowding invites humidity that can lead to rot, not roots. It’s better to have a few strong cuttings than a potful of struggling ones.
- A little bottom heat goes a long way: If you have a seedling heat mat, placing your pots on it can significantly speed up root development. It warms the soil without overheating the foliage.
Aftercare & Troubleshooting
Once your cuttings have roots – and you can usually tell because they’ll start to put out new growth – it’s time to transition them.
- Harden them off: Gradually remove the plastic bag or dome over a week or so, letting them get used to your home’s environment.
- Water regularly but don’t overwater: Keep the soil consistently moist but not soggy. You should be able to feel the roots when you gently tug on the cutting.
- Yellowing leaves: This can happen. If the lower leaves turn yellow, it’s often because the plant is redirecting its energy to root formation. You can generally pluck them off.
- Rot: The most common sign of failure is rot. If a cutting turns black and mushy, it’s succumbed to unfavorable conditions, usually too much moisture and not enough air circulation. Don’t be discouraged; just try again with fresh cuttings.
A Loving Wrap-Up
Propagating Achillea barrelieri is a journey, and like all good gardening endeavors, it requires a touch of patience. Watch for those tiny signs of new life, celebrate each successful root, and remember that even the most seasoned gardeners have the occasional setback. So go ahead, grab a cutting, and enjoy the incredible satisfaction of growing your own beautiful Achillea. Happy propagating!
Resource:
https://identify.plantnet.org/k-world-flora/species/Achillea%20barrelieri%20(Ten.)%20Sch.Bip./data