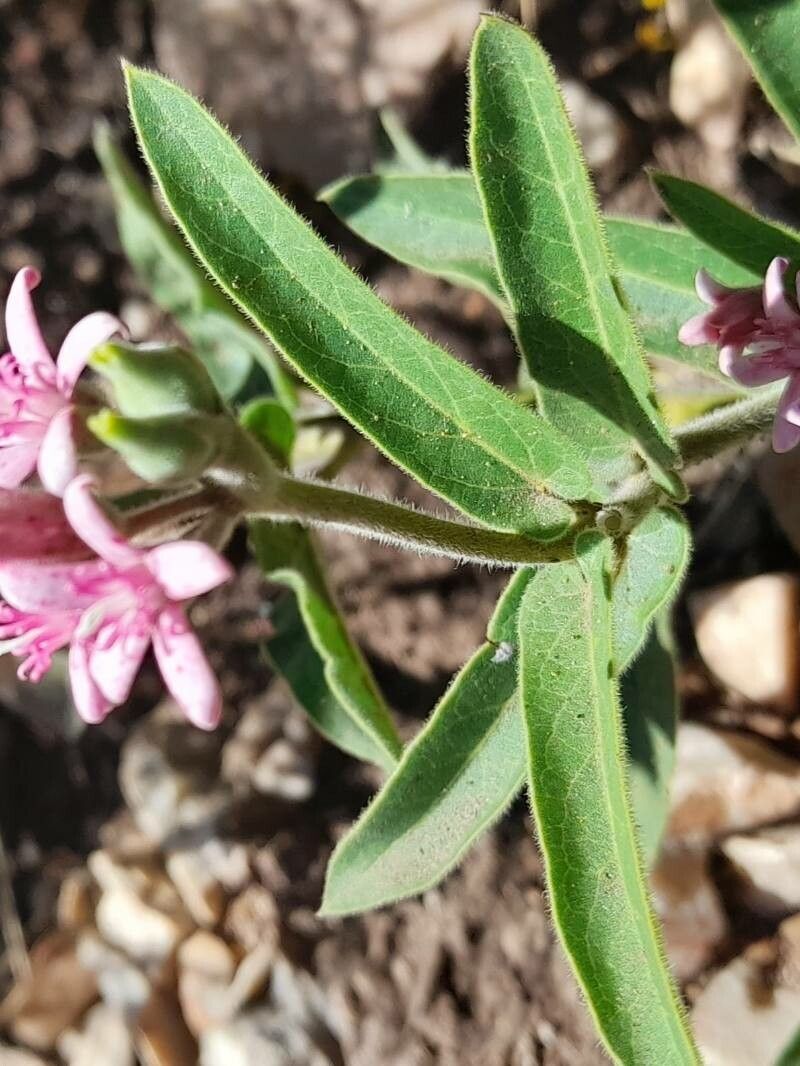
Oh, hello there! Come on in, the kettle’s just boiled. Let’s chat about Oxypetalum solanoides, shall we? I’ve been growing this beauty for years, and honestly, it’s like having a little piece of sunshine in the garden. The lovely, starry flowers and that soft fuzz on the leaves – it’s just so charming. And the best part? It’s surprisingly straightforward to grow more of them!
If you’re new to propagation, don’t fret. Oxypetalum solanoides is a pretty forgiving plant to get started with. It’s not one of those finicky divas that throws a tantrum if you look at it wrong. You’ll get the hang of it in no time, and soon you’ll be gifting little starter plants to all your friends.
The Best Time to Start
For the highest success rate with your Oxypetalum solanoides, spring is your golden ticket. After the last frost has passed and your plant is really starting to wake up and put on new growth is the ideal time. You’re looking for those soft, new shoots that are pliable and full of life. Avoid taking cuttings from old, woody stems; they’re just too tough to root.
Supplies You’ll Need
Before we get our hands dirty, let’s gather our tools. Here’s what I recommend:
- Sharp Pruning Shears or a Clean Knife: For taking clean cuts.
- Seed Starting Mix or a Well-Draining Potting Mix: I often mix in a bit of perlite to ensure excellent drainage.
- Small Pots or Trays: Anything that can hold your cuttings. Old yogurt cups with drainage holes poked in work wonders!
- Rooting Hormone (Optional but Recommended): This really gives your cuttings a helping hand.
- Plastic Bags or a Small Greenhouse/Cloche: To create a humid environment.
- Watering Can with a Fine Rose: For gentle watering.
Propagation Methods
There are a couple of ways we can encourage our Oxypetalum solanoides to make a new friend. I find stem cuttings to be the most reliable method.
Stem Cuttings
- Find a Healthy Shoot: Look for a stem that’s about 3-6 inches long with a few sets of leaves.
- Make Your Cut: Just below a leaf node (where a leaf attaches to the stem), make a clean cut with your shears or knife. This is where roots are most likely to form.
- Prepare the Cutting: Gently remove the lower leaves, leaving just a few at the top. This prevents them from rotting when buried. If your cutting is particularly long, you can even pinch off the very top tip to encourage bushier growth later.
- Dip (if using): If you’re using rooting hormone, dip the cut end into the powder, tapping off any excess.
- Plant Your Cutting: Stick the prepared end into your moist potting mix. Make sure at least one leaf node is buried under the soil. Gently firm the soil around the base.
Water Propagation (A Simpler Alternative)
- Take Your Cutting: Follow steps 1-3 from the stem cutting method.
- Place in Water: Pop the cutting into a small glass or jar of water. Crucially, ensure no leaves are submerged. Submerged leaves will rot and can take the whole cutting down with them.
- Find a Bright Spot: Place the jar in a bright location, out of direct sunlight.
- Change Water Regularly: Refresh the water every few days to keep it clean and oxygenated.
The “Secret Sauce” (Pro Tips)
Now, for a couple of little tricks I’ve picked up over the years that can really boost your success:
- Think Humidity! This is probably the most important part. Once your cuttings are in pots, cover them with a plastic bag or pop them into a mini-greenhouse. This traps moisture and stops the cuttings from drying out before they can root. Just make sure the leaves don’t touch the inside of the bag – that can cause rot. I like to prop up the bag with a small stick or bamboo cane if needed.
- Bottom Heat is Your Friend: If you have a seedling heat mat, using it under your pots can make a HUGE difference. It encourages root development from below, essentially giving your cuttings a warm hug to get them started. It’s not strictly necessary, but it will speed things up.
- Don’t Rush to Pot Up: Resist the urge to poke and prod. When propagating in water, wait until you see a decent root system, maybe an inch or two long. For cuttings in soil, be patient. You’ll see new leaf growth at the top – that’s a great sign roots are forming!
Aftercare & Troubleshooting
Once you see signs of new growth – tiny leaves unfurling at the top – that’s your cue that roots are developing!
- Gradual Acclimation (for bagged cuttings): If you’ve used the plastic bag method, start by removing the bag for a few hours each day, gradually increasing the time until the cutting is fully exposed to the ambient air.
- Gentle Watering: Continue to keep the soil consistently moist but not waterlogged. If you propagated in water, carefully transplant your cutting into well-draining potting mix.
- Bright, Indirect Light: Continue to provide bright, indirect light. Direct sun can scorch those tender new leaves.
Now, what if things go wrong? The most common issue is rot. If your cutting turns black and mushy, or the leaves start to yellow and drop off very quickly, it’s usually a sign of overwatering or poor drainage. Unfortunately, rotten cuttings are a lost cause. Don’t be discouraged! Just chalk it up to experience and try again with fresh material. Sometimes, a cutting just won’t take, and that’s okay.
A Encouraging Closing
Growing new plants is such a rewarding journey. It’s all about patience, observation, and a willingness to learn. Don’t be afraid to experiment and see what works best in your own garden. Enjoy the process, and before you know it, you’ll have a whole collection of Oxypetalum solanoides to admire! Happy gardening!
Resource:
https://identify.plantnet.org/k-world-flora/species/Oxypetalum%20solanoides%20Hook.%20&%20Arn./data