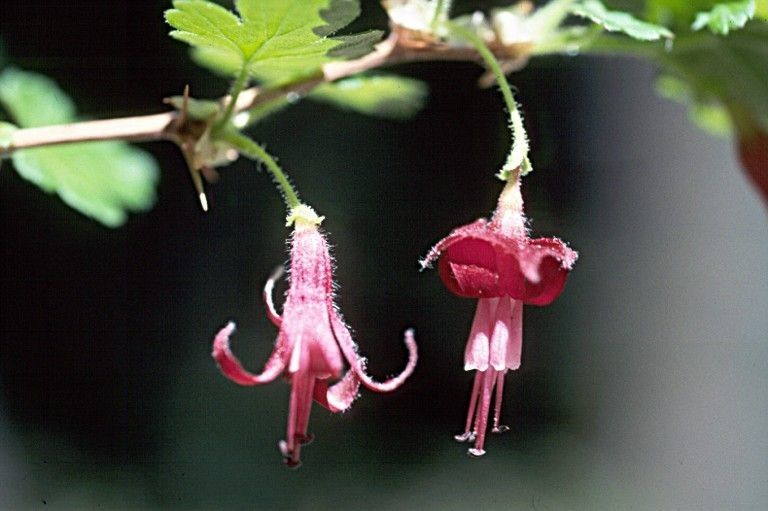
Oh, Ribes lobbii! If you’ve ever admired those delicate, nodding pink flowers cascading down thorny branches, you’re not alone. This Pacific Northwest native, often called the Gummy Gooseberry (though I think “Pink Cascade Gooseberry” has a nicer ring to it!), is a real charmer in the garden. It brings beautiful blooms in spring and then lovely, if not always huge, edible berries later on. Honestly, propagating it is such a gratifying way to multiply that charm. And the good news? For most of us, it’s a pretty enjoyable and accessible process. You don’t need to be a propagation guru to get started.
The Best Time to Start
For the best chance of success with Ribes lobbii, I always reach for softwood cuttings in late spring or early summer. That’s when the plant is actively growing, and those new, flexible shoots are full of life and readily adaptable to rooting. Think about mid-May through June, once your plants have really woken up from their winter slumber and are putting on a good show.
Supplies You’ll Need
Gathering your tools makes the whole process smoother. Here’s what I usually have on hand:
- Sharp Pruning Shears or a Knife: Clean cuts are crucial for healthy new growth. Make sure they’re not rusty!
- Rooting Hormone: A powdered or gel form helps new cuttings form roots faster. I find the gel is a little less messy.
- Small Pots or Seedling Trays: About 4-inch pots are usually perfect. Make sure they have drainage holes.
- Well-Draining Potting Mix: A good starting point is a 50/50 blend of seed-starting mix and perlite, or a specialized cutting mix. We want to avoid soggy roots at all costs!
- Plastic Bag or Humidity Dome: To keep those cuttings nice and humid while they’re trying to root.
- Marker Pen: To label your pots – trust me, you’ll thank yourself later!
- Watering Can or Spray Bottle: For gentle watering.
Propagation Methods
I’ve had the most luck with stem cuttings for Ribes lobbii. Here’s how I do it:
- Take Your Cuttings: On a cool, overcast morning, select healthy, vigorous stems that are about pencil-thick and 6-8 inches long. Look for stems that are flexible but not floppy – sort of like a fresh twig from a healthy bush. Using your sharp shears, make a clean cut just below a leaf node (that’s where a leaf attaches to the stem). Remove the leaves from the bottom half of the cutting.
- Prepare the Cuttings: Dip the cut end into your rooting hormone. Gently tap off any excess. We want just a light coating.
- Plant the Cuttings: Fill your pots with your well-draining mix. Make a small hole in the center of each pot with your finger or a pencil. Carefully insert the cutting into the hole, ensuring at least two leaf nodes are buried in the soil. Firm the soil gently around the base of the cutting.
- Water and Cover: Water the soil thoroughly until it drains from the bottom. Then, cover the pots with a clear plastic bag or a humidity dome. This creates a mini-greenhouse effect, keeping those tender cuttings from drying out. Secure the bag loosely.
The “Secret Sauce” (Pro Tips)
Here are a few little tricks that tend to make a big difference for me:
- No Dipping in Water First! Unlike some plants, I find that for Ribes, dipping your cuttings in water before the rooting hormone can sometimes lead to rot before they even get a chance to root. Go straight from the clean cut to the rooting hormone.
- Bottom Heat is Your Friend: If you have one, popping your pots onto a gentle heat mat can really speed up root development. It mimics what happens naturally in the soil during warmer months and gives those roots a cozy environment to emerge.
- Air Circulation Matters: While we want humidity, don’t forget to poke a few small holes in the plastic bag or lift the humidity dome for a few minutes each day. This prevents any fungal issues from taking hold.
Aftercare & Troubleshooting
Once your cuttings are potted, place them in a bright spot but out of direct, harsh sunlight. Keep the soil consistently moist but not waterlogged. You’ll know they’re rooting when you see new leaf growth starting to emerge, usually within 4-8 weeks. Don’t rush to pull them out to check for roots; let them do their thing!
The most common sign of trouble is wilting or mushy stems, often a sign of rot. This usually means the soil is too wet or there isn’t enough air circulation. If you see this, I’d carefully remove the affected cutting and let the others dry out a bit more and ensure good airflow.
A Encouraging Closing
Propagating Ribes lobbii is a journey, and like all good things in the garden, it requires a bit of patience. Don’t get discouraged if a few don’t make it; it’s all part of the learning process. Enjoy the satisfaction of watching those tiny roots emerge and knowing you’ve created new life from just a little snippet of a branch. Happy gardening!
Resource:
https://identify.plantnet.org/k-world-flora/species/Ribes%20lobbii%20A.Gray/data