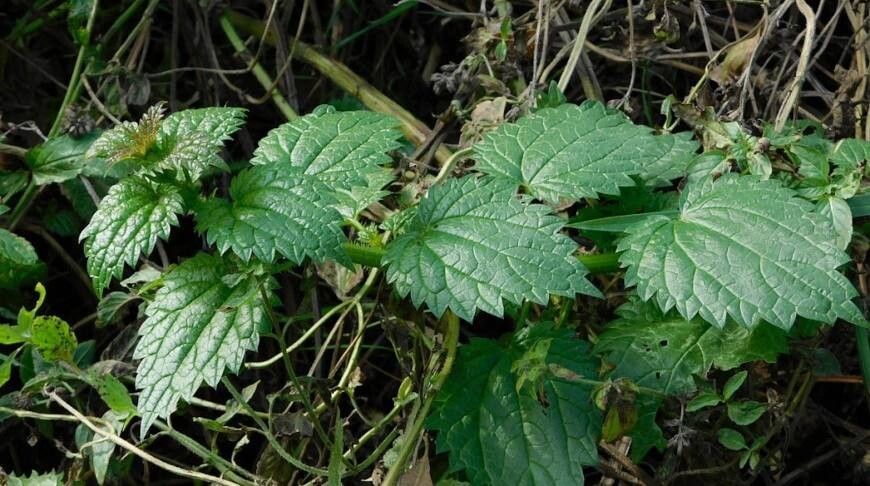
Hey there, fellow plant enthusiasts! Today, we’re diving into the wonderful world of Urtica kioviensis. You might know it as the striking stinging nettle, but I’ve found it has a certain wild allure, especially in a more contained garden setting. Propagating it isn’t just about getting more plants; it’s about understanding its tenacious spirit and rewarding yourself with the satisfaction of coaxing new life from a single stem. For beginners? I’d say it’s moderately easy, but with a little care, you’ll be a pro in no time.
The Best Time to Start
Honestly, spring is your golden ticket for propagating Urtica kioviensis. As the plant really kicks into gear after winter, you’ll find its stems are full of vigor. Aim for late spring or early summer, when the stems are still somewhat soft and pliable, but have had a chance to develop. This is when they have the most energy for root development.
Supplies You’ll Need
Before we get our hands dirty, let’s gather our tools. Having everything ready makes the process so much smoother.
- Sharp pruning shears or a clean knife: For taking clean cuts.
- Rooting hormone (optional but helpful): Especially for stem cuttings. It gives them an extra boost.
- Potting mix: A well-draining mix is crucial. I often use a blend of perlite, peat moss, and a bit of compost.
- Small pots or propagation trays: Clean ones are essential to prevent disease.
- Water: For misting and watering.
- Clear plastic bags or a propagation dome: To maintain humidity.
- Labels: So you don’t forget what you planted where!
Propagation Methods
Let’s get down to business! Urtica kioviensis is quite keen to spread, making propagation a joy.
1. Stem Cuttings: My Go-To Method
This is straightforward and usually gives me the best results.
- Select a healthy stem: Look for a vibrant, non-flowering stem from your established plant. Aim for a piece about 4-6 inches long.
- Make the cut: Using your sharp pruners or knife, make a clean cut just below a leaf node. This is where the magic of root formation happens.
- Prepare the cutting: Gently remove the lower leaves, leaving just a couple at the top. This reduces water loss and prevents leaves from rotting in the soil.
- Apply rooting hormone (optional): If you’re using it, dip the cut end into the rooting hormone, tapping off any excess.
- Plant the cutting: Stick the cut end into your prepared, moist potting mix. Make a small hole with a pencil or your finger to avoid knocking off the rooting hormone. Gently firm the soil around the stem.
- Create a humid environment: Water the pot lightly and then cover it with a clear plastic bag or place it under a propagation dome. This traps moisture, which is vital for cuttings.
2. Division: For Older, Bushier Plants
If you have a more mature Urtica kioviensis that’s gotten a bit too large, division is a great way to get multiple plants.
- Carefully dig up the plant: In spring or early fall, gently excavate the entire root ball.
- Gently tease apart the roots: Look for natural divisions within the root system. You can use your hands to carefully separate sections. For tougher clumps, a clean spade or knife can help.
- Ensure each division has roots and shoots: Each piece you plant should have a decent root system and at least one or two healthy stems.
- Replant immediately: Pot up each division into its own pot with fresh potting mix. Water them well.
The “Secret Sauce” (Pro Tips)
Here are a few little tricks I’ve learned over the years that often make a big difference:
- Don’t let the leaves touch the water, ever. This is paramount, especially in water propagation, or even if you’re misting cuttings in soil. Any submerged leaves will quickly rot.
- Bottom heat is your friend. If you’re serious about rooting speed, popping your pots onto a gentle heat mat can significantly speed up root development. It mimics the warmer soil found in summer.
- Cleanliness is king. Always use sterilized tools and clean pots. Introducing any bacteria or fungal spores can spell doom for your precious cuttings.
Aftercare & Troubleshooting
Once you’ve got your cuttings or divisions planted, the waiting game begins.
- Keep them consistently moist but not soggy. A light misting daily is often enough, depending on the humidity you’ve created. If they’re in pots, water when the top inch of soil starts to feel dry.
- Provide bright, indirect light. Direct sun can scorch delicate new cuttings.
- Check for roots: After a few weeks, gently tug on a cutting. If there’s resistance, you’ve got roots! You can also look for new leaf growth.
- Signs of trouble: The most common issue is rot. If you see mushy, black stems or leaves, unfortunately, that cutting is likely lost. This usually means it was too wet, not enough airflow, or a poor cutting. If a cutting just looks sad and droopy, don’t give up immediately – sometimes they need time and better conditions.
A Little Patience Goes a Long Way
Propagating plants is a lesson in patience and observation. Don’t be discouraged if not every single cutting takes. Each little success is incredibly rewarding. Enjoy the process of nurturing these new Urtica kioviensis plants. You’ve got this!
Resource:
https://identify.plantnet.org/k-world-flora/species/Urtica%20kioviensis%20Rogow./data