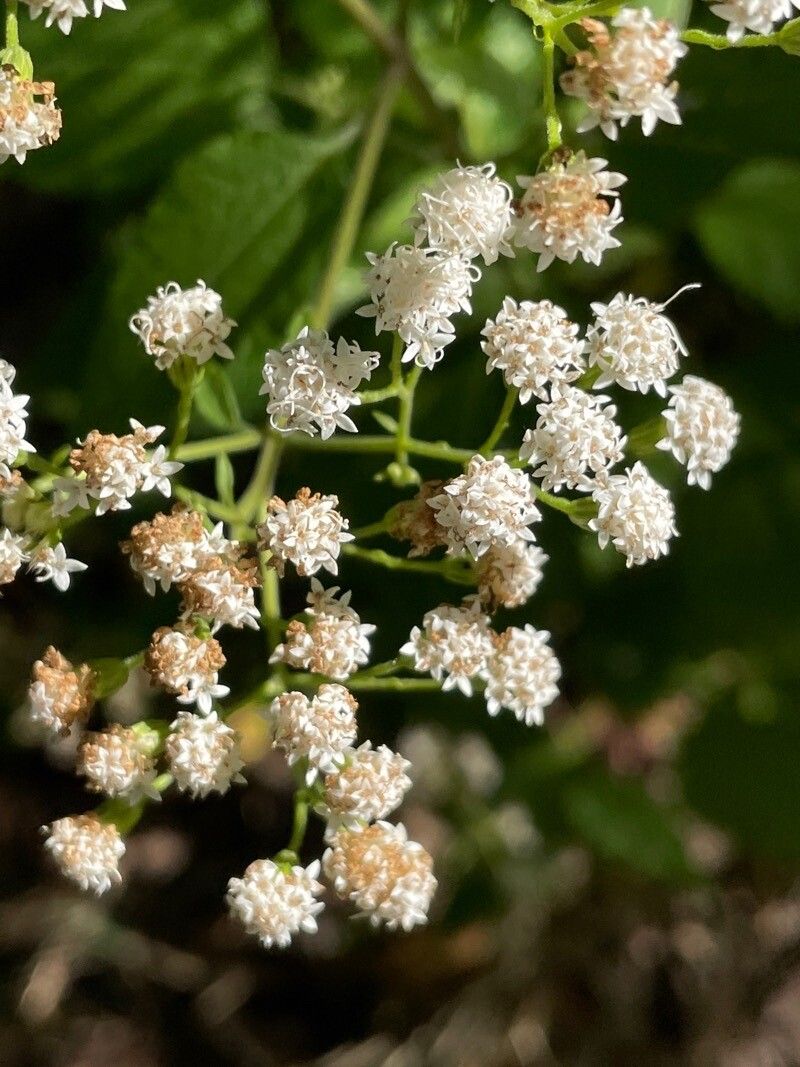
Oh, hello there! Grab a mug, settle in, and let’s talk about a little gem I absolutely adore: Ageratina jucunda. If you’re looking for a plant that brings a burst of cheerful, airy charm to your garden, this is it. With its delicate clusters of white flowers, it’s like a cloud of confetti for your landscape. And the best part? Sharing that beauty by propagating it yourself is incredibly satisfying.
Now, I know some plants can feel a bit intimidating to start from scratch, but I’m happy to tell you that Ageratina jucunda is actually quite forgiving. It’s a wonderful plant for beginners looking to dip their toes into the world of propagation. You’ll likely find yourself with more little beauties than you know what to do with, which is just the way we like it, right?
The Best Time to Start
For the highest success rate with Ageratina jucunda, spring is your golden ticket. This is when the plant is really waking up from its winter rest and buzzing with vigorous growth. The new softwood or semi-hardwood stems are flexible, full of life, and eager to root. While you can take cuttings later in the season, spring just seems to give them that extra boost they need to get established quickly.
Supplies You’ll Need
Before we get our hands dirty, let’s gather our tools. You don’t need anything too fancy, just the essentials:
- Sharp Pruning Shears or a Craft Knife: Clean cuts are key to encouraging good root development and minimizing disease.
- Small Pots or Seed Trays: Anything that can hold your potting mix and provide drainage.
- Well-Draining Potting Mix: A good blend for me is equal parts peat moss or coco coir, perlite, and a bit of compost. Ageratina hates sitting in soggy soil.
- Rooting Hormone (Optional but Recommended): A little magic powder or gel can significantly speed up root formation.
- Watering Can with a Fine Rose or a Spray Bottle: Gentle watering is important initially.
- A Plastic Bag or Propagation Dome: To create a humid environment for your cuttings.
Propagation Methods
Let’s dive into how to make more of these lovely plants. I find using stem cuttings to be the most reliable and straightforward method for Ageratina jucunda.
Stem Cuttings:
- Select Your Cuttings: Look for healthy, non-flowering stems on your mature Ageratina jucunda. You want to take cuttings that are about 4-6 inches long. These should be from the current year’s growth.
- Make the Cut: Using your clean pruning shears or craft knife, make a clean cut just below a leaf node. A leaf node is where a leaf emerges from the stem – this is where the magic for root development happens.
- Prepare the Cutting: Gently remove the lower leaves from the cutting, leaving just a few at the top. This prevents them from rotting when you stick them in the soil and also reduces water loss.
- Apply Rooting Hormone (If Using): Dip the cut end of the stem into your rooting hormone, tapping off any excess.
- Plant Your Cuttings: Fill your small pots with your prepared potting mix. Make a small hole with your finger or a pencil and gently insert the cut end of the stem into the soil, ensuring at least one leaf node is buried. Firm the soil gently around the cutting.
- Water Gently: Water the potting mix thoroughly but carefully, so you don’t dislodge your cuttings.
- Create Humidity: Place a clear plastic bag over the pot, securing it with a rubber band, or use a propagation dome. This creates a mini-greenhouse effect.
(Alternatively, for a quicker observation of root development):
Water Propagation:
- Follow steps 1-3 from the stem cutting method.
- Instead of planting in soil, place the prepared cuttings in a jar or glass of clean water.
- Crucially, make sure no leaves are submerged in the water. This will cause them to rot and do no good for your cutting.
- Place the jar in bright, indirect light. Change the water every few days to keep it fresh. You’ll be able to see roots forming right before your eyes!
The “Secret Sauce” (Pro Tips)
Here are a few little tricks I’ve picked up over the years that can really give your Ageratina cuttings the edge:
- Bottom Heat is Your Friend: If you can, using a seedling heat mat under your pots can significantly speed up root development. It mimics ideal soil temperatures and encourages those roots to get going faster.
- Don’t Go Overboard with Watering: I know I said water gently, but it’s worth repeating. Ageratina cuttings are prone to rot. It’s better to have the soil slightly dry than sitting waterlogged. Check the moisture level before watering, and when in doubt, wait a day.
- The Leaf Node is King: When making your cuttings, always prioritize making the cut right below a leaf node. This is where the plant’s regenerative cells are concentrated, making it the prime spot for root initiation.
Aftercare & Troubleshooting
Once you start seeing tiny roots emerging from the drainage holes of your pots, or if you’re water propagating and see root growth, congratulations! It’s time for a little more focused care.
- Gradual Acclimation: Gently remove the plastic bag or propagation dome for increasing periods each day. You want to slowly acclimate your new cuttings to the drier air in your home or greenhouse.
- Transplanting: Once your cuttings have a good root system (you’ll see roots filling the pot if you carefully tip it out, or they’ll be quite substantial in water), it’s time to pot them up into individual, slightly larger containers with your well-draining potting mix.
- Watering: Continue to water them gently, allowing the top inch of soil to dry out between waterings.
- Light: Keep them in bright, indirect light as they continue to grow.
Now, what if things don’t go as planned? The most common issue you might encounter is rot. If your cuttings turn mushy, black, or develop a foul smell, it’s a sign of too much moisture and not enough air circulation. Unfortunately, once rot sets in, it’s often too late to save the cutting. This is where those pro tips come in handy – ensuring good drainage and avoiding overwatering are your best defenses. Another sign of trouble can be yellowing leaves, which might indicate it’s not getting enough light, or sometimes the opposite, too much direct sun.
A Little Patience Goes a Long Way
Propagating plants is a journey, and there’s always a learning curve. Don’t get discouraged if your first few attempts aren’t perfect. Each time you try, you’ll learn something new. The joy of watching a tiny cutting unfurl new leaves and eventually grow into a beautiful, thriving plant is immense. So, be patient, enjoy the process, and soon you’ll have an abundance of Ageratina jucunda to share with friends or simply to fill your own garden with its delightful charm. Happy propagating!
Resource: