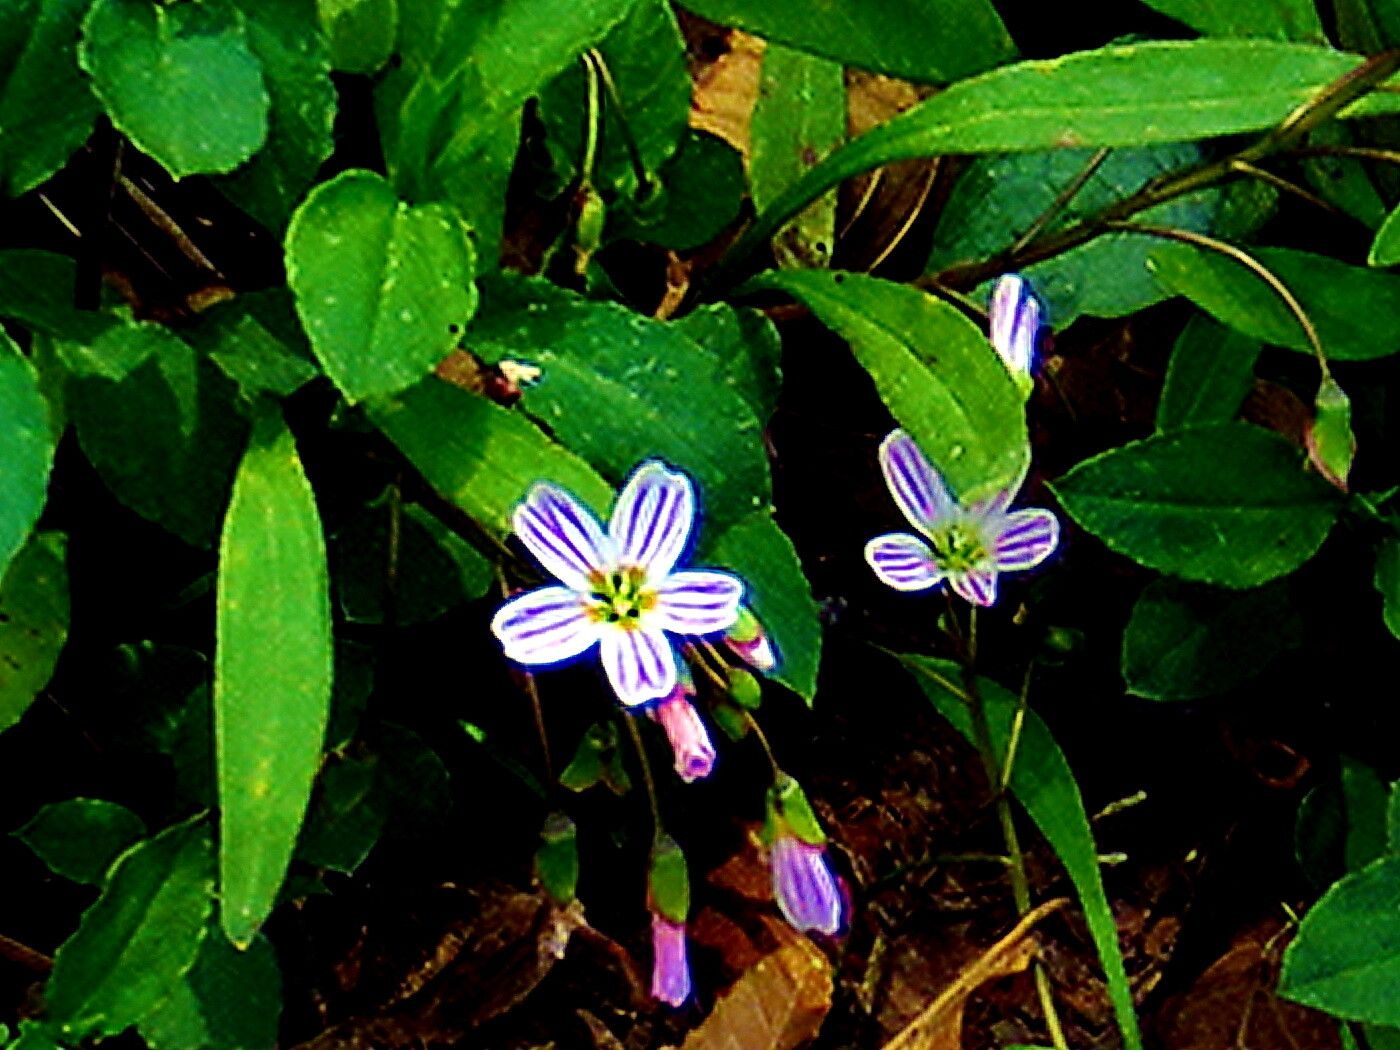
Oh, hello there! Pull up a chair. I’m just delighted you’re curious about Claytonia caroliniana, or Carolina Springbeauty as it’s affectionately known. If you’re looking for a little woodland charm for your garden, this is just the ticket. Its delicate pink flowers and succulent leaves bring such a gentle beauty to the early spring. And propagating it? Well, that’s a wonderfully rewarding way to share its charm around. Now, is it a walk in the park for a brand-new gardener? I’d say it falls somewhere in the middle. It’s not the absolute easiest, but with a little attention, you’ll be well on your way.
The Best Time to Start
Honestly, the best time to propagate Claytonia is when the plant is actively growing but not stressed. For us here, that usually means late spring or early summer, right after it’s finished its main bloom. You want to work with healthy, vigorous material, so aim for that period when it’s bursting with life. Trying to propagate when it’s dormant or stressed is like asking for a whole lot of frustration.
Supplies You’ll Need
Here’s what I always have on hand when I’m getting ready to propagate Claytonia:
- Sharp pruning shears or a clean knife: For clean cuts, always.
- Rooting hormone (optional but helpful): A little powder or gel can boost success.
- Well-draining potting mix: I like a blend of peat moss, perlite, and a bit of fine compost.
- Small pots or trays: Clean ones are crucial!
- Watering can with a fine rose: Gentle watering is key.
- Plastic bags or propagation domes: To create a humid environment.
- Labels: You’ll thank me later!
- A warm spot: For bottom heat, if you have it.
Propagation Methods
Claytonia caroliniana isn’t what you’d call a “grab and go” propagation plant. It’s a bit more delicate. The most successful methods for me have been division and seed propagation. Stem cuttings just haven’t been as reliable for me with this particular beauty.
Division
This is my go-to for Claytonia. It mimics how the plant naturally spreads anyway.
- Gently dig up the plant: Choose a clump that looks healthy and well-established. Carefully, and I mean carefully, ease it out of the soil. You don’t want to damage those tender roots.
- Separate the divisions: Look for natural breaks in the root system. You’ll often see where one cluster of leaves is attached to a distinct set of roots. Use your fingers or a clean knife to gently tease apart the root ball into smaller sections. Each division should have at least a few leaves and a healthy-looking root system.
- Replant immediately: You want to get these divisions back into the soil as quickly as possible.
- Water them in: Give them a good, gentle watering to settle the soil.
Seed Propagation
This method takes a little more patience, but it’s so satisfying to watch them grow from scratch.
- Collect seeds: Allow the seed pods to ripen on the plant. Once they’re dry and start to split, you can carefully collect the tiny seeds.
- Sow in fall: For Claytonia, it’s best to sow seeds in the fall. This mimics their natural cycle, allowing them to go through a period of cold stratification (which they need to germinate).
- Use a fine compost mix: Fill a shallow tray with your well-draining mix.
- Sow thinly: Sprinkle the seeds evenly over the surface of the compost.
- Lightly cover: You don’t need to bury them deeply; just a light dusting of compost or vermiculite will do.
- Water gently: Use a fine mist to avoid disturbing the seeds.
- Keep moist and cool: Place the tray in a sheltered spot outdoors where it will receive natural rainfall and temperature fluctuations. A cold frame is perfect.
- Be patient: Germination can take months, and you might not see anything until the following spring.
The “Secret Sauce”
Now, for a couple of little tricks I’ve learned over the years that can make a difference:
- For divisions, think “root first”: When you’re dividing, focus on ensuring each little piece has enough root to sustain it. If a division looks a bit leggy with minimal roots, it’s probably not worth the effort. Smaller, well-rooted divisions are always better than larger, root-challenged ones.
- Mimic their natural habitat: Claytonia loves cool, moist conditions, especially when establishing. After dividing or transplanting seedlings, maintain consistent moisture without waterlogging. A light mulch of leaf litter can also help retain humidity and keep the soil cool.
Aftercare & Troubleshooting
Once your divisions are planted or your seeds have germinated, the care is fairly straightforward.
- Keep them moist: This is the most critical part. They don’t like to dry out, especially in the initial stages. Water them regularly, but avoid letting them sit in soggy soil, which can lead to root rot. This is the most common sign something is wrong – mushy stems or leaves are a giveaway.
- Provide shade: In the heat of summer, a little afternoon shade is beneficial. They’re woodland plants, after all!
- Watch for pests: Aphids can sometimes be a nuisance. A gentle spray of soapy water usually does the trick.
A Encouraging Closing
Growing plants is a journey, and each one has its own personality and needs. Propagating Claytonia caroliniana may require a little gentle care and patience, but the reward of seeing those delicate blooms appear year after year, knowing you helped them along, is truly special. So, don’t be discouraged if your first attempt isn’t perfect. Just keep observing, keep learning, and most importantly, enjoy the process of nurturing these little green beauties. Happy gardening!
Resource:
https://identify.plantnet.org/k-world-flora/species/Claytonia%20caroliniana%20Michx./data