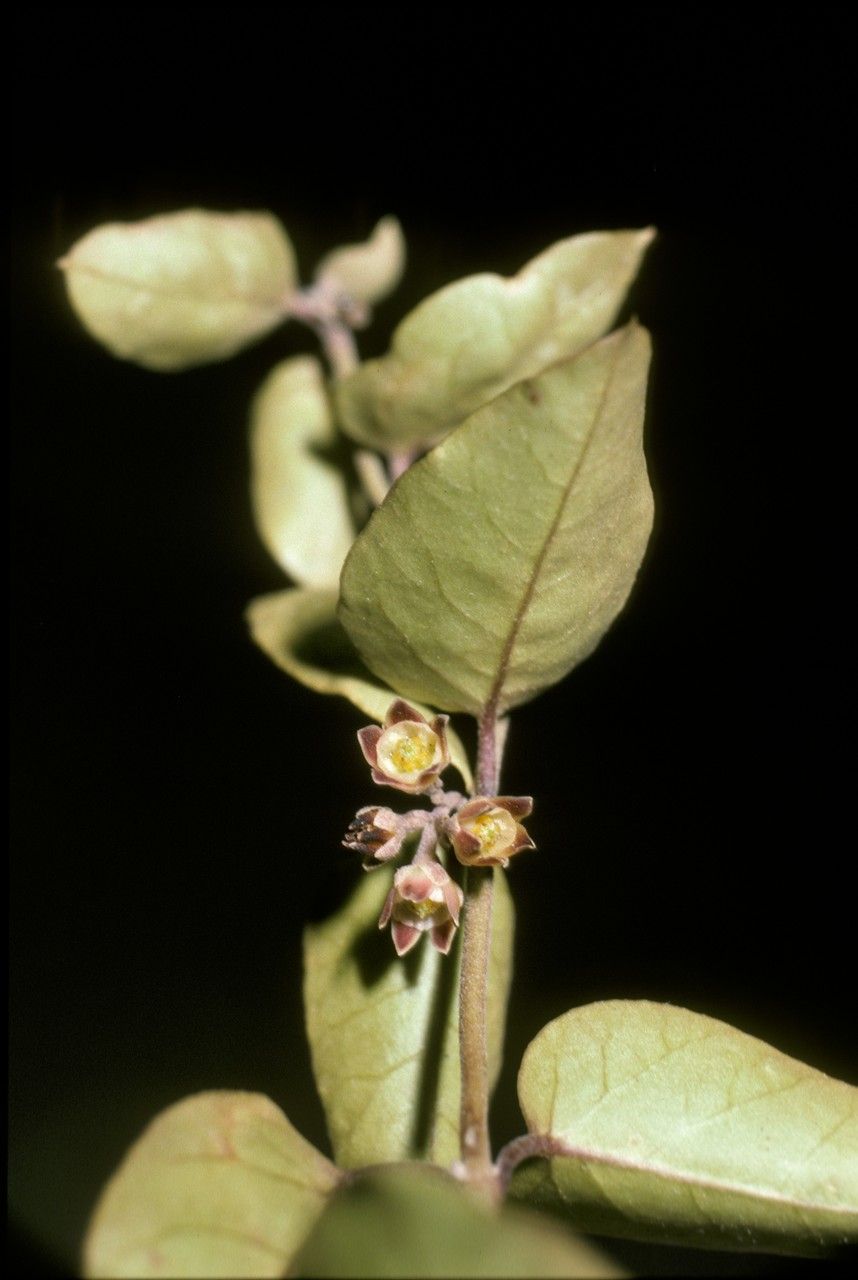
Oh, hello there! Come on in, grab a mug. It’s so lovely to chat about plants with you today, especially about one that brings such a unique charm to any garden: Diplolepis mucronata. You know, the one with those delightful, almost intricate little flowers? They’re such a joy, and successfully propagating them feels like unlocking a little bit of plant magic. It’s a process I’ve really come to appreciate over the years.
Now, is it a good one for beginners? I’d say it’s moderately easy. It’s not as simple as snipping a geranium, but with a little attention and the right approach, you’ll absolutely be rewarded. Watching a tiny cutting transform into a thriving plant is one of the most satisfying gardening experiences, don’t you think?
The Best Time to Start
For Diplolepis mucronata, I’ve found the real sweet spot for propagation is late spring to early summer. This is when the plant is in active growth, pushing out lots of new, vigorous shoots. Aim for stems that have started to harden off a bit – they’re not completely floppy and green, but they haven’t gone woody and stiff either. Think of it as the “perfectly bendy” stage. Trying to propagate when the plant is dormant or stressed just makes things harder on everyone involved.
Supplies You’ll Need
Here’s what you’ll want to have on hand before you get started:
- Sharp Pruning Shears or a Craft Knife: Clean, sharp tools are non-negotiable for making clean cuts.
- Potting Mix: I like a good blend of perlite and peat moss (or coco coir). It needs to be airy and well-draining. You can also buy a specific seed-starting or propagation mix.
- Small Pots: Clean, small pots or seedling trays work best. Drainage holes are a must!
- Rooting Hormone (Optional but Recommended): This is a nice boost to encourage root development. Look for one with an IBA (indole-3-butyric acid) base.
- Clear Plastic Bags or a propagator: To create a humid environment.
- Watering Can or Spray Bottle: For gentle watering.
Propagation Methods
We’ll focus on stem cuttings, as it’s generally the most successful for Diplolepis mucronata.
-
Take Your Cuttings: Head out to your plant with your clean shears. Look for those healthy, non-flowering stems. You want to select pieces that are about 4-6 inches long. Make a clean cut just below a leaf node. A leaf node is where a leaf attaches to the stem, and it’s where roots are most likely to form. Discard the very tip of the stem.
-
Prepare the Cuttings: Gently remove the lower leaves from your cuttings, leaving just 2-3 sets of leaves at the top. If the remaining leaves are quite large, I like to snip them in half horizontally. This reduces water loss through transpiration while still allowing for photosynthesis.
-
Apply Rooting Hormone (Optional): If you’re using rooting hormone, dip the cut end of each stem into the powder or gel. Tap off any excess.
-
Pot Them Up: Fill your small pots with your prepared potting mix. Stick each cutting about 1-2 inches deep into the soil, firming the soil gently around it. Make sure the leaf nodes that were below the soil line are buried.
-
Create a Humid Environment: This is crucial! Water the soil thoroughly but gently. Then, you can either cover the pot with a clear plastic bag secured with a rubber band, or place the pot inside a propagator. This traps moisture and mimics the high humidity the cuttings need to start rooting.
The “Secret Sauce” (Pro Tips)
Alright, let me share a couple of things that have really upped my success rate:
- Bottom Heat is Your Friend: If you can, try to provide a little warmth from below. A heating mat designed for seedlings is perfect. Diplolepis mucronata roots really appreciate that gentle warmth encouraging them from the soil.
- Don’t Let Leaves Touch the Water (in the Soil): I know it sounds obvious, but it bears repeating. When you water, ensure no leaves are sitting submerged in the soil. This is a fast track to rot. If a leaf is too close, just trim it off.
- Air Circulation is Key (Later): While you want humidity initially, once you start to see signs of new growth (tiny leaves unfurling or a slight resistance when you gently tug), you’ll need to gradually introduce more air. Start by opening the plastic bag a little each day, or lifting the propagator lid for a few hours. Too much stagnant dampness at this stage can still cause problems.
Aftercare & Troubleshooting
Once your cuttings have been in their humid environment for a few weeks, give them a gentle tug. If you feel resistance, congratulations! You’ve got roots.
Now, it’s time to transition them to life outside their mini-greenhouse. Gradually increase the ventilation over a week or so. Once they look established, you can begin watering them as you would a mature plant, allowing the soil to dry slightly between waterings. Keep them in a bright spot, but out of direct, scorching sun for the first few weeks.
What if things go wrong? The most common culprit is rot. If you see your cuttings turning mushy, blackening, or developing a foul smell, they’ve likely rotted. This usually happens from too much moisture, poor drainage, or lack of air circulation. Unfortunately, in these cases, it’s best to discard them and start again, perhaps adjusting your watering or ventilation strategy.
A Encouraging Closing
Propagating plants is always a journey, a bit of a gamble, and a wonderful learning experience. Don’t be discouraged if your first attempt isn’t a resounding success. Each plant, and each cutting, is a little unique. Be patient with your new Diplolepis mucronata babies, give them good care, and enjoy watching them grow. It’s a rewarding feeling that keeps me coming back to the propagation bench year after year. Happy gardening!
Resource: