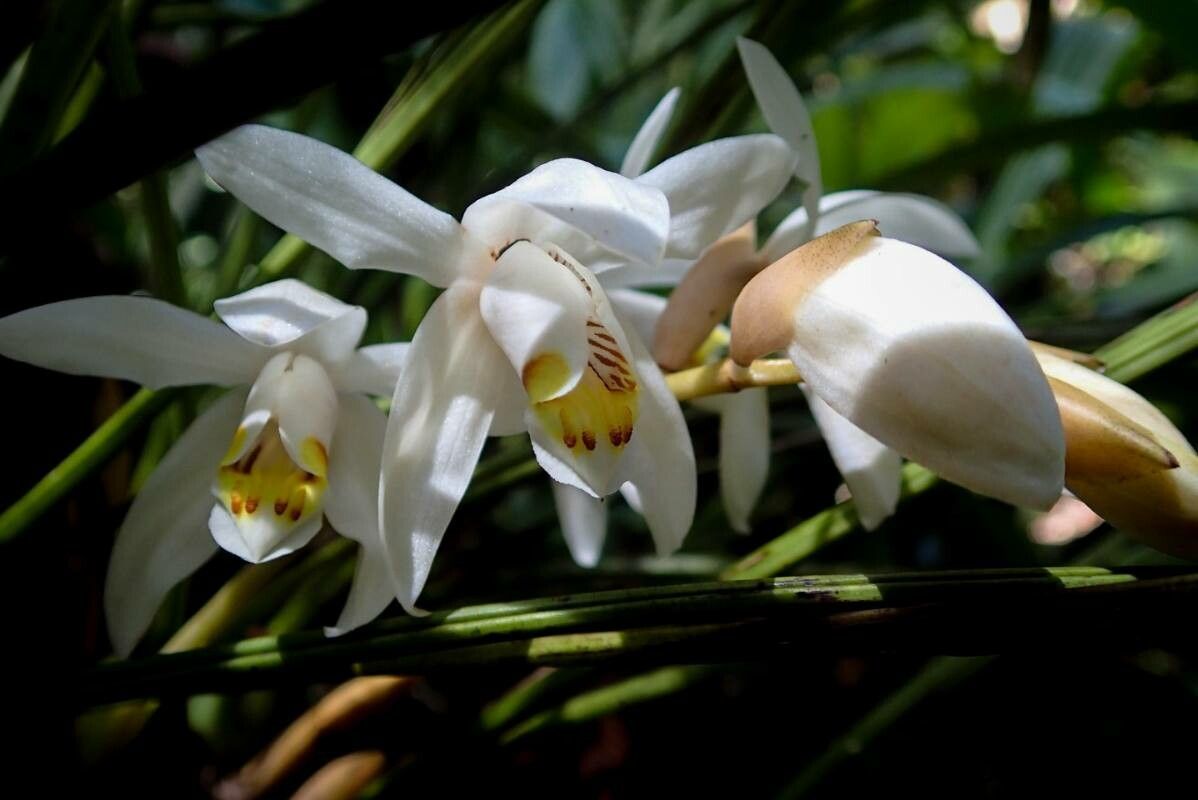
Oh, Coelogyne swaniana! If you’ve ever had the pleasure of seeing this orchid bloom, you know why I’m so excited to talk about it. Those delicate, waxy flowers have a charm all their own. And the best part? You can bring that charm into your own home by propagating them. It’s truly a rewarding experience to nurture a new life from an established beauty. Now, is it a walk in the park for a total newbie? I’d say it leans a little more towards the “intermediate” side, but with these instructions, you’ll be well on your way!
The Best Time to Start
For Coelogyne swaniana, the sweet spot for propagation is generally after the blooming period. This usually falls in the spring or early summer, when the plant is actively growing. You’ll want to look for signs of new growth, like developing pseudobulbs or fresh roots. This ensures the plant has plenty of energy to dedicate to its new offspring.
Supplies You’ll Need
Gathering your tools beforehand makes everything so much smoother. Here’s what I recommend:
- Sharp, sterile pruning shears or a clean knife: For making precise cuts.
- Coarse orchid potting mix: A blend of bark, perlite, and charcoal works wonderfully for drainage.
- Small pots or net pots: Enough to house your new divisions or cuttings.
- Optional: Rooting hormone: This can give your new propagations an extra boost.
- Clean water: For rinsing and keeping things hydrated.
- Labels: Don’t forget to label your new plants!
Propagation Methods
Coelogyne swaniana is most commonly propagated by division. It’s like giving your plant a little haircut and sharing it with friends!
Division: The Tried-and-True Method
- Gently remove the orchid from its pot. If it’s been in the same pot for a while and is tightly root-bound, you might need to gently loosen the roots from the pot’s sides. Sometimes a gentle squeeze of a plastic pot helps.
- Inspect the rhizome. This is the creeping stem that connects your pseudobulbs. You’re looking for sections of the rhizome that have at least two to three healthy pseudobulbs and ideally, some visible aerial roots.
- Make the cut. Using your sterilized shears or knife, carefully cut through the rhizome to separate the sections. Try to make a clean cut.
- Prepare the new divisions. If the roots are very dense, you can gently tease them apart. Remove any dead or mushy roots. If you’re using rooting hormone, you can dip the cut end of the rhizome or the base of the pseudobulbs into it.
- Pot them up. Place each division into its own small pot with your coarse orchid mix. Ensure the base of the pseudobulbs is at the surface of the mix. You want to position them so new growth can emerge upwards without being buried.
The “Secret Sauce” (Pro Tips)
Here are a few things I’ve learned over the years that often make a big difference:
- Don’t overwater the newly divided plants. While they need moisture, they don’t have a fully established root system yet, making them prone to rot. I usually wait a few days after dividing before the first watering, and then water sparingly.
- Good air circulation is key. After potting, place your divisions in a well-ventilated area. This helps prevent fungal issues, especially during those crucial first few weeks. Imagine a gentle breeze – that’s what they need!
- Consider a humidity tray. Until your new divisions start showing signs of solid growth, a humidity tray filled with pebbles and water (making sure the pot sits above the water level) can provide that extra bit of consistent moisture they crave.
Aftercare & Troubleshooting
Once your divisions are potted, don’t fuss over them too much. Keep them in a spot with bright, indirect light and maintain good air circulation. Water when the potting mix is almost dry.
The most common sign of a problem is rot. If you see pseudobulbs turning black and mushy, or the leaves start to yellow and fall off prematurely, it’s usually a sign of too much moisture or poor air circulation. If you catch it early, you might be able to salvage part of the division by cutting away the rotten parts and repotting in fresh, dry mix. Patience is your best friend here; new roots and shoots can take time to develop.
A Warm Encouragement
Propagating Coelogyne swaniana is a journey, and like all good gardening adventures, it requires a little patience and a lot of observation. Don’t be discouraged if your first attempt isn’t perfect. Each plant teaches us something new. So go ahead, give it a try, and enjoy the delightful process of growing your orchid family! Happy gardening!
Resource:
https://identify.plantnet.org/k-world-flora/species/Coelogyne%20swaniana%20Rolfe/data