Hey there, fellow garden enthusiasts! It’s lovely to have you join me today. Pull up a chair and let’s chat about a plant that’s truly captured my heart over the years: Nepeta trachonitica.
Nepeta trachonitica: A Gardener’s Delight
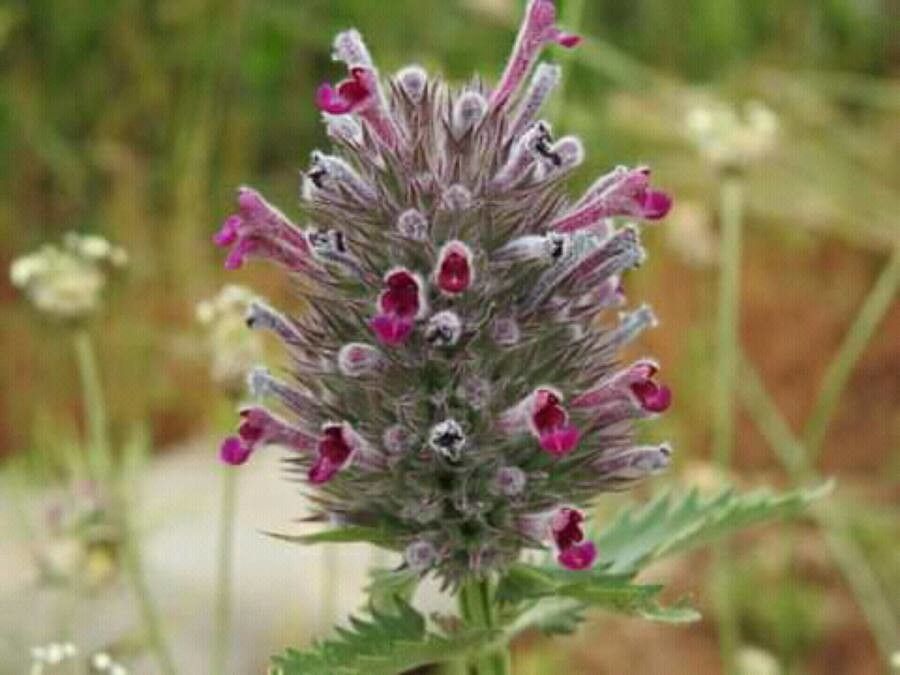
There’s something so utterly charming about these catnips. Their soft, silvery foliage and prolific displays of lavender-blue flowers are a magnet for beneficial insects, especially bees and butterflies. They bring such a lovely, relaxed feel to any garden border or container. Plus, they’re wonderfully fragrant – a gentle rub releases that delightful, unmistakably minty aroma.
If you’ve ever admired a mature clump of Nepeta trachonitica and wished you had more, you’re in luck! Propagating this beauty is surprisingly accessible, even for those of you just dipping your toes into the world of plant propagation. I’d say it’s a pretty beginner-friendly plant to work with, which makes the rewards all the sweeter.
When to Get Your Hands Dirty
For the absolute best success rate with Nepeta trachonitica, I find that late spring to early summer is your golden window. This is when the plant is actively growing and has plenty of fresh, healthy material to work with. Aim for stems that are firm but not yet woody – think of them as being in that perfect “semi-hardwood” stage. You’ll know it’s right when a stem snaps cleanly rather than bending.
Your Propagation Toolkit
Gathering your supplies beforehand makes the whole process smooth sailing. Here’s what you’ll want to have on hand:
- Sharp Pruning Shears or a Craft Knife: Clean cuts are crucial for healthy rooting.
- Rooting Hormone (Optional but Recommended): This gives your cuttings a helpful boost. I usually opt for a powder form.
- Small Pots or Trays: About 3-4 inches in diameter work well. Make sure they have drainage holes!
- Potting Mix: A good quality, well-draining potting mix is key. I like to use a blend of equal parts peat moss or coco coir and perlite for excellent aeration.
- Watering Can with a Fine Rose: Gentle watering is paramount.
- Labeling Stakes: You’ll want to know what you’ve planted and when!
- Clear Plastic Bags or a Propagator: This helps maintain humidity.
Bringing More Nepeta to Life
There are a couple of fantastic ways to multiply your Nepeta collection. My go-to method is usually stem cuttings, but division is also a breeze.
Stem Cuttings: My Personal Favorite
- Take Cuttings: Using your clean pruning shears, select healthy, non-flowering stems from your established plant. Cut pieces that are about 4-6 inches long. Remove any flowers or flower buds, as these take energy away from root development. Also, strip off the lower leaves, leaving just a few sets at the top.
- Prepare the Stems: If you’re using rooting hormone, dip the cut end of each stem into the powder, tapping off any excess. This helps stimulate root formation.
- Plant Your Cuttings: Fill your small pots with the prepared potting mix. Make a small hole in the center of the soil with your finger or a pencil. Insert the cut end of the Nepeta stem into the hole, ensuring the leaves aren’t buried. Gently firm the soil around the stem.
- Water Gently: Water the soil thoroughly but carefully. You don’t want to dislodge your cuttings.
- Create a Humid Environment: Now, this is important! Cover each pot loosely with a clear plastic bag, or place them inside a propagator. This creates a mini-greenhouse effect, keeping the humidity high, which is vital for cuttings to root before they can absorb water through their new roots.
Division: The “Plant it and Forget it” Approach
If you have a larger, mature clump of Nepeta trachonitica, division is wonderfully simple. In early spring, before it gets too bushy, you can:
- Gently Uproot: Carefully dig up the entire plant.
- Divide the Mass: Using your hands or a trowel, gently pull the root ball apart into smaller sections. Each section should have a good amount of roots and some leafy growth.
- Replant: Replant your divisions into well-prepared soil, either back in the garden or in pots, at the same depth they were originally growing. Water them in well.
The “Secret Sauce” from My Garden
I’ve learned a few tricks over the years that really seem to make a difference.
- Don’t Let the Leaves Touch Standing Water: If you’re water propagating (just pop a stem in a jar of water), make absolutely sure no leaves are submerged. Rot sets in fast that way. For cuttings in pots, check that the leaves aren’t touching the soil surface either, especially if it stays damp.
- Bottom Heat is Your Friend: While Nepeta is forgiving, a little gentle warmth from below can really speed up root development. If you have a seedling heat mat, placing your pots on it (only during the day, or as needed) is a bit of a game-changer for getting those roots going quicker.
Aftercare and What to Watch For
Once your cuttings have rooted – and you’ll know this when you see new growth and they resist a gentle tug – it’s time for a little more independence.
Gradually Acclimatize: Remove the plastic bags or propagator lid for a few hours each day, slowly increasing the time until they’re used to the regular garden humidity.
Watering: Water when the top inch of soil feels dry. They’ll still prefer consistent moisture but don’t like to be waterlogged.
Common Pitfalls: The biggest enemy here is rot. If your cuttings turn black and mushy, it’s usually due to too much moisture and not enough air circulation. Drooping leaves can mean underwatering or overwatering – always check the soil moisture! Sometimes, a cutting just doesn’t take. Don’t be discouraged; this is all part of the learning process.
Happy Rooting!
Propagating Nepeta trachonitica is a simple pleasure, a way to double your enjoyment of this wonderful plant without spending a dime. Be patient with your new charges, observe them closely, and trust the process. Before you know it, you’ll have a whole new fleet of fragrant beauties to adorn your garden. Happy growing!
Resource:
https://identify.plantnet.org/k-world-flora/species/Nepeta%20trachonitica%20Post/data