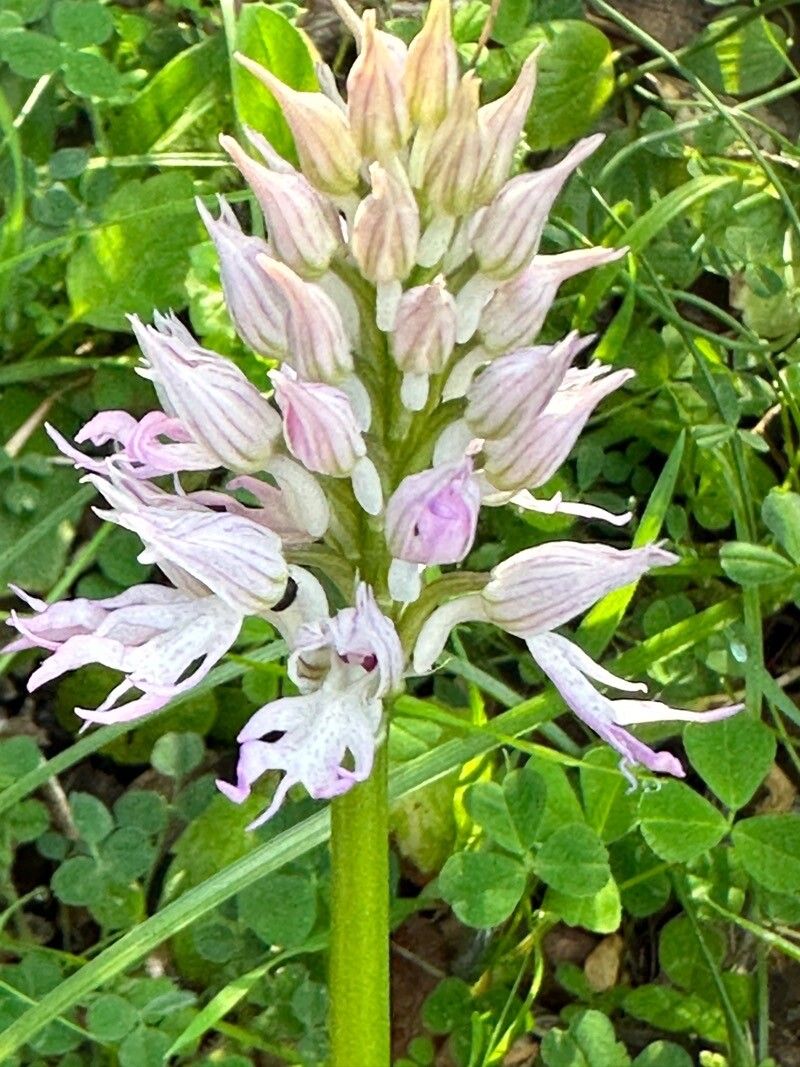
Hello fellow plant enthusiasts! I’m so glad you’re here. Today, we’re going to talk about a truly charming orchid: Orchis italica, or the Naked Man orchid. Its whimsical little flower spikes, resembling tiny humanoids, are an absolute delight to behold. Propagating these beauties can feel like a special kind of magic, a way to share that charm and expand your own collection. Now, I’ll be honest, Orchis italica isn’t the most straightforward orchid to propagate from a beginner’s perspective. It requires a bit of understanding and patience, but don’t let that deter you! The rewards are so worth the effort.
When Does Orchis Italica Want to Grow?
The best time to think about propagating Orchis italica is generally after it has finished flowering, usually in late spring or early summer. This is when the plant is transitioning from its blooming phase into active growth, preparing to build up energy for the next season. You’ll see new shoots or pseudobulbs starting to emerge. This is the plant’s signal that it’s ready for some energetic expansion!
What to Have on Hand
Before we get our hands dirty, let’s gather our supplies. Having everything ready makes the process much smoother.
- Sharp, sterile pruning shears or a clean knife: For making clean cuts.
- Good quality orchid potting mix: A well-draining blend is crucial. I often use a mix of orchid bark, perlite, and a bit of sphagnum moss.
- Small pots or propagation trays: Clean ones, of course!
- Rooting hormone (optional but helpful): Especially for divisions.
- Plastic bags or a propagation dome: To create a humid environment.
- Watering can with a fine rose: For gentle watering.
- Patience! (This is the most important ingredient).
Bringing New Orchis Italica to Life
Orchis italica is typically propagated through division, and occasionally through offsets, though they are less common.
Propagating by Division:
This is the most reliable method for Orchis italica.
- Gently remove the orchid from its pot. Turn it upside down and tap the pot firmly. The orchid should slide out. If it’s stuck, don’t force it – you might damage the roots.
- Inspect the root system. Look for where the plant naturally divides. You’ll see distinct pseudobulbs (those swollen stem-like structures) connected by rhizomes (the underground stem).
- Identify a healthy section. Choose a division that has at least two or three healthy pseudobulbs and a good root system.
- Carefully separate the divisions. Use your sterile shears or knife to cut through the rhizome, cleanly separating the sections. If there are a lot of tangled roots, you might need to gently tease them apart with your fingers, being as gentle as possible to avoid unnecessary damage.
- Treat the cut surfaces (optional). If you’re concerned about rot, you can dust the cut surfaces with a bit of cinnamon or a fungicide powder.
- Pot up the new divisions. Plant each division in its own small pot, using your well-draining orchid mix. Make sure the pseudobulbs are sitting at the surface of the mix, not buried too deeply.
- Water gently. Water lightly after potting to settle the mix around the roots.
My Little Garden Secrets
Here are a couple of things I’ve learned over the years that can really help boost your success:
- Don’t overpot: It’s tempting to put a newly divided orchid into a large pot, but smaller pots are actually better for divisions. They dry out a bit faster, which is usually what orchids like, and discourage rot.
- Mimic nature with humidity: After potting, I like to pop the division into a clear plastic bag or cover it with a propagation dome. This creates a humid microclimate that helps the roots establish without the plant losing too much moisture through its leaves. Just make sure to open it for a few minutes every day to allow for air circulation.
Aftercare and What to Watch For
Once your new Orchis italica is potted, its journey is just beginning.
- Placement is key. Keep your newly divided orchids in a bright spot with indirect light. Avoid direct sun, which can scorch young leaves.
- Water sparingly at first. Wait until the potting mix is nearly dry before watering again. Overwatering is the most common way to lose these plants, especially after division when they’re still establishing.
- Watch for new growth. The real sign of success is when you see new roots emerging or a new leaf or shoot starting to grow. This can take several weeks, so remember that patience is truly a virtue here!
- Signs of trouble. The most common sign of failure is rot. If you see mushy, black pseudobulbs or leaves, it’s usually a sign of too much moisture. If a division completely fails, don’t be too hard on yourself. The learning process is part of the joy of gardening.
Propagating Orchis italica is a wonderful way to deepen your connection with these fascinating plants. It’s a process that rewards careful observation and a gentle touch. Enjoy the journey, celebrate each tiny success, and don’t be afraid to learn from any setbacks. Happy growing!
Resource:
https://identify.plantnet.org/k-world-flora/species/Orchis%20italica%20Poir./data