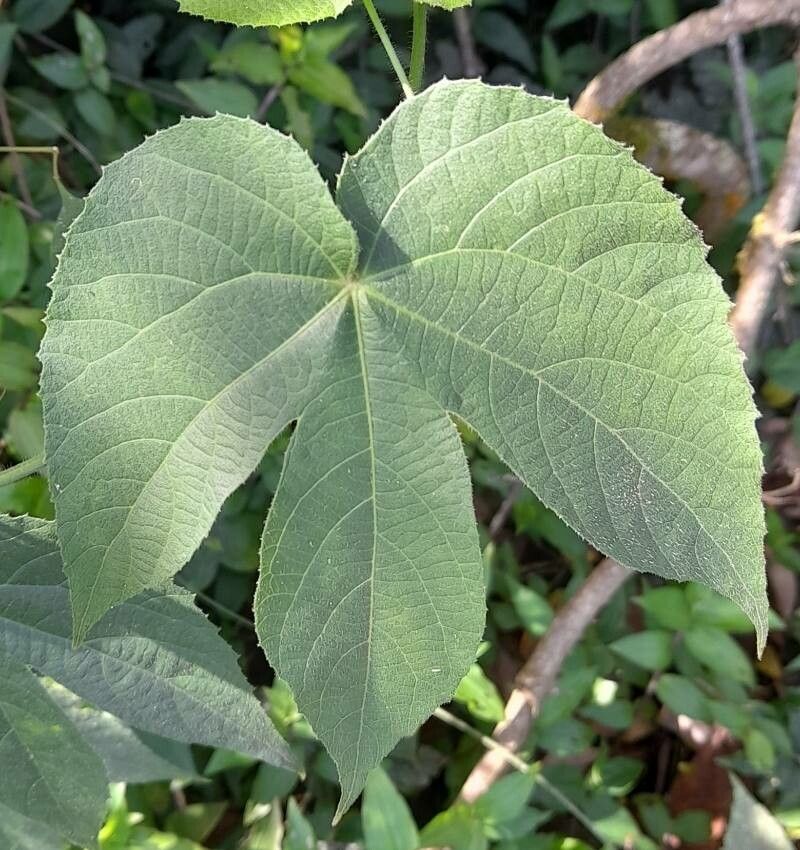
Oh, hello there! Grab yourself a cuppa, and let’s chat about one of my favorite plants: Dalechampia stipulacea, also known as the Cup Flower or even Vining Hops by some. It’s a real showstopper with those delicate, papery bracts that often have a lovely chartreuse or creamy edge, looking a bit like little tissue-paper bells. Plus, it’s a vigorous climber, perfect for trailing over an arbor or weaving through a pergola.
Propagating it? Absolutely! It’s a fantastic way to get more of this beauty for your own garden or to share with fellow plant lovers. Honestly, I’d say Dalechampia stipulacea is moderately easy to propagate. It’s not quite as foolproof as a pothos, but with a little attention, you’ll be rewarded with plenty of new plants.
The Best Time to Start
For the highest success rate, I always aim to propagate my Dalechampia stipulacea in late spring or early summer. This is when the plant is really hitting its stride, producing lots of new, vigorous growth. You’re essentially tapping into its peak energy, which gives those cuttings the best chance to root. Don’t be afraid to take cuttings when the plant is actively flowering or just finished doing so; that strong growth is what we’re after.
Supplies You’ll Need
Here’s what I like to have on hand:
- Sharp pruning shears or a clean knife: For making clean cuts.
- A good potting mix: I prefer a mix that drains well, something like a blend of potting soil, perlite, and a bit of peat moss or coco coir. You can also use a specialized seed-starting or propagation mix.
- Small pots or trays: For planting your cuttings. Yogurt cups with drainage holes poked in the bottom work in a pinch!
- Rooting hormone (optional but recommended): A powdered or gel form can significantly speed up root development.
- Plastic bag or dome: To create a humid environment for your cuttings.
- Watering can or spray bottle: For gentle watering.
- Labels: So you don’t forget what you planted where!
Propagation Methods
I find stem cuttings to be the most reliable and straightforward method for Dalechampia stipulacea.
- Select your stems: Look for healthy, non-flowering stems that are about 6-8 inches long. These should be flexible but not floppy – think pencil thickness.
- Make the cut: Using your sharp pruning shears, make a clean cut just below a leaf node (that little bump where the leaf attaches to the stem). This is where the magic happens!
- Prepare the cutting: Gently remove the leaves from the bottom half of the cutting. If you have any very large leaves, you can cut them in half to reduce water loss.
- Apply rooting hormone (if using): Dip the cut end into the rooting hormone, tapping off any excess.
- Plant the cutting: Make a hole in your prepared potting mix with your finger or a pencil. Insert the cut end of the stem into the hole, ensuring the nodes where you removed the leaves are buried. Gently firm the soil around the base of the cutting.
- Water gently: Water thoroughly until you see water draining from the bottom of the pot.
- Create humidity: Place the pot inside a clear plastic bag, forming a mini-greenhouse. Or, if you have a propagation tray, use the clear plastic dome cover. Make sure the plastic doesn’t touch the leaves too much.
The “Secret Sauce” (Pro Tips)
Here are a few things I’ve learned over the years that really make a difference:
- Don’t overcrowd: Give each cutting its own space in a small pot. They need room to breathe and develop roots without competing.
- Bottom heat is your friend: If you have a heating mat designed for propagation, use it! Keeping the soil temperature consistently warm (around 70-75°F or 21-24°C) can dramatically speed up root formation. It’s like giving them a cozy heated bed.
- Patience with the leaves: For Dalechampia stipulacea, I’ve found it’s best if no leaves are submerged in water if you were to try water propagation (which I find less successful for this plant). Any part of the leaf in standing water is an invitation for rot. Stick to soil propagation for this one!
Aftercare & Troubleshooting
Once your cuttings are planted and happily ensconced in their humid little greenhouses, place them in a brightly lit spot, but out of direct, harsh sunlight. Too much sun can scorch those tender new cuttings. Keep the soil consistently moist, but not waterlogged.
You’ll know they’re rooting when you see new leaf growth appearing from the tip or from the side. This usually takes anywhere from 3 to 6 weeks, sometimes a bit longer. You can also gently tug on the cutting; if there’s resistance, roots are forming.
Troubleshooting: The most common issue is rot. If your cutting turns mushy, black, or just looks generally sad and droopy without any signs of rooting, it’s likely rotted. This is often due to overwatering or poor air circulation. Don’t despair if some don’t make it! It’s part of the learning process. Just toss the failed ones and try again with fresh cuttings.
A Encouraging Closing
See? It’s really not too complex. Propagating Dalechampia stipulacea is a rewarding journey. It requires a bit of gentle care and a good dose of patience. But trust me, the satisfaction of watching those tiny cuttings transform into robust new plants is absolutely worth it. Enjoy the process, and happy gardening!
Resource:
https://identify.plantnet.org/k-world-flora/species/Dalechampia%20stipulacea%20Müll.Arg./data