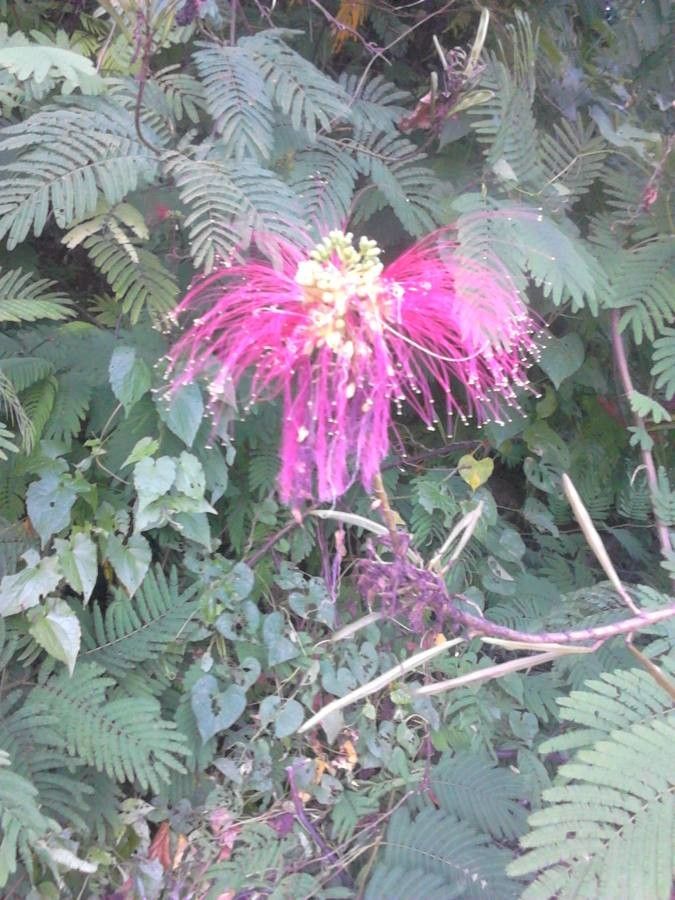
Oh, those stunning Calliandra houstoniana! Those vibrant, powder-puff blooms are just a showstopper in any garden, aren’t they? They bring such a delightful, tropical feel, and the hummingbirds and butterflies absolutely adore them. If you’ve been captivated by their beauty and are dreaming of a whole garden full of them, or perhaps sharing some with friends, propagating them yourself is a wonderfully rewarding endeavor. Now, I wouldn’t say this is a plant that leaps into propagation with the same ease as, say, a pothos, but with a little patience and the right approach, it’s certainly achievable for the budding propagator. You’ll get a real sense of accomplishment when you see those tiny roots emerge!
The Best Time to Start
For Calliandra houstoniana, I’ve found the sweet spot for propagation is generally late spring or early summer. This is when the plant is actively growing and has plenty of energy to put into developing new roots. Look for new, semi-hardwood growth – that’s usually a stem that’s started to firm up a bit but still has some flexibility to it. Avoid the brand-new, bright green, floppy tips, as they tend to be too soft and are prone to rot. Likewise, very old, woody stems are less likely to root.
Supplies You’ll Need
Gathering your supplies beforehand makes the whole process smoother. Here’s what you’ll want to have on hand:
- Sharp Pruning Shears or a Clean Knife: For making precise cuts that minimize damage.
- Rooting Hormone: A good quality rooting powder or gel, especially one formulated for semi-hardwood cuttings.
- Propagating Mix: I like to use a blend of perlite and peat moss or coco coir (about 50/50). This mix provides excellent drainage and aeration, which is crucial for preventing rot. You can also buy specialized seed-starting or propagation mixes.
- Small Pots or Trays: Clean pots with drainage holes are essential.
- Plastic Bags or a Propagator: To create a humid environment for your cuttings.
- Water: For misting.
- Spray Bottle: For gentle misting.
Propagation Methods
Stem cuttings are by far the most successful and practical method for multiplying Calliandra houstoniana.
Stem Cuttings:
- Take Your Cuttings: On a mild day in late spring or early summer, select a healthy stem that has reached the semi-hardwood stage. Using your clean shears or knife, make a cut just below a leaf node (where a leaf attaches to the stem). Aim for cuttings that are about 4-6 inches long.
- Prepare the Cuttings: Gently remove any lower leaves from the cutting. You want to expose the node where roots will hopefully form. Leave just a couple of leaves at the top, and if those leaves are particularly large, you can gently trim them in half to reduce water loss through transpiration.
- Apply Rooting Hormone: Dip the cut end of the stem into water, then dip it into your rooting hormone powder or gel. Make sure the entire cut surface and a small portion of the stem are coated. Tap off any excess.
- Pot Them Up: Fill your clean pots with your propagating mix. Make a small hole in the center of the mix with a pencil or your finger. Carefully insert the rooted end of the cutting into the hole, ensuring the rooting hormone stays in place. Gently firm the mix around the stem.
- Water and Cover: Water the mix thoroughly but gently. You can use a spray bottle at this stage to avoid disturbing the cuttings. Place the pots into a plastic bag or propagator, making sure the leaves of the cuttings do not touch the sides of the bag. This creates a mini-greenhouse effect, keeping humidity high.
The “Secret Sauce” (Pro Tips)
I’ve learned a few things over the years that can really give your cuttings a boost.
- Bottom Heat is Your Friend: Calliandras are tropical plants, and they love warmth. Placing your pots on a heated propagation mat can significantly speed up root formation. This gentle warmth from below encourages root development without drying out the top of the cutting.
- Don’t Over-Water, But Keep it Humid: While we want humidity, we don’t want soggy soil. Let the top layer of your propagating mix dry out slightly between waterings. A gentle misting every couple of days can keep the humidity up without drowning your cuttings.
- Patience is Key (Especially with the Tougher Ones): Sometimes, Calliandra cuttings can take their sweet time to show signs of rooting. Don’t be discouraged if you don’t see new growth for several weeks. Try to resist the urge to constantly tug on them to check for roots – you’ll only damage what’s trying to grow!
Aftercare & Troubleshooting
Once you start to see signs of new growth – tiny leaves unfurling or resisting gentle tugging – that’s a good indicator that roots have formed.
- Acclimatizing: Gradually introduce your new plants to open air by opening the plastic bag or propagator for longer periods each day over a week. This helps them adjust to drier conditions.
- Transplanting: When the roots have filled the pot, it’s time to transplant them into slightly larger pots with a good quality potting mix. Continue to keep them in a bright spot but out of direct, harsh sunlight for the first few weeks.
- Troubleshooting Rot: The most common issue is rot, where the cutting turns black and mushy. This is usually a sign of too much moisture and not enough air circulation. If you see this, remove the affected cutting immediately and ensure your propagating mix has excellent drainage. It can also happen if the cutting is too soft and has too many leaves.
A Encouraging Closing
Propagating plants is such a rewarding part of gardening. It’s a chance to connect with the natural world, and there’s nothing quite like nurturing a tiny cutting into a flourishing plant. So don’t be afraid to give it a go! Be patient with your Calliandra cuttings, celebrate every little success, and most importantly, enjoy the magical process of bringing new life into your garden. Happy propagating!
Resource: