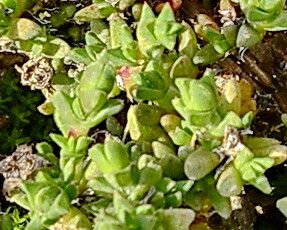
Oh, hello there! Pull up a chair and let’s chat about a little gem that’s captured my heart over the years: Antimima concinna. If you’re looking for a succulent that’s just a little bit different, with its charming, finger-like leaves that cluster together, then this is your gal! Propagating it is truly a joy. You get to witness that spark of new life, and honestly, it’s not as daunting as you might think. For the absolute beginner, it’s a delightful challenge that’s very forgiving.
The Best Time to Start
When it comes to Antimima concinna, you’ll find the best success by taking cuttings when the plant is actively growing. This usually means late spring through summer. You want to catch it when it’s feeling energetic and ready to put out some roots. Avoid trying to propagate during its dormancy period in winter; it just won’t have the same get-up-and-go.
Supplies You’ll Need
You won’t need a whole workshop for this, just a few trusty companions:
- Sharp Pruning Shears or a Craft Knife: Cleanliness is key here to prevent disease.
- Well-Draining Potting Mix: I like a succulent or cactus mix, often with extra perlite or pumice added for even better drainage.
- Small Pots or Seedling Trays: Terracotta pots are my go-to because they breathe.
- Rooting Hormone (Optional but Recommended): This gives your cuttings a little boost.
- Watering Can with a Fine Rose or a Spray Bottle: Gentleness is the name of the game.
- A Sunny Spot: But not harsh, direct sun initially.
Propagation Methods
We’ll focus on the most straightforward and effective way to multiply your Antimima concinna beauties: stem cuttings.
-
Select Your Cuttings: Look for healthy, mature stems. You want pieces that are about 2-4 inches long. Use your clean shears or knife to make a clean cut just above a leaf node.
-
Allow Cuttings to Callus: This is a crucial step! Before you plant anything, let those cut ends dry out and form a callus for a few days to a week. Lay them on a dry paper towel in a bright, airy spot. This prevents rot when they hit the soil. It might feel counterintuitive, but trust me on this!
-
Prepare Your Pots: Fill your small pots with your well-draining mix. Gently water the soil so it’s just slightly moist, not soggy.
-
Apply Rooting Hormone (If Using): Dip the callused end of the cutting into your rooting hormone, tapping off any excess.
-
Plant Your Cuttings: Make a small hole in the soil with your finger or a pencil and gently insert the callused end of the cutting. Firm the soil around it so it stands upright. Don’t cram too many into one pot; give them a little space.
-
Water Sparingly: After planting, give them a light watering. You don’t want them sitting in pooled water.
The “Secret Sauce” (Pro Tips)
Now for a couple of tricks I’ve picked up over the years that really make a difference.
- The Cuttings Should Breathe: When you’re letting your cuttings callus, I often place them on a piece of newspaper or a paper towel in a tray. It allows air to circulate around them, which is just as important as drying them out.
- Bottom Heat is Your Friend (Sometimes): If you’re propagating in a cooler spot or during a slightly cooler time of year, placing your pots on a gentle propagation mat can work wonders. It encourages root development from below without drying out the top of the soil too quickly. Just keep an eye on it so it doesn’t get too hot!
Aftercare & Troubleshooting
Once your cuttings are planted, place them in a bright spot that receives indirect sunlight. direct sun can scorch those tender new cuttings. Water only when the soil has dried out completely. You’re looking for that sweet spot between too wet and too dry.
You’ll know your Antimima concinna has rooted when you see new growth emerging from the tip or the leaves firm up and plump out. It can take anywhere from a few weeks to a couple of months, so patience is a virtue here.
The biggest thing to watch out for is rot. If your cuttings are mushy, dark, or just collapsing, it’s a sign they’re getting too much moisture or weren’t allowed to callus properly. If you spot rot, you might need to trim away the affected bit and let the remainder callus again before trying a new spot.
A Little Encouragement
See? Not so scary, is it? Propagating Antimima concinna is a wonderfully rewarding journey. It’s a chance to connect with your plants on a deeper level and enjoy the miracle of new life. Be patient with yourself and your little cuttings. Before you know it, you’ll have a whole clan of these fascinating succulents to share, or to adorn your own shelves! Happy propagating!
Resource: