Hello fellow garden lovers!
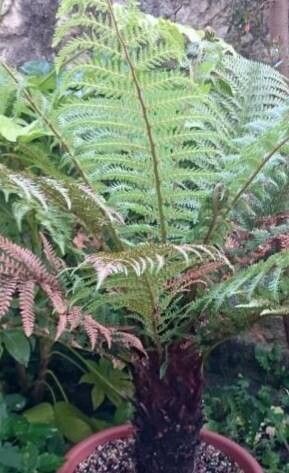
Today, I want to talk about a plant that truly captures the ancient spirit of the garden: the Dicksonia fibrosa. You know, the one with the charming, fuzzy trunk and those glorious, unfurling fronds. It’s like a piece of a prehistoric forest that you can grow yourself! Propagating these beauties can feel like a bit of a journey, but trust me, the reward of watching a new little fern sprout from your efforts is incredibly satisfying. For beginners, I’d say it’s a moderately challenging plant to propagate, but with a little patience and these tips, you’ll be well on your way.
The Best Time to Start
Timing is everything in the garden, and with Dicksonia fibrosa, late spring to early summer is your sweet spot. This is when the plant is actively growing and has the most energy to put into new life. You’ll want to work with healthy, vigorous fronds that are fully emerged but still have that tender, vibrant green.
Supplies You’ll Need
Here’s what you’ll want to have on hand before you get started:
- Sharp pruning shears or a clean knife: For making precise cuts.
- Peat moss: For its excellent moisture retention.
- Perlite or coarse sand: To ensure good drainage.
- Sphagnum moss: Ideal for creating a humid environment for cuttings.
- Rooting hormone powder (optional but recommended): This can give your cuttings a helpful boost.
- Small pots or propagation trays: Clean and ready for use.
- Clear plastic bags or a propagation dome: To maintain humidity.
- Watering can with a fine rose: For gentle watering.
Propagation Methods
While you won’t be taking stem cuttings in the traditional sense with Dicksonia fibrosa, we have a couple of excellent ways to multiply these magnificent ferns.
Method 1: Talar Division (The Most Reliable Way)
This is essentially taking pieces of the main trunk where new plantlets might naturally form or where you can encourage them.
- Preparation is Key: Select a mature plant that looks healthy and robust. Ensure your tools are sterilized to prevent disease.
- Gentle Extraction: Identify a section of the trunk that has a growth bud or a developing “pup” that looks like it has its own root system starting. Using your sharp knife or shears, carefully cut away this section, making sure it includes some of the fibrous “hair” and a portion of the root system. Aim for a section that’s at least a few inches long.
- Planting the Division: Pot your new division in a well-draining mix of peat moss and perlite (about 50/50). Make sure the “bud” end is facing upwards and lightly cover the bottom of the division with the mix.
- Creating the Microclimate: Mist the division generously and then cover the pot completely with a clear plastic bag or place it under a propagation dome. This is crucial for maintaining high humidity.
Method 2: Spore Propagation (For the Patient Gardener)
This is the more challenging, but incredibly rewarding, method that mimics how ferns naturally reproduce.
- Gathering Spores: Look at the underside of mature fronds. You’ll see small, often brownish structures called sporangia. When these are ripe and dry, they’ll release tiny spores. Carefully collect these spores by gently tapping the fronds over a clean sheet of paper.
- Sowing the Spores: Prepare a shallow tray with a sterile mix of finely sieved peat moss and sand. Lightly moisten this mix. Sprinkle the collected spores thinly over the surface.
- Incubation Station: Cover the tray with a clear plastic lid or bag. Place it in a warm, bright spot out of direct sunlight. Keep the surface consistently moist by misting. It can take weeks to months for anything to happen. You’ll be looking for tiny, moss-like growths called gametophytes.
The “Secret Sauce” (Pro Tips)
I’ve learned a few things over the years that can really make a difference:
- Humidity is Gold: For talar divisions, if the fibrous covering on the trunk feels a bit dry, I like to wrap it gently in damp sphagnum moss before potting. It’s like giving it a spa treatment for root development!
- Bottom Heat for Speed: If you’re propagating by spores, placing the tray on a gentle heated propagator mat can significantly speed up germination and the development of those tiny gametophytes.
- Patience with Spores: Honestly, the biggest secret with spores is radical patience. Don’t give up if you don’t see anything for a month. Keep them consistently moist and warm, and eventually, you’ll be rewarded.
Aftercare & Troubleshooting
Once your Dicksonia fibrosa division starts to show signs of growth – new frond buds emerging or increasing vigor – it’s time for a little extra care.
- Gradual Acclimation: For bagged divisions, start to gradually “harden them off” by opening the bag for short periods each day, increasing the time over a week or two. This helps them adjust to lower humidity.
- Watering Wisely: Keep the soil consistently moist but not waterlogged. Let the top half-inch of the soil dry out slightly between waterings. I prefer to water from the bottom of the pot if possible.
- Light Requirements: New plants need bright, indirect light. Avoid direct sun, which can scorch delicate new foliage.
Troubleshooting: The most common issue is rot, which usually happens when the plant is kept too wet or doesn’t have enough air circulation. If you see browning at the base of the frond or a foul smell, remove the plant from its pot, trim away any rotten material with clean shears, and repot in fresh, well-draining mix. If propagating by spores and you see mold, it’s often a sign of too much moisture and not enough air.
A Little Encouragement
Propagating Dicksonia fibrosa is a beautiful act of nurturing. It requires a bit of faith, a lot of patience, and a willingness to learn. Don’t be discouraged if your first attempt isn’t perfect. Every garden journey has its bumps, and each experience offers valuable lessons. Enjoy the process, celebrate every little green shoot, and soon you’ll have a new piece of living history to admire. Happy growing!
Resource:
https://identify.plantnet.org/k-world-flora/species/Dicksonia%20fibrosa%20Colenso/data