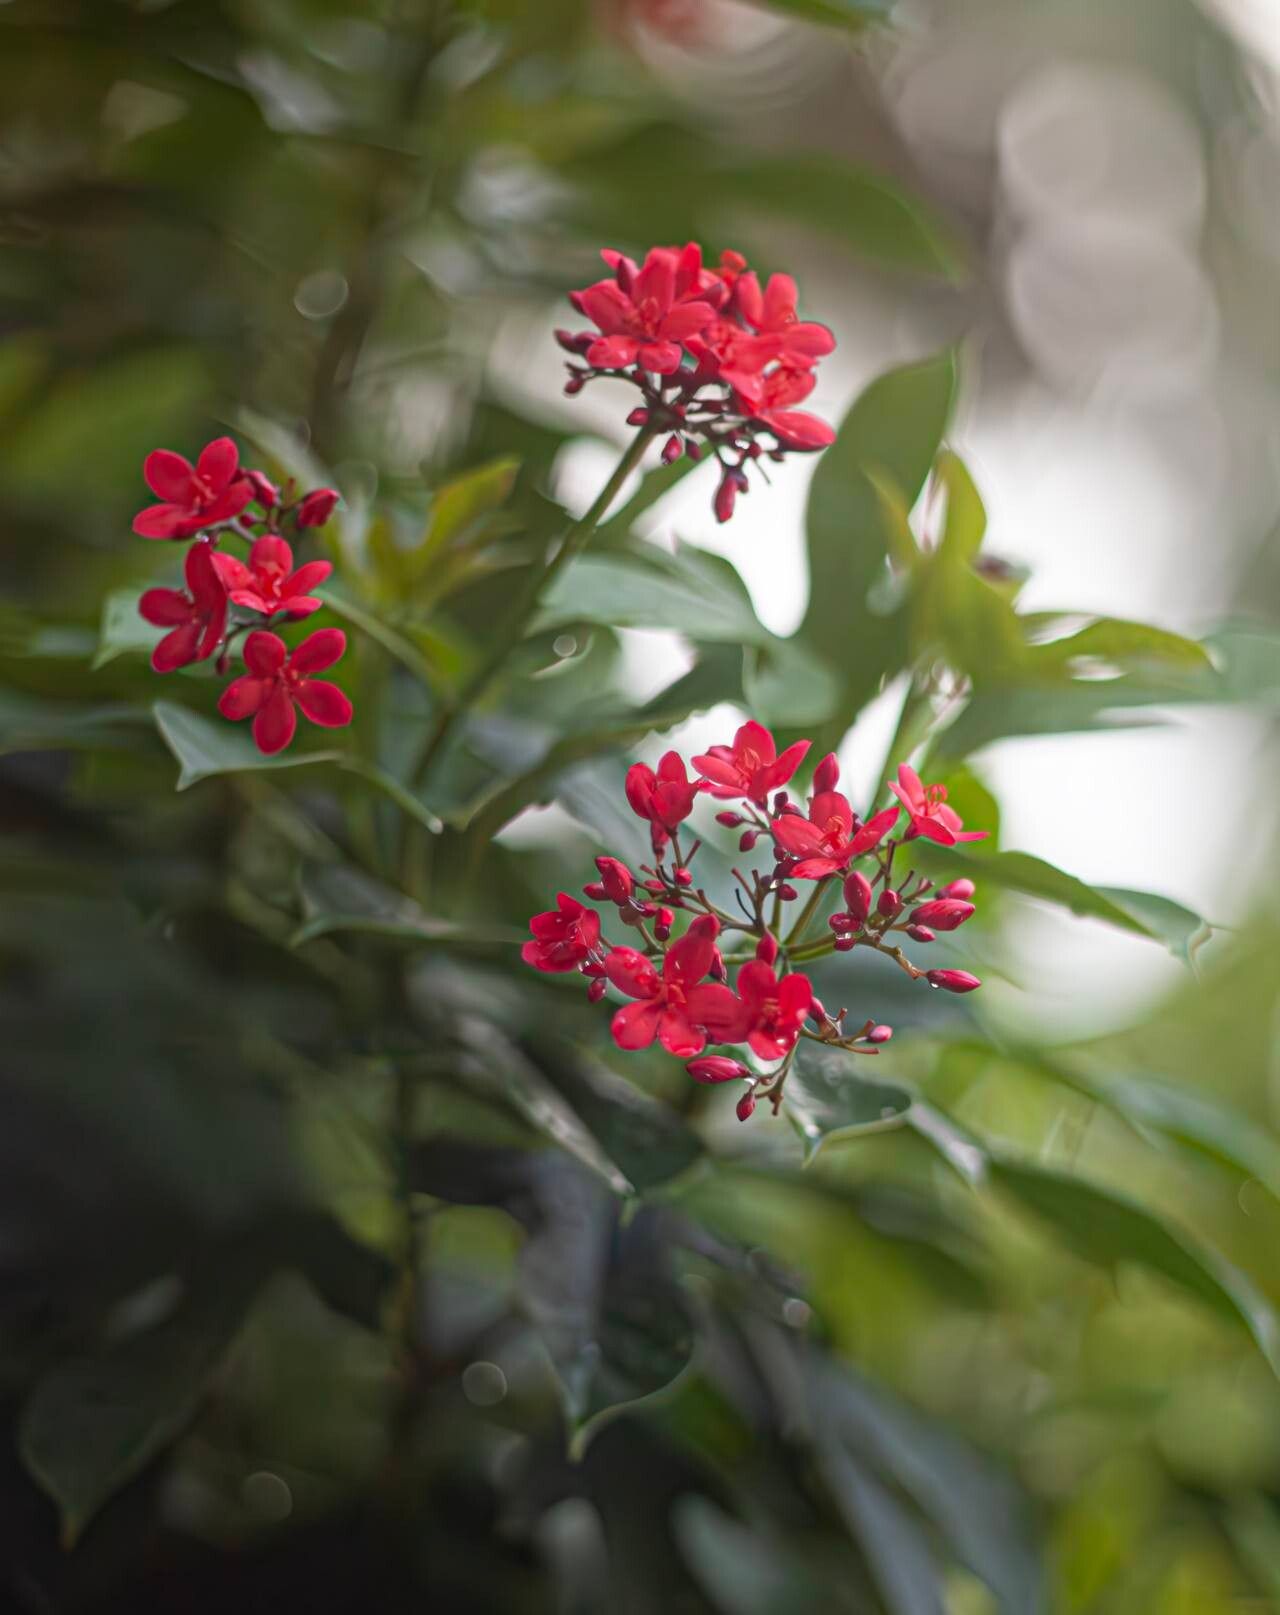
Oh, hello there! It’s so lovely to have you join me today. I’m thrilled to chat about one of my absolute favorites: Jatropha integerrima, often called Coral Plant or Peregrina. If you’re looking for a burst of vibrant color and a plant that just keeps on giving, this is it! Its bright red, star-shaped flowers bloom almost year-round, attracting hummingbirds and butterflies like a magnet. And the best part? Sharing this beauty is wonderfully rewarding, and propagating your own little Coral Plants is surprisingly achievable. Don’t let the “tropical” tag fool you; while it enjoys warmth, it’s not an overly fussy plant to start from cuttings.
The Best Time to Start
When it comes to getting the most joy from your propagation efforts, timing is everything. For Jatropha integerrima, I find the late spring or early summer to be your sweet spot. This is when the plant is in its most vigorous growth phase. New, healthy stems are readily available, and the warmth helps cuttings root a bit faster. You can also try in late summer, but try to get roots established before cooler weather sets in.
Supplies You’ll Need
Gathering your supplies beforehand makes the whole process smooth sailing. Here’s what I always have on hand:
- Sharp Pruning Shears or a Knife: Cleanliness is key here! You want to make clean cuts to avoid damaging the stem and introducing diseases.
- Rooting Hormone: While not strictly necessary for Jatropha, it significantly boosts your success rate and speeds up rooting. I usually opt for a powder.
- A Well-Draining Potting Mix: A good blend is crucial. I like to use a mix of equal parts perlite, peat moss, and a good quality potting soil. Some growers also use a coir-based mix.
- Small Pots or Propagation Trays: Terracotta pots are nice because they breathe, but plastic works well too. Ensure they have drainage holes!
- Watering Can or Spray Bottle: For gentle watering.
- Plastic Bags or a Clear Cover: To create a mini-greenhouse effect.
- A Small Stick or Wooden Skewer: For making holes in the soil.
Propagation Methods
For Jatropha integerrima, stem cuttings are my go-to method. It’s straightforward and yields great results.
-
Taking the Cuttings: Select healthy, non-flowering stems about 6-8 inches long. Look for stems that are slightly woody but not old and brittle. Using your clean shears, make a clean cut just below a leaf node (where the leaf attaches to the stem). Remove the leaves from the bottom half of the cutting. If there are any flower buds, pinch them off; they’ll divert energy from root development.
-
Preparing the Cuttings: Dip the cut end of each stem into your rooting hormone. Gently tap off any excess.
-
Planting the Cuttings: Fill your pots with your prepared potting mix. Use your skewer or finger to make a hole in the center of the soil for each cutting. This prevents the rooting hormone from rubbing off. Gently insert the prepared cuttings into the holes, making sure at least two leaf nodes are buried beneath the soil surface. Firm the soil gently around the base of each cutting.
-
Watering: Water the soil thoroughly until water drains from the bottom. You want the soil to be moist but not soggy.
-
Creating a Humid Environment: Cover the pots loosely with a plastic bag or a clear plastic dome. This traps humidity, which is vital for cuttings to root. Make sure the leaves aren’t directly touching the plastic; if they are, prop it up with a few small sticks.
The “Secret Sauce” (Pro Tips)
Here are a couple of things I’ve learned over the years that can really make a difference:
- Bottom Heat is Your Friend: If you can, place your pots on a gentle heat mat designed for seedlings. This consistent warmth from below encourages root development much more effectively than just relying on ambient room temperature. It’s like giving those nascent roots a cozy incubator!
- The “Water Test” for Readiness: Before you even think about potting them up, I like to give my cuttings a gentle tug after a few weeks. If you feel resistance, it means roots have formed and are anchoring the cutting. Don’t yank! Just a tiny, gentle pull.
Aftercare & Troubleshooting
Once you start seeing signs of new growth – tiny leaves unfurling or the tug test feeling firm – you’re well on your way!
- Gradual Acclimation: Slowly remove the plastic cover over a week or two. This allows the new plant to get used to lower humidity.
- Light Requirements: Place your newly rooted Jatropha in a bright, indirect light location. Avoid harsh, direct sun when they are still very young and tender.
- Watering: Continue to keep the soil consistently moist but not waterlogged. As the plant grows, you can gradually introduce it to more direct sunlight, but always watch for signs of stress.
Now, what if things don’t go as planned? The most common issue I see is rot. This usually happens when the soil is too wet and compacted, and there isn’t enough air circulation. If a cutting feels mushy or turns black and slimy, it’s likely best to discard it. Sometimes, the cuttings just don’t root. Don’t get discouraged! It can happen, and it might be due to the quality of the cutting, the temperature, or just a bit of bad luck.
A Little Patience Goes a Long Way
Propagating plants is a journey, and like any good garden project, it requires a bit of patience. Don’t be afraid to experiment, and remember that every cutting you try is a learning experience. Seeing those first tiny roots emerge, knowing you’ve brought a new life into being, is incredibly rewarding. Enjoy the process, and soon you’ll have a whole little jungle of Coral Plants to share! Happy growing!
Resource:
https://identify.plantnet.org/k-world-flora/species/Jatropha%20integerrima%20Jacq./data