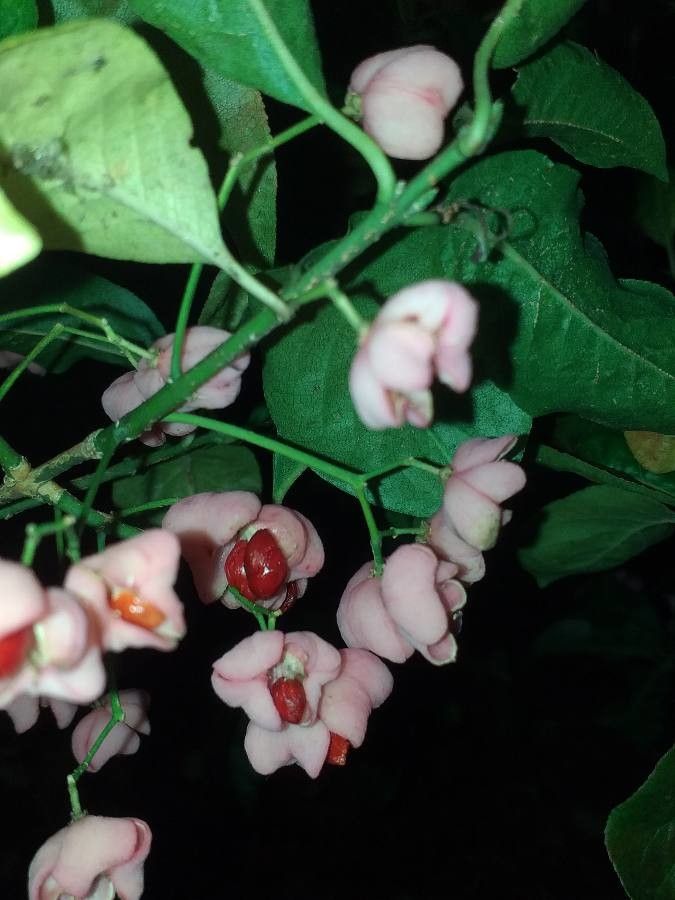
Oh, Euonymus maackii! What a beauty. I’ve always loved this particular euonymus for its graceful habit and those lovely, delicate flowers. And the best part? It’s quite rewarding to bring new ones into the world yourself. If you’re new to propagating, I’d say Euonymus maackii is a great one to start with. It’s not overly fussy, which is always a relief!
The Best Time to Start
For Euonymus maackii, my absolute favorite time to get propagating is in late spring or early summer. This is when the plant is in its active growing phase, producing lots of new, flexible shoots. These are the best ones to take cuttings from for the highest success rate. Aim for stems that are semi-hardwood – not brand new growth that’s still floppy, but not old, woody stems either. You want something with a bit of give.
Supplies You’ll Need
Here’s what I usually gather before I dive in. It’s all pretty standard garden fare!
- Sharp pruning shears or secateurs: Clean cuts are key.
- Rooting hormone (powder or gel): This isn’t strictly essential for Euonymus maackii, but it can give your cuttings a nice little boost.
- Small pots or trays: Make sure they have drainage holes!
- Propagation mix or a good quality potting soil: I often use a 50/50 mix of peat moss (or coir for a more sustainable option) and perlite. It drains well.
- Plastic bags or a mini greenhouse: To keep humidity high.
- Potting dibber or a pencil: For making planting holes.
- Watering can or spray bottle: For gentle watering.
Propagation Methods
We’ll focus on stem cuttings, as that’s the most straightforward way to multiply Euonymus maackii.
Taking Stem Cuttings:
- Select your stems: Look for those healthy, semi-hardwood shoots I mentioned. You want them to be about 4-6 inches long.
- Make the cut: Use your clean secateurs and make a cut just below a leaf node. This is where roots are most likely to form.
- Remove lower leaves: Gently pull off the leaves from the bottom half of the cutting. If any leaves are very large, you can even cut them in half. This helps reduce water loss.
- Dip in rooting hormone (optional): If you’re using rooting hormone, dip the cut end into it. Tap off any excess.
- Prepare the pots: Fill your pots with your propagation mix. Make a small hole with your dibber or pencil.
- Insert the cuttings: Place each cutting into the hole, and gently firm the soil around it. You can usually fit 2-3 cuttings per small pot.
- Water gently: Water the soil thoroughly but gently. You don’t want to dislodge the cuttings.
- Create a humid environment: Cover the pots loosely with a plastic bag or place them in a mini greenhouse. Make sure the leaves don’t touch the plastic if possible, as this can encourage rot.
The “Secret Sauce” (Pro Tips)
Here are a few things I’ve learned that really make a difference:
- Bottom heat is your friend: If you can, place your pots on a heat mat designed for propagation. This gentle warmth from below encourages root development much faster than ambient room temperature alone. It’s like giving them a cozy little spa treatment!
- Don’t overcrowd: It’s tempting to cram in as many cuttings as possible, but giving them a bit of space helps with air circulation and reduces the risk of fungal issues. A little patience here pays off.
- Watch for the “wiggle test”: Once you think they might be rooted, give a cutting a very gentle tug. If you feel a bit of resistance, that’s a good sign roots have formed. Don’t be tempted to yank it out to check!
Aftercare & Troubleshooting
Once your cuttings have started to root (this can take anywhere from 4 to 8 weeks, sometimes longer!), it’s time to adjust their care.
- Reduce humidity gradually: Once you see new growth, start to acclimatize them to drier air. Open the plastic bag a little each day, or lift the lid off your mini greenhouse.
- Water when the soil feels dry: Don’t keep them constantly soggy. Allow the top inch of soil to dry out slightly between waterings.
- Move to brighter, indirect light: After they’ve rooted successfully and are acclimatizing, they’ll appreciate more light, but keep them out of harsh, direct sun, which can scorch young leaves.
The most common problem you might encounter is rot. If you see your cuttings turning black and mushy, it usually means they’re getting too much moisture and not enough air circulation. Unfortunately, these are usually beyond saving, so remove them promptly to prevent it from spreading. Using well-draining soil and not overwatering are your best defenses.
A Encouraging Closing
See? It’s really not rocket science! Propagating Euonymus maackii is a wonderful way to fill your garden or share these lovely plants with friends. Be patient. Sometimes propagation takes its time, but the joy of nurturing a new plant from a tiny cutting is truly special. Happy gardening!
Resource:
https://identify.plantnet.org/k-world-flora/species/Euonymus%20maackii%20Rupr./data