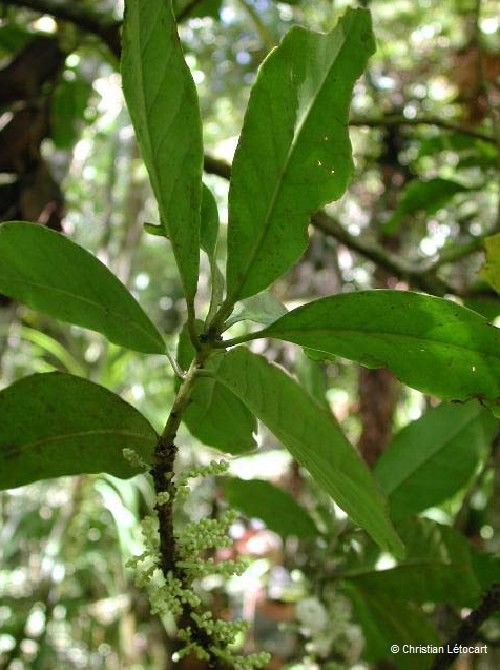
Hello there, fellow plant enthusiasts! You know, some plants just have that je ne sais quoi, don’t they? Symplocos caerulescens is definitely one of those. Its delicate, sky-blue flowers are truly a sight to behold, creating a soft haze of color in the garden. And the best part? You can bring that beauty into your own home or share it with friends by propagating your own!
While Symplocos caerulescens might sound a bit exotic, propagating it is a wonderfully rewarding experience. For those of you just dipping your toes into the world of plant propagation, I’d say this one falls into the moderately easy category. It’s not as straightforward as a pothos, but with a little patience and care, you’ll be celebrating success in no time.
The Best Time to Start
Timing is everything when it comes to getting the best results. For Symplocos caerulescens, I find that late spring to early summer is your golden window. This is when the plant is actively growing, sending out fresh shoots. These new, semi-hardened stems have the best energy reserves to develop roots. Trying to propagate from very soft, new growth or old, woody stems just doesn’t have the same success rate.
Supplies You’ll Need
Gathering your tools before you begin makes the whole process smoother. Here’s what I usually have on hand:
- Sharp, clean pruning shears or a razor blade: For making clean cuts.
- Rooting hormone powder (optional but recommended): Encourages root development. Look for one specifically for woody cuttings.
- Small pots or propagation trays: With drainage holes, of course!
- A well-draining potting mix: I like to use a blend of perlite, peat moss, and a bit of coarse sand. A good general-purpose potting soil with added perlite also works.
- A clear plastic bag or humidity dome: To create a mini-greenhouse effect.
- Watering can with a fine rose: For gentle watering.
- Labels and a permanent marker: To keep track of your cuttings!
Propagation Methods
My go-to method for Symplocos caerulescens is stem cuttings. It’s reliable and gives you a great chance of success.
Here’s how I do it:
- Take Your Cuttings: On a bright, but not scorching hot, morning, select a healthy stem that has just finished flowering or has new growth. Look for a stem about 4-6 inches long with at least two sets of leaves. Using your sharp, clean shears, make a cut just below a leaf node (where a leaf attaches to the stem). This is where precious rooting hormones are concentrated.
- Prepare the Cutting: Gently remove the lower leaves, leaving just the top two or three leaves. If the remaining leaves are very large, I sometimes like to cut them in half horizontally. This reduces water loss through transpiration while still allowing enough photosynthesis.
- Apply Rooting Hormone (Optional): Dip the cut end of the stem into your rooting hormone powder. Tap off any excess – you don’t want a clump, just a light dusting.
- Potting Up: Fill your small pots or trays with your pre-moistened potting mix. Make a small hole in the center of the mix with your finger or a pencil.
- Plant the Cutting: Insert the cut end of the stem into the hole, ensuring the leaf nodes are below the soil surface. Gently firm the soil around the cutting to ensure good contact.
- Create a Humid Environment: Water the soil gently. Then, place a clear plastic bag over the pot, securing it with a rubber band around the rim, or simply cover it with a humidity dome. This is crucial for keeping the humidity high, which is what those cuttings need to prevent drying out before they can form roots.
- Find the Right Spot: Place your newly potted cuttings in a bright location with indirect light. Avoid any direct sun, which can scorch the delicate leaves and overheat the cuttings in their plastic shelter.
The “Secret Sauce” (Pro Tips)
Over the years, I’ve picked up a few little tricks that seem to make a difference. Here are a couple of my favorites for Symplocos caerulescens:
- The “Air Gap” Trick: If you’re using a plastic bag to cover your cuttings, try to ensure the leaves aren’t touching the plastic. If they do, condensation can build up on the leaves and lead to fungal diseases. You can prop up the bag slightly with a chopstick if needed.
- Gentle Bottom Heat: Symplocos caerulescens really seems to appreciate a little warmth at its base. Placing your pots on a heated propagation mat can significantly speed up root formation. It mimics the warmth of spring soil and gives those roots a strong incentive to emerge. Don’t go too hot, though – just a gentle warmth is perfect.
Aftercare & Troubleshooting
Once your cuttings are in their humid little homes, patience is key! I usually check them every few days for moisture. Keep the soil consistently moist but not waterlogged. If you see condensation on the inside of the bag, that’s a good sign of high humidity.
You’ll know your cuttings are successful when you see new leaf growth. This is a fantastic indicator that roots have formed! It usually takes about 4-8 weeks, but sometimes longer. Once you see that new growth, you can slowly start to acclimate them to lower humidity by opening the bag a little more each day over a week or so.
The most common problem you might encounter is rot. If you see your cuttings turning mushy or developing black spots, it’s usually a sign of too much moisture and not enough air circulation. Sadly, once rot sets in, it’s hard to save them. That’s why that well-draining soil and avoiding waterlogged conditions are so important.
Keep Growing!
And there you have it! Propagating Symplocos caerulescens is a journey, and like any good garden project, it requires a bit of care and a lot of hope. Don’t get discouraged if not every single cutting takes. Learn from it, adjust your approach, and celebrate every little success. Happy propagating, and may your garden be forever blooming!
Resource: