Hello fellow garden lovers! It’s so wonderful to connect with you today. I’m excited to dive into a topic that brings me immense joy: coaxing new life from existing plants. Today, we’re talking about Bufonia tenuifolia.
Unveiling the Magic of Bufonia tenuifolia Propagation
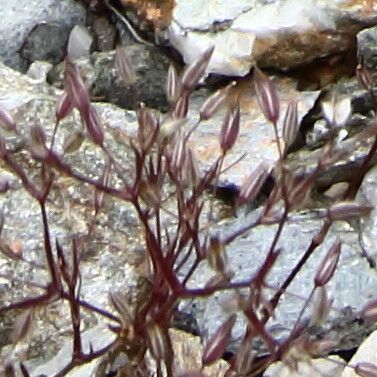
Ah, Bufonia tenuifolia! Isn’t it just a delight? I adore its delicate, airy appearance, like a little cloud of fine, mossy foliage. It’s fantastic for adding texture to rock gardens, spilling over edges, or even as a unique addition to miniature landscapes. And the best part? Multiplying it yourself is incredibly rewarding. It’s actually quite forgiving, making it a great plant for those of you just dipping your toes into the world of propagation.
When to Get Your Hands Dirty
The sweet spot for propagating Bufonia tenuifolia is definitely late spring to early summer. This is when the plant is actively growing and has plenty of energy to channel into new roots. You’ll want to work with semi-hardwood cuttings – that’s wood that’s starting to firm up but is still a little bit flexible. Think of it as being “bendable but not breakable.”
Your Propagation Toolkit
Before we get started, let’s gather our essentials. Having everything ready makes the process so much smoother!
- Sharp pruning shears or a clean, sharp knife: Crucial for clean cuts that heal well.
- Small pots or seed trays: With drainage holes, of course!
- A well-draining potting mix: I like a blend of equal parts perlite, coarse sand, and a good quality potting soil. This ensures good aeration and prevents waterlogging.
- Rooting hormone (optional but recommended): A powdered or liquid hormone can give your cuttings a significant boost.
- A misting bottle: For keeping things humid.
- Clear plastic bags or a propagation dome: To create a mini-greenhouse effect.
- Labels and a pen: You’ll thank me later when you have a whole tray of new babies!
Bringing New Life: Stem Cuttings
This is my go-to method for Bufonia tenuifolia. It’s reliable and produces healthy new plants.
- Take your cuttings: Using your clean shears or knife, make a cut just below a leaf node (where a leaf attaches to the stem). Aim for cuttings that are about 3-4 inches long. Remove the lower leaves, leaving just a few at the top.
- Apply rooting hormone (if using): Dip the cut end of the stem into the rooting hormone, tapping off any excess.
- Plant your cuttings: Fill your pots with your prepared potting mix. Make a small hole with a pencil or your finger and gently insert the cutting. Firm the soil around it.
- Water gently: Water thoroughly but avoid making the soil soggy.
- Create a humid environment: Cover the pots with a clear plastic bag, securing it loosely around the rim with a rubber band, or place them under a propagation dome. Ensure the leaves don’t touch the sides of the bag, as this can encourage rot.
- Find the right spot: Place your pots in a bright location that receives indirect sunlight. Too much direct sun can scorch your tender cuttings.
The “Secret Sauce” from My Garden
Here are a couple of things I’ve learned over the years that really make a difference:
- Bottom Heat is Your Friend: If you have a seedling heat mat, pop your pots onto it! Bufonia tenuifolia loves a little warmth from below, which really encourages root formation. It’s like a cozy little spa day for your cuttings.
- Don’t Over-Water, Don’t Under-Water: This is a tough balance! Check the soil regularly. It should feel slightly moist to the touch, but never waterlogged. If the top feels dry, give it a gentle misting. This is where that misting bottle becomes indispensable.
Nurturing Your New Growth and What to Watch For
You’ll start to see signs of life within a few weeks. A gentle tug on the cutting should reveal resistance if roots have formed. You might also see tiny new leaves or shoots emerging. Once you have good root development – usually after about a month or two – you can carefully transplant your new Bufonia tenuifolia into its own small pot. Continue to keep it in bright, indirect light and water as needed.
Now, sometimes things don’t go as planned. Rot is the enemy! If your cuttings turn black and mushy or look wilted and unhealthy, it’s usually a sign of too much moisture and not enough air circulation. If you see this happening, try to remove the affected cutting immediately to prevent it from spreading. Ensure your soil mix is airy and don’t be afraid to slightly reduce watering.
Go Forth and Grow!
Propagating plants is such a wonderfully meditative and rewarding experience. It teaches us patience and allows us to share the beauty of our gardens with others. Don’t be discouraged if your first attempt isn’t perfect. Every garden, and every cutting, is a learning opportunity. Enjoy the process, and soon you’ll have a whole troop of delightful Bufonia tenuifolia to admire! Happy gardening!
Resource:
https://identify.plantnet.org/k-world-flora/species/Bufonia%20tenuifolia%20L./data