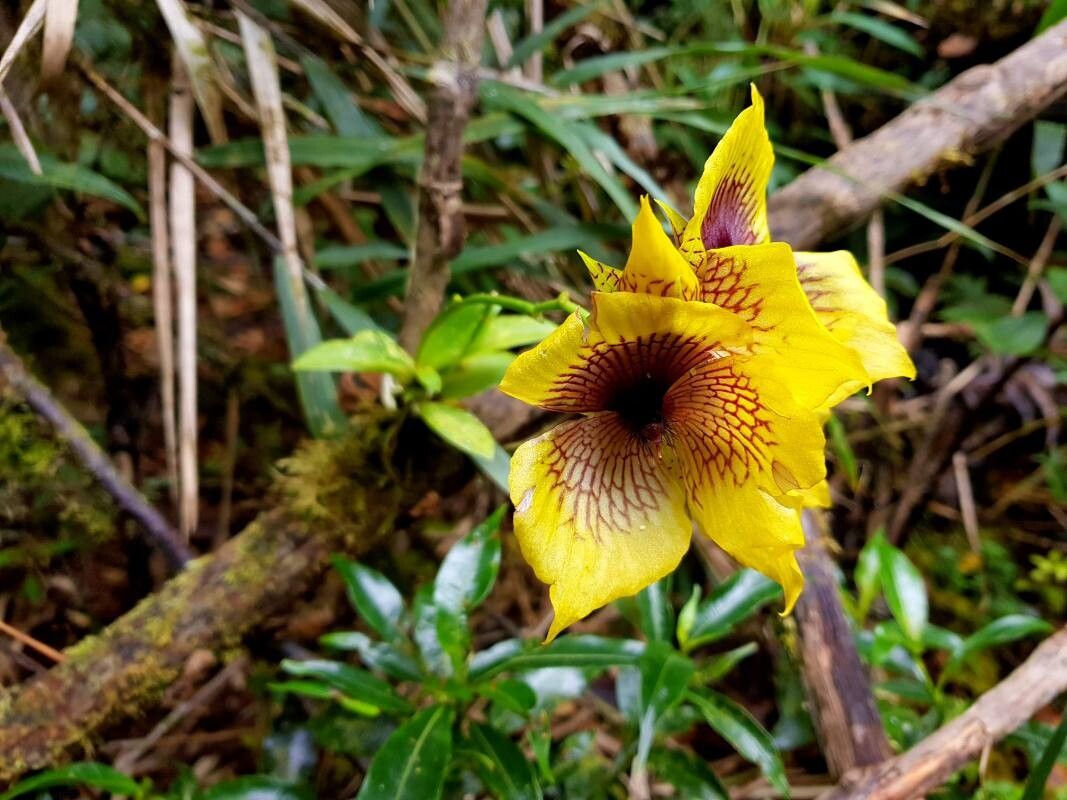
Hello, fellow plant enthusiasts! Today, I’m absolutely thrilled to talk to you about a truly special orchid: Telipogon ampliflorus. If you’ve ever seen one of these beauties, you understand their allure. They boast striking, large, often vibrantly colored flowers that can have a wonderfully architectural presence in a collection. Propagating them is a journey I’ve undertaken many times, and I can tell you, it’s incredibly rewarding. Now, I won’t sugarcoat it; Telipogon ampliflorus isn’t the easiest plant for an absolute beginner to propagate. It requires a bit more attention to detail, but with a little patience and the right approach, you can absolutely succeed!
The Best Time to Start
For Telipogon ampliflorus, the real sweet spot for propagation is generally during its active growing season. This usually means spring and early summer, after the plant has finished its flowering cycle and is putting on new leaves and roots. You want to work with a healthy, vigorous specimen that has plenty of energy to invest in those new beginnings. Trying to propagate when the plant is dormant or stressed is just asking for trouble.
Supplies You’ll Need
Gathering your tools beforehand makes the whole process much smoother. Here’s what I always have on hand:
- Sharp, sterile pruning shears or a clean knife: Essential for making clean cuts. Sterilize with rubbing alcohol between cuts.
- Orchid bark mix (fine grade): A well-draining mix is non-negotiable. I often use a blend of fine orchid bark, perlite, and a touch of sphagnum moss.
- Hormone rooting powder (optional but recommended): Helps encourage root development.
- Small pots or seedling trays: Clean and with good drainage.
- Clear plastic bags or a propagation dome: To create a humid environment.
- Watering can with a fine rose: For gentle watering.
- Label tags and a permanent marker: To keep track of your projects!
Propagation Methods
Telipogon ampliflorus is typically propagated through division. Because they tend to form pseudobulbs or rhizomes that grow outwards, creating clumps, division is the most natural and successful method.
Division Method: Step-by-Step
- Prepare Your Plant: Gently remove the orchid from its pot. Be careful not to damage the roots. If it’s really stuck, you might need to gently coax it.
- Clean the Roots: Carefully brush away as much of the old potting mix as you can to get a clear view of the plant’s structure and root system.
- Identify Division Points: Look for natural breaks where the plant has grown into distinct sections, each with its own roots and at least a few healthy pseudobulbs or shoots.
- Make the Cut: Using your sterile pruning shears or knife, make a clean cut through the rhizome or pseudobulbs to separate the divisions. Ensure each division has a good portion of healthy roots attached.
- Treat the Wounds (Optional but Wise): If you’ve made any significant cuts, you can dust them with crowning powder or a fungicide to help prevent rot. Allow the cut surface to air dry for a few hours before repotting.
- Pot Up Your New Divisions: Place each division into its own clean pot with your prepared orchid bark mix. Make sure the roots are spread out and the base of the plant is at the surface of the mix, not buried too deeply.
- Provide Initial Shelter: Water lightly. Then, cover the pots loosely with a clear plastic bag or place them inside a propagation dome. This helps maintain high humidity, which is crucial for new root development.
The “Secret Sauce” (Pro Tips)
Here are a couple of things I’ve learned over the years that really make a difference:
- The Humidity Hug: While you want that high humidity, ensure no leaves are directly touching the damp surface of the potting mix or water inside the bag. This is a surefire way to invite fungal issues and rot. Lift them slightly if needed.
- Gentle Encouragement: After about two to three weeks, start to gradually acclimate your new divisions to normal humidity by opening the plastic bags for a few hours each day. Don’t rush this step; it helps prevent shock.
- A Little Warmth Goes a Long Way: If you can, place your divisions in a location with gentle bottom heat. A heat mat designed for seedlings can provide this warmth, mimicking natural conditions and significantly encouraging root growth.
Aftercare & Troubleshooting
Once your Telipogon ampliflorus divisions have started to show signs of new growth – usually new roots or leaves appearing after a few weeks to a couple of months – you can slowly reduce their humidity and treat them much like your mature plants. Continue to water when the potting mix is almost dry, and ensure good air circulation.
The most common sign of trouble is rot. If you see mushy, blackening stems or roots, it’s usually a sign of too much moisture and poor air circulation. If rot sets in, you may need to remove the affected part, repot into fresh, dry mix, and hope for the best. Wilting without new growth can also indicate that the roots aren’t establishing, or perhaps the plant is too dry. Stay observant!
A Little Patience, A Lot of Reward
Propagating any plant is an act of faith and patience, and Telipogon ampliflorus is no different. Don’t get discouraged if not every division takes off immediately. Celebrate each success, learn from any setbacks, and most importantly, enjoy the process of nurturing new life. Happy growing!
Resource:
https://identify.plantnet.org/k-world-flora/species/Telipogon%20ampliflorus%20C.Schweinf./data