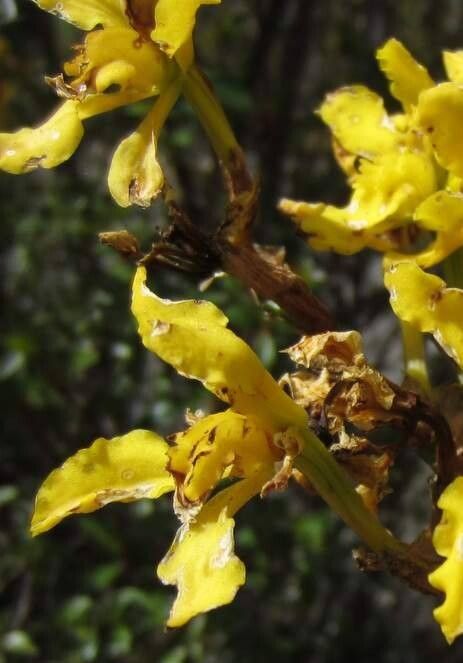
Well hello there, fellow plant lover! It’s me, your garden buddy with a few decades of dirt under my fingernails. Today, we’re diving into the delightful world of Cyrtochilum auropurpureum. If you haven’t met this beauty yet, imagine dazzling blooms, a cascade of color, and an air of exotic elegance. Growing them from scratch is just pure joy, and sharing that journey with you is why I do this.
Welcome to the Wonderful World of Cyrtochilum auropurpureum Propagation
There’s something incredibly satisfying about coaxing new life from a beloved plant. Cyrtochilum auropurpureum, with its stunning orchid-like flowers, is no exception. Propagating it is a fantastic way to expand your collection or share these treasures with friends. Now, I won’t sugarcoat it – orchids can be a little finicky, and Cyrtochilum is no different. It’s not the easiest plant for a complete beginner, but with a bit of patience and the right approach, you absolutely can be successful. Think of it as a rewarding challenge!
The Best Time to Start: Timing is Everything
For Cyrtochilum auropurpureum, the sweet spot for propagation is usually after the plant has finished its flowering cycle and is entering a period of active growth. This often happens in the spring or early summer. You want to avoid trying to propagate when the plant is stressed, either from extreme heat, cold, or during its blooming phase. Look for signs of new leaf or root development – that’s your cue!
Supplies You’ll Need
Gathering your tools beforehand makes the whole process smoother. Here’s what I like to have on hand:
- Sharp, sterilized pruning shears or a clean razor blade: Essential for making clean cuts.
- Orchid potting mix: A very airy, well-draining mix is crucial. Think bark, perlite, and charcoal.
- Small plastic pots or seedling trays: With plenty of drainage holes, of course.
- Rooting hormone (optional but recommended): A powder or gel can give your cuttings a nice boost.
- Watering can with a fine rose attachment: For gentle watering.
- Spray bottle: For keeping humidity levels up.
- Labels and a permanent marker: So you don’t forget what you’ve planted!
Propagation Methods: Bringing New Life Forth
The most reliable way to propagate Cyrtochilum auropurpureum is through division. This is essentially splitting a mature plant into smaller, independent sections. Orchids like this have pseudobulbs, which are swollen stems that store water and nutrients, and these are perfect for division.
Here’s how I do it:
- Gently remove the orchid from its pot. Be patient and try not to damage the roots too much. You might need to loosen the old potting mix.
- Inspect the root system and pseudobulbs. Look for areas where you can divide the plant naturally. You’re aiming for sections that have at least two or three healthy pseudobulbs and some good roots.
- Using your sterilized shears or razor blade, carefully cut through the rhizome (the stem connecting the pseudobulbs) to separate the divisions. Make sure each division has enough roots to support itself.
- Trim away any dead or mushy roots. This helps prevent rot.
- Repot each division into its own small pot with fresh, well-draining orchid mix. Plant them so the base of the pseudobulbs is just at the surface of the mix.
- Water lightly. You don’t want them sitting in soggy conditions right away.
- Place the newly potted divisions in an area with good humidity and bright, indirect light.
The “Secret Sauce” (Pro Tips)
Over the years, I’ve picked up a few tricks that seem to make all the difference.
- Don’t rush the watering after division. Let the cut surfaces on the rhizome callus over for a day or two before watering. This is a small but mighty step in preventing rot.
- Consider bottom heat. If you can, placing your divisions on a heat mat set to a gentle warmth (around 70-75°F or 21-24°C) can really encourage root development. It mimics those lovely warm soil temperatures.
- Keep it humid, but well-ventilated. Orchids love moisture, but stagnant air can invite fungal issues. A good spray bottle misting a couple of times a day, or placing them near a humidifier, is fantastic. Just ensure there’s some air movement around them.
Aftercare & Troubleshooting: Nurturing Your New Sprouts
Once your divisions are potted, it’s all about keeping them happy and healthy.
- Watering: Water when the potting medium feels dry to the touch. Overwatering is a common pitfall, so err on the side of caution.
- Light: Provide bright, indirect light. Direct sun can scorch delicate new growth.
- Humidity: Continue to maintain good humidity.
- Patience: This is key! It can take several weeks, sometimes even months, for your divisions to show significant new growth.
The most common sign of trouble is rot. You’ll see pseudobulbs become mushy and discolored, often with a foul smell. If this happens, immediately remove the affected part with your sterilized tool and try to improve air circulation and reduce watering. You might also see yellowing leaves, which can indicate too much or too little water, or not enough light.
A Little Patience Goes a Long Way
Propagating Cyrtochilum auropurpureum is a journey, and like all good journeys, it requires a bit of faith and patience. Don’t be discouraged if your first attempt isn’t perfect. Each time you try, you learn something new. Enjoy the process of nurturing these small beginnings, and soon you’ll be rewarded with the vibrant blooms of your own homegrown beauties. Happy growing!
Resource: