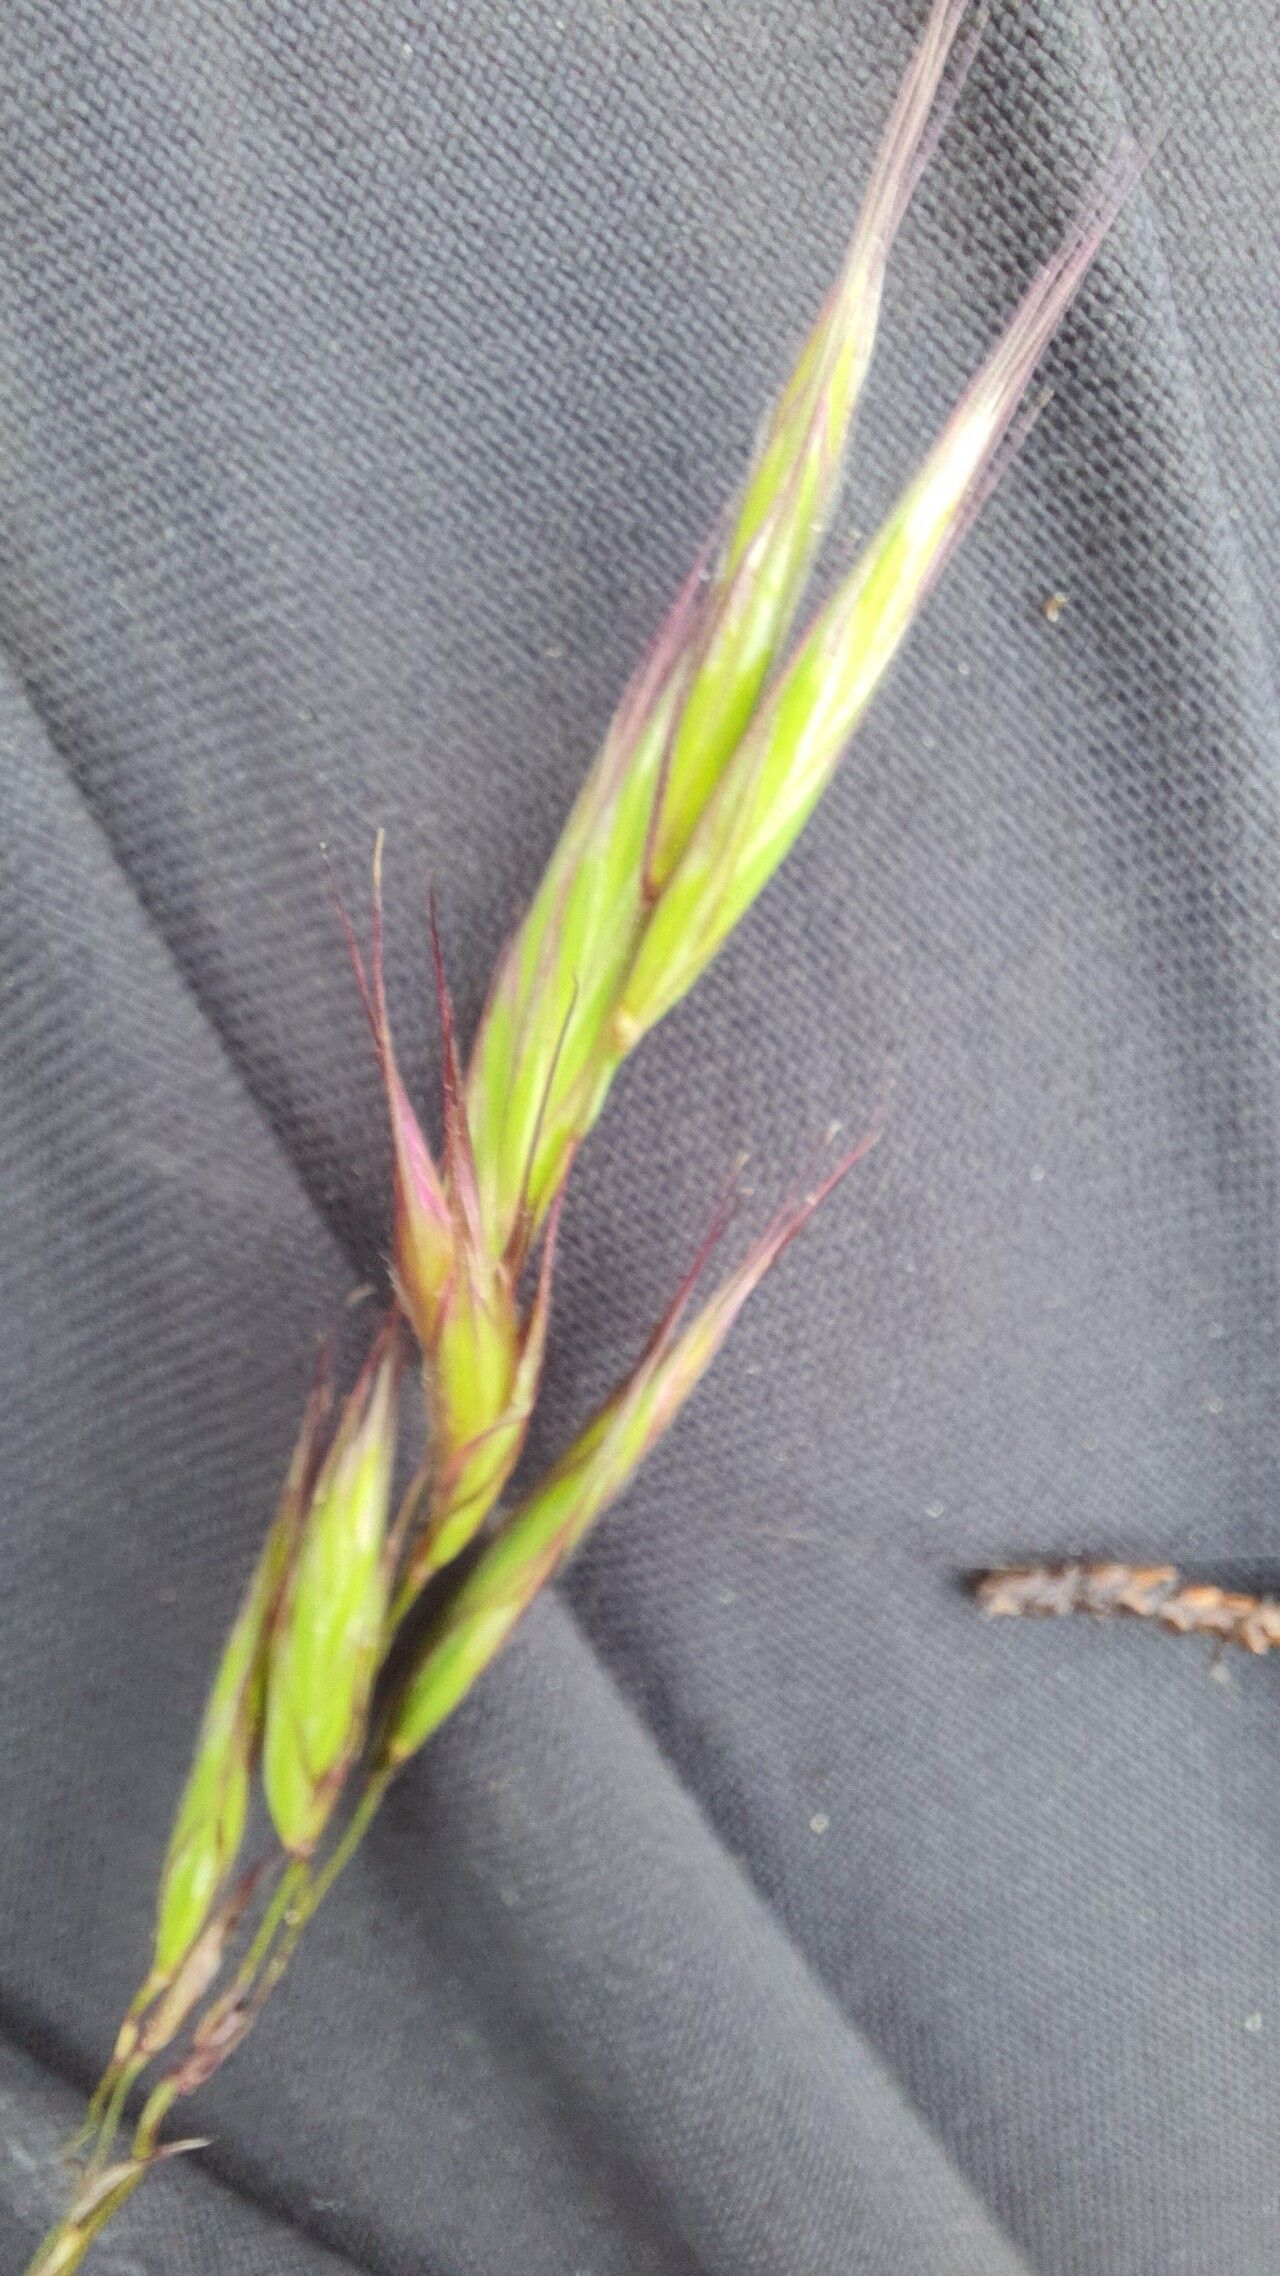
Oh, hello there! Come on in, grab a mug. Today we’re diving into the wonderful world of Bromus himalaicus. If you’re anything like me, you’ve probably admired its graceful, arching seed heads and lovely foliage. It brings such a sense of natural beauty to the garden, doesn’t it? And the best part? You can easily grow more of these beauties yourself!
Why Propagate Bromus himalaicus?
There’s a special kind of joy in taking a piece of a plant you love and nurturing it into a whole new life. It’s incredibly rewarding, not to mention a fantastic way to fill in bare spots in your garden or share with fellow plant enthusiasts. For Bromus himalaicus, propagation is generally quite straightforward and a great starting point for anyone new to plant-starting. Don’t be intimidated; you’ve got this!
The Best Time to Start
The absolute sweet spot for propagating Bromus himalaicus is in the late spring to early summer. This is when the plant is actively growing and has plenty of energy. You’ll be looking for new, healthy shoots that aren’t flowering yet. Trying to propagate from very old, woody material is less likely to be successful.
Supplies You’ll Need
To set yourself up for success, gather these few essentials:
- Sharp pruning shears or a clean craft knife: For taking clean cuttings.
- A good quality potting mix: Something that drains well is key. I like a mix of peat moss, perlite, and a bit of compost.
- Small pots or seed trays: Make sure they have drainage holes.
- Rooting hormone (optional but helpful): This isn’t strictly necessary for this grass, but it can give cuttings a little boost.
- A watering can with a fine rose: For gentle watering.
- A clear plastic bag or propagator lid: To create a humid environment for cuttings.
- A small trowel or dibber: For making holes in the soil.
Propagation Methods: Let’s Get Our Hands Dirty!
The easiest and most common way to propagate Bromus himalaicus is through division. This grass forms clumps, and separating those clumps into smaller plants is remarkably simple.
Division Method:
- Dig Up the Clump: In late spring or early summer, carefully dig up the entire plant. Try to disturb the roots as little as possible. You can use a garden fork to help loosen the soil around the edges before lifting.
- Clean the Roots: Gently shake off excess soil from the root ball. This will help you see where the natural divisions lie.
- Separate the Divisions: You can do this by hand, gently pulling the clump apart. If it’s a tough one, you might need to use your clean pruning shears or even a sharp spade to cut through the roots. Aim for divisions that have a good amount of roots attached and at least one or two healthy shoots.
- Replant Immediately: Pot up each division into its own pot filled with your well-draining potting mix. Plant them at the same depth they were growing before. Water thoroughly.
- Keep Them Hydrated: Place the newly potted divisions in a spot that gets bright, indirect light and keep the soil consistently moist but not waterlogged. They should start showing new growth in a few weeks.
While division is king for this grass, you can try seed propagation, though it’s a bit more hit-and-miss and might take longer to establish. If you collect seeds from dried seed heads in late summer, store them in a cool, dry place. Sow them in pots in spring, lightly covering them with soil, and keep them moist.
The “Secret Sauce” (Pro Tips)
Here are a few little things I’ve learned over the years that can really make a difference:
- For divisions, make sure each new piece has plenty of healthy-looking roots. This is their lifeline! If a division looks rootless, it’s probably not going to make it.
- When watering your divisions, water from the bottom if possible. Sit your pots in a tray of water for about 30 minutes. This encourages the roots to grow downwards and prevents the soil surface from damping off or rotting.
- Don’t be afraid to trim back exceptionally long or damaged leaves after division. This reduces water loss and helps the plant focus its energy on root establishment.
Aftercare & Troubleshooting
Once your divisions have settled in and you see new shoots emerging, you’re on your way! Continue to water regularly, especially during dry spells. As they grow stronger, you can gradually introduce them to more sun.
The most common issue you might encounter is rot, usually due to overwatering or poor drainage. If you see stems turning mushy and brown at the base, it’s a sign things are too wet. If this happens, gently remove the affected parts and allow the soil to dry out a bit more. Good airflow is also important, so don’t overcrowd your new plants.
A Little Patience Goes a Long Way
Growing new plants is a journey, and Bromus himalaicus is a grateful traveler. Be patient, enjoy the process of nurturing these lovely grasses, and soon you’ll have plenty to admire and share. Happy gardening!
Resource:
https://identify.plantnet.org/k-world-flora/species/Bromus%20himalaicus%20Stapf/data