Hello, fellow garden lovers!
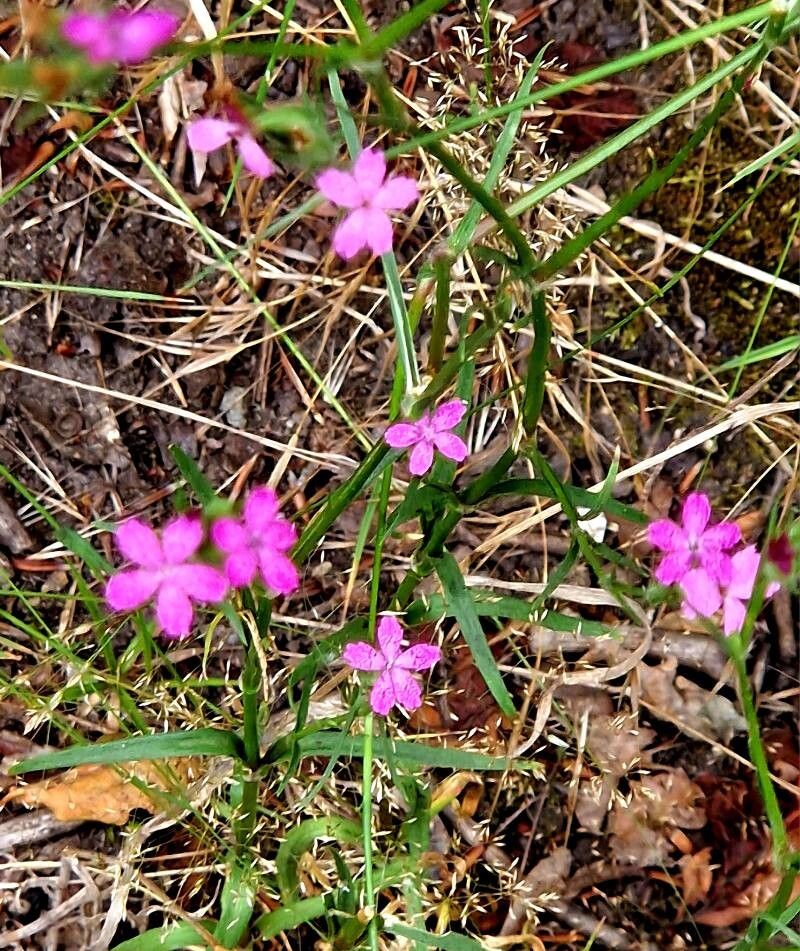
Today, I want to chat about a little gem that brings so much charm to the garden: Dianthus armeria, also known as Sweet William or Wild Pink. I’ve spent many happy hours with these cheerful little plants, and let me tell you, they’re a joy to grow. Their tiny, fringed blooms in shades of pink and red are just delightful, and they have a lovely, subtle fragrance that fills the air on a warm day. Propagating them is a wonderful way to expand your collection or share these beauties with friends. And I’m happy to report, Dianthus armeria is quite forgiving, making it a great option for beginners looking to try their hand at propagation!
The Best Time to Start
For the most success, I find that late spring or early summer is the sweet spot for propagating Dianthus armeria. This is when the plant is actively growing, and the stems are firm but not yet woody. You want to take cuttings from new growth, so after the main flush of spring blooms has passed is also a good time.
Supplies You’ll Need
Gathering your supplies before you start makes the whole process go much smoother. Here’s what I usually have on hand:
- Sharp, clean pruning shears or a sharp knife: To make clean cuts.
- Rooting hormone (optional but recommended): Helps cuttings develop roots faster.
- Small pots or seed trays: For your cuttings to root in.
- A well-draining potting mix: I like a blend of equal parts peat moss or coco coir and perlite or coarse sand. This ensures good aeration and prevents soggy conditions.
- A watering can with a fine rose attachment: For gentle watering.
- Plastic bags or a propagator lid: To create a humid environment.
- Labels and a permanent marker: So you don’t forget what you’ve planted!
Propagation Methods
While Dianthus armeria can be grown from seed, I find propagating by stem cuttings is usually more rewarding and gives you plants true to the parent.
Stem Cuttings
This is my go-to method for Sweet William.
- Select your parent plant: Look for a healthy, vigorous Dianthus armeria that’s not currently flowering.
- Take the cuttings: Using your clean shears or knife, snip off pieces of stem that are about 3-4 inches long. Make your cut just below a leaf node (where a leaf attaches to the stem).
- Prepare the cuttings: Gently remove the lower leaves from the stem, leaving just a few at the top. If the leaves are very large, you can even snip them in half to reduce water loss.
- Apply rooting hormone (optional): Dip the cut end of each stem into the rooting hormone powder, tapping off any excess.
- Pot them up: Fill your small pots or trays with your well-draining potting mix. Make a small hole in the center of each pot with your finger or a pencil.
- Insert the cuttings: Gently place a prepared cutting into each hole, firming the soil around it.
- Water gently: Water the soil thoroughly until it’s moist but not waterlogged.
- Create humidity: Cover the pots loosely with a plastic bag or a propagator lid. This keeps the humidity high, which is crucial for cuttings to root. Pop your pots somewhere with bright, indirect light.
The “Secret Sauce” (Pro Tips)
Here are a few little tricks I’ve picked up over the years that can really boost your success:
- Don’t let the leaves touch the water: I know this sounds obvious, but if you’re doing a quick water propagation before potting, ensure only the stem is submerged. Leaves sitting in water are a fast ticket to rot.
- Bottom heat is your friend: If you have a greenhouse or a warm windowsill, placing your potted cuttings on a gentle heat mat can significantly speed up root development. It mimics the warmth of spring and encourages those roots to get moving!
- Be patient with water propagation: If you choose to root in water first, don’t be disheartened if it takes a little while to see distinct roots. A tiny white nub is a good sign! Once they’re about an inch long, it’s time to pot them into soil.
Aftercare & Troubleshooting
Once you see new growth appearing at the tips of your cuttings, it’s a good sign that roots are forming.
- Gradually acclimate: Once roots have developed (you might see them peeking out of the drainage holes), it’s time to slowly acclimate your new plants. Start by opening the plastic bag or propagator lid for a few hours each day.
- Watering: Keep the soil consistently moist but avoid overwatering. Allow the top inch of soil to dry out slightly between waterings.
- Light: Continue to provide bright, indirect light. As they get stronger, you can gradually introduce them to more direct sunlight.
Now, the tricky part: what if things go wrong? The most common culprit is rot. If your cuttings turn black and mushy, it’s usually a sign of too much moisture and not enough air circulation. Make sure your soil drains well and you’re not overwatering. If a cutting fails, don’t fret! Just remove it and try again. Gardening is all about learning from each experience.
A Little Encouragement
Propagating plants is a journey, not a race. Be patient with your new Dianthus armeria cuttings. Give them time and the right conditions, and you’ll be rewarded with beautiful new plants to enjoy. Happy propagating!
Resource:
https://identify.plantnet.org/k-world-flora/species/Dianthus%20armeria%20L./data