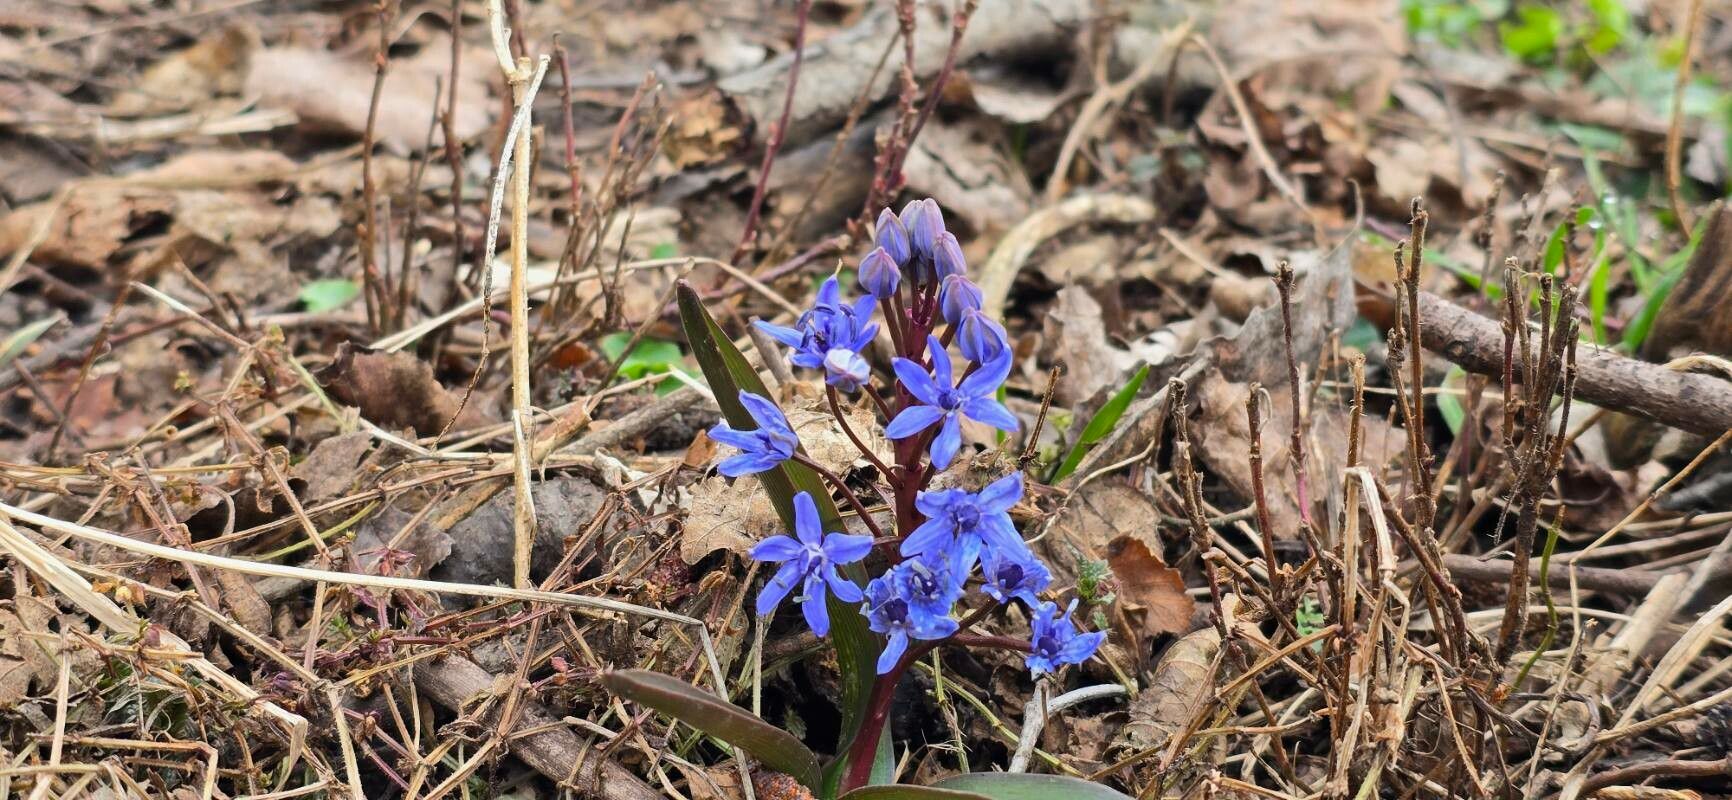
Hello fellow garden lovers! Today, I want to chat about a gem that brings a little bit of magic to the spring garden: Scilla vindobonensis. These little beauties, with their starry, often deep blue or violet blooms, are just delightful. They pop up early, bringing cheer when we most need it. And the best part? They are surprisingly easy to share! Propagating them is a wonderful way to expand your patch of blue or to give a piece of your garden to a friend. For beginners, I’d say Scilla are quite forgiving. You’ll likely have success with a little patience.
The Best Time to Start
When it comes to Scilla vindobonensis, timing is everything. The absolute sweet spot for propagating these lovely bulbs is right after they finish flowering and their foliage begins to yellow and die back. This is typically in late spring to early summer. This is when the energy the plant has stored is still readily available, and it’s a natural period of dormancy preceding a new growth cycle. Trying to divide them when they are actively growing or covered in flowers can stress the plant and reduce your success rate.
Supplies You’ll Need
Gathering your tools beforehand makes the whole process smoother. Here’s what I usually have on hand:
- A sharp, clean trowel or spade: For gently lifting and dividing the bulbs.
- Gardening gloves: To protect your hands.
- A clean, shallow tray or pot: For replanting the divisions.
- Well-draining potting mix: A mix formulated for bulbs or a general purpose potting soil amended with perlite or coarse sand works wonderfully. About a 50/50 ratio is a good starting point.
- Optional: A label marker and waterproof labels: To keep track of what you’ve planted and when.
Propagation Methods: The Gentle Art of Division
Scilla vindobonensis is best propagated by dividing its bulbs. These plants form little clumps as they grow, and separating these clumps is the key.
- Locate your Scilla: Gently poke around the area where your Scilla are growing. You’re looking for a clump of bulbs.
- Prepare the soil: Loosen the soil around the clump with your trowel, working outwards a bit to avoid damaging the bulbs.
- Lift the clump: Carefully scoop under the entire clump with your trowel and lift it out of the ground. You’ll likely see that the bulbs are clustered together, sometimes with smaller offsets attached.
- Separate the bulbs: Gently tease the bulbs apart. You can often do this with your hands. If they are tightly bound, use your clean trowel to carefully slice through the root structures between them. Aim to separate them into individual bulbs or small clusters of 2-3. Don’t worry if a few roots break; they’ll regrow.
- Inspect and discard: Look for any soft, mushy, or damaged bulbs. These are likely diseased and should be discarded. Healthy bulbs will be firm.
- Replant immediately: Find a new spot in your garden or prepare your pots. Dig holes large enough to accommodate the separated bulbs. Plant them at about the same depth they were previously growing, or slightly deeper if you prefer. Make sure the pointed end (where new growth will emerge) is facing upwards. Space them out according to their mature size, usually about 2-3 inches apart.
- Water thoroughly: Once replanted, give them a good drink of water to settle the soil around the bulbs.
The “Secret Sauce” (Pro Tips)
Here are a couple of things I’ve learned over the years that can really help your Scilla divisions thrive:
- Don’t be too aggressive with separation: While you want to separate them, try not to “shatter” the bulb. If you have a cluster of bulbs with a few small offsets, leaving them attached can actually give those smaller offsets a better start. They’ll gain strength from the larger bulb. The plant is pretty resilient, but a little gentleness goes a long way.
- Consider pot culture for faster establishment: If you want to have more control or are short on garden space, pot up your divisions! Use your well-draining mix in small pots. This allows you to monitor moisture levels more closely and protect them from immediate competition. You can then move them to their permanent garden spot once they’ve established a good root system in the pot.
Aftercare & Troubleshooting
After you’ve divided and replanted your Scilla, the main thing is to keep the soil consistently moist, but not waterlogged, especially during their first few weeks. As the foliage starts to grow (or if you replanted them and they already have some green), they’ll need regular watering.
The biggest challenge you might encounter is rot. This happens when bulbs sit in overly wet soil for too long. If you notice any bulbs turning mushy, dark, and smelly, they’ve likely succumbed to rot. Remove them immediately to prevent it from spreading. For healthy divisions, you should see new shoots emerge within a few weeks, especially if you’ve planted them in the spring. If no growth appears by mid-summer, don’t despair! Sometimes bulbs take a while to settle in. Just ensure the soil is reasonably moist.
A Encouraging Closing
So there you have it! Propagating Scilla vindobonensis is a straightforward and rewarding way to fill your garden with these delightful early blooms. Be patient with your new divisions; they might not flower as prolifically in their first year, but they are establishing themselves. Enjoy the process of nurturing these little bits of blue magic, and happy gardening!
Resource:
https://identify.plantnet.org/k-world-flora/species/Scilla%20vindobonensis%20Speta/data