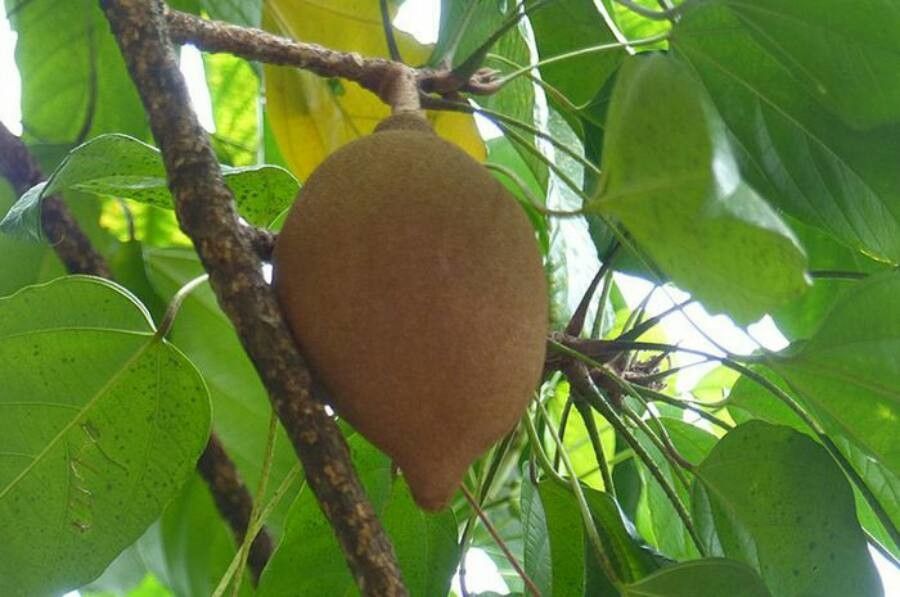
Oh, hello there! It’s so lovely to have you join me for a chat about, of all things, Pangium edule. You know, that stunning tree with those remarkably large, delicious fruits? There’s something truly special about growing your own Pangium edule, and propagating it yourself? Well, that’s a whole other level of gardening satisfaction. It’s a bit of a project, not exactly a beginner’s “blink and you’ll miss it” kind of plant, but with a little patience and the right guidance, it’s absolutely achievable. And the rewards, my friends, the rewards are immense.
The Best Time to Start
For Pangium edule, your best bet for successful propagation is right at the beginning of the rainy season. Think of it as giving your new little plants the best possible start. They’ll have consistent moisture, and the warmer temperatures will encourage healthy root development. You’ll want to take cuttings from healthy, active-growing stems that haven’t yet flowered.
Supplies You’ll Need
Gathering your tools beforehand is half the battle! Here’s what I usually have on hand:
- Sharp pruning shears or a clean knife: Make sure they’re sterilized to prevent disease transfer.
- Cuttings: Healthy stems from your mature plant.
- Rooting hormone (optional but recommended): This really gives your cuttings a boost. I prefer a powder form.
- Well-draining potting mix: A good ratio of peat moss, perlite, and a bit of coco coir works wonderfully for me.
- Pots or trays: Small pots are perfect for starting out. Make sure they have drainage holes.
- Plastic bags or a propagation dome: To create a humid environment.
- Watering can or spray bottle: Gentle hydration is key.
Propagation Methods
While Pangium edule can be a little tricky, the most reliable method for us home gardeners is through stem cuttings.
- Select Your Cuttings: Find a healthy, semi-hardwood stem that’s about 6-8 inches long. Cut just below a leaf node. This is where the magic happens with root formation. Remove any lower leaves so they won’t rot off in the soil, but leave a few at the top to continue photosynthesis.
- Prepare the Cutting: If you’re using rooting hormone, dip the cut end into it, tapping off any excess.
- Planting: Make a small hole in your prepared potting mix with a pencil or your finger. Gently insert the cutting into the hole, ensuring the leaf nodes that were below the soil line are covered. Firm the soil gently around the base of the cutting.
- Create a Humid Environment: Water the soil lightly. Then, cover the pot with a plastic bag (propped up with a stick so it doesn’t touch the leaves) or place it under a propagation dome. This traps humidity, which is crucial for cuttings to root.
- Placement: Place the pot in a warm, bright location out of direct sunlight. A windowsill that gets indirect light is usually perfect.
The “Secret Sauce”
Now, for a few little tricks I’ve picked up over the years that can really make a difference:
- Bottom Heat is Your Friend: If you have a heat mat designed for seedlings, use it! Pangium edule cuttings absolutely love a bit of warmth from below, mimicking the tropical soil they naturally grow in. It significantly speeds up root development.
- Don’t Over-Water! This is a big one. While humidity is essential, soggy soil is the enemy. You want the soil to be consistently moist but not waterlogged. I usually check by poking my finger about an inch into the soil. If it feels dry, it’s time for a light watering.
- Be Patient with the Leaf Test: Leaves will often wilt a bit when you first take cuttings. Don’t despair! If the leaves stay green and firm up slightly after a few days in the humid environment, that’s a good sign. If they turn yellow or mushy, it’s not looking promising.
Aftercare & Troubleshooting
Once you start to see new growth appearing, that’s your cue that roots have formed! At this point, you can start to gradually acclimate your new plant to less humid conditions by opening the bag a little more each day. Continue to keep it in bright, indirect light.
The most common issue you’ll encounter is rot. This is usually caused by overwatering or poor drainage. If a cutting looks mushy, turns black, or smells foul, it’s likely rotted and unfortunately, beyond saving. Discard it and try again. Keep an eye out for any signs of pests, too, though that’s less common at this stage.
A Grate Closing
Propagating Pangium edule is a journey, not a race. There will be times you’ll want to peek every five minutes, and times you’ll need to let nature do its thing. Don’t get discouraged if your first attempts aren’t perfect. Every gardener has their learning curve. Just be gentle, be patient, and enjoy the quiet satisfaction of nurturing new life. Happy propagating!
Resource:
https://identify.plantnet.org/k-world-flora/species/Pangium%20edule%20Reinw./data