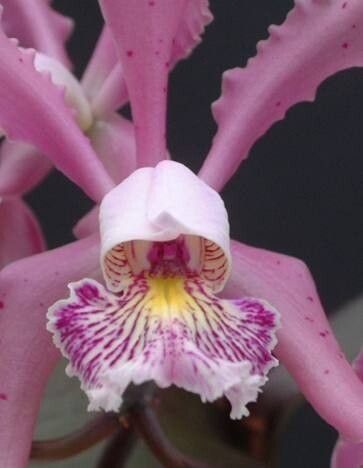
Oh, hello there! Grab a mug of your favorite brew, and let’s chat about Cattleya schilleriana. This orchid, with its gorgeous, often speckled blooms and sturdy pseudobulbs, has a certain charm, doesn’t it? Propagating it can feel like a little bit of magic, watching life spring from something you nurtured. Now, I gotta be honest, Cattleya schilleriana isn’t always the easiest orchid to get started with if you’re brand new to the orchid world. It takes a bit of understanding, but don’t let that deter you! With a little patience and these tips, you’ll be well on your way to having more of these beauties.
The Best Time to Start
Timing is everything in the garden, and for Cattleya schilleriana, you’ll want to aim for late spring or early summer. This is when the plant is actively growing and has the most energy to put into new roots and shoots. You’ll often see new growth emerging right after the blooming season has passed. That’s your cue! Trying to propagate when the plant is dormant or stressed is just asking for disappointment.
Supplies You’ll Need
Before we dive in, let’s gather our tools. Having everything at the ready makes the whole process smoother.
- Sharp, sterile pruning shears or a clean knife: For making precise cuts. Sterilize them with rubbing alcohol between each plant or section.
- Well-draining orchid mix: I like a blend of coarse bark, perlite, and a bit of charcoal. You want good aeration but also enough moisture retention.
- Small pots or net pots: Just big enough for your new division or cutting.
- Rooting hormone powder (optional but helpful): Specifically formulated for orchids, this can give your cuttings a nice boost.
- Watering can or spray bottle: For gentle watering.
- Sphagnum moss (optional): Can be useful for creating a humid microclimate.
- Labels and a permanent marker: To keep track of what you’ve done and when.
Propagation Methods
While you can technically try stem cuttings with some orchids, for Cattleya schilleriana, the most reliable and commonly used method is division. This is essentially splitting a mature plant into smaller, independent sections.
Here’s how we’ll tackle it:
- Assess Your Plant: Look for a plant that has at least three to four good pseudobulbs per section. Older, leafless pseudobulbs aren’t usually worth keeping. You want healthy-looking growth.
- Gently Remove from Pot: Carefully unpot your Cattleya schilleriana. If it’s really stuck, a little gentle squeezing of the pot can help. Try not to damage the roots too much.
- Clean Off Old Mix: Gently brush away as much of the old potting mix as you can, especially around the rhizome (the creeping stem that connects the pseudobulbs). This will help you see where to make your cuts.
- Make the Cut: Using your sterile shears or knife, carefully cut through the rhizome. Aim to create sections, each with at least three healthy pseudobulbs and a bit of healthy rhizome attached. Don’t be afraid to be decisive, but also don’t be needlessly destructive.
- Inspect and Prune: Look at the roots of each division. Trim away any dead, mushy, or black roots. If there are any very long, coiled roots that are difficult to pot, you can trim them back a bit.
- Apply Rooting Hormone (Optional): If you’re using rooting hormone, lightly dust the cut surface of the rhizome on each division. This can help prevent rot and encourage new root growth.
- Pot Up Your Divisions: Place each division in its own small pot. Position it so the newest pseudobulb is closest to the center of the pot. Fill the pot with your well-draining orchid mix, gently firming it around the roots. Make sure the top of the rhizome is exposed and not buried too deeply.
The “Secret Sauce” (Pro Tips)
Now, for a couple of little tricks I’ve picked up over the years. These really make a difference!
- Don’t Water Immediately: After potting your divisions, resist the urge to water for a few days. This allows any small cuts on the rhizome to callus over, which drastically reduces the risk of rot. When you do water, water thoroughly.
- Embrace the Humidity (But Not Drowning): New divisions love a bit of a humid environment. You can achieve this by placing the pots on a tray filled with pebbles and water (making sure the pot isn’t sitting in the water), or by loosely covering the entire tray with a clear plastic bag. Make sure there’s some air circulation to prevent fungal issues. A little ventilation goes a long way!
Aftercare & Troubleshooting
After the initial few days of waiting to water, you’ll want to water your newly potted divisions when the potting mix is almost dry. Look for new root growth – they’ll typically be a healthy green or white.
The biggest challenge you might face is rot. If you see pseudobulbs turning black and mushy, or leaves yellowing and dropping off rapidly, it’s often a sign of too much moisture and not enough air circulation, or that your cut didn’t heal properly. If you suspect rot, you might need to unpot the section, trim away the affected parts, and let it dry out more before repotting in fresh, drier mix. It’s tough, but sometimes a sacrifice needs to be made to save the rest.
A Encouraging Closing
Propagating Cattleya schilleriana is a journey, not a race. Be patient with your new divisions. It might take several months to see significant new growth or roots. Don’t get discouraged if one doesn’t make it – that’s part of the learning process! The joy of watching a new plant flourish from a piece of an old one is incredibly satisfying. Happy growing!
Resource:
https://identify.plantnet.org/k-world-flora/species/Cattleya%20schilleriana%20Rchb.f./data