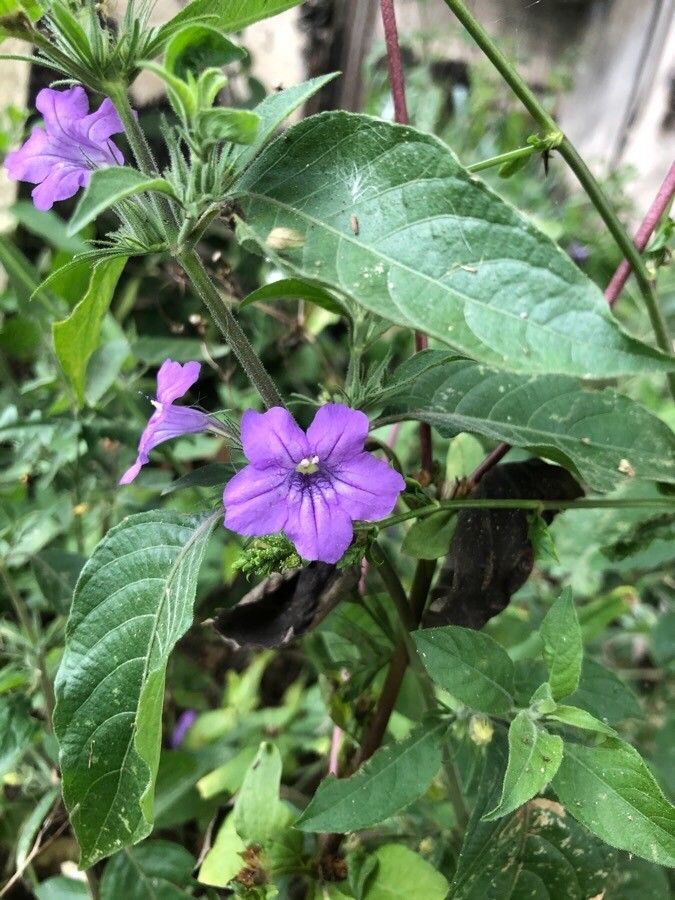
Hello, fellow plant lovers! Today, I want to chat about a plant that’s been bringing a splash of cheerful color to my garden for years: Ruellia pedunculata, often called Wild Petunia or Shooting Star Ruellia. Its delicate, trumpet-shaped flowers bloom in shades of purple and pink, and it has a wonderfully relaxed, natural way of spreading. If you’ve ever admired this beauty and wished you had more of it, or wanted to share it with friends, you’re in luck! Propagating Ruellia pedunculata is quite rewarding, and I’m happy to say, it’s a pretty beginner-friendly task.
The Best Time to Start
My personal favorite time to get busy with cuttings is in the late spring or early summer. This is when the plant is actively growing and full of vigor. New growth tends to root more readily than older, woodier stems. You can also propagate from divisions a bit later in the season, after flowering has peaked.
Supplies You’ll Need
Here’s what I reach for when I’m ready to multiply my Ruellias:
- Sharp pruning shears or a clean knife: For making clean cuts, which is super important!
- Small pots or seed trays: Anything that can hold the potting mix and your cuttings.
- A good quality potting mix: I like to use a mix that drains well. A blend of peat moss or coco coir, perlite, and a bit of compost works wonders. You can also find pre-made seedling or cutting mixes.
- Rooting hormone (optional but helpful): A little encouragement for your cuttings can speed things up.
- Watering can or spray bottle: For gentle watering.
- Plastic bags or a propagation dome: To create a humid environment.
- Labels and a marker: To remember what you planted and when!
Propagation Methods
Ruellia pedunculata is wonderfully versatile. I find two methods work best:
1. Stem Cuttings: My Go-To Method
This is how I usually get the most plants.
- Find a healthy stem: Look for a stem that’s not flowering but has plenty of green, actively growing tips. Avoid anything that feels old or woody.
- Make your cut: Using your sharp shears, cut a stem about 4-6 inches long. Make the cut just below a leaf node (where a leaf attaches to the stem). This is where the magic happens for root development.
- Prepare the cutting: Gently remove the lower leaves, leaving just a couple of sets at the top. This prevents them from rotting in the soil.
- Dip in rooting hormone (optional): If you’re using it, dip the cut end into the rooting hormone, tapping off any excess.
- Plant your cuttings: Fill your small pots with your prepared potting mix. Make a small hole with your finger or a pencil and insert the cut end of the stem, making sure at least one leaf node is below the soil surface. Gently firm the soil around the stem.
- Water gently: Water the soil until it’s evenly moist but not soggy.
- Create humidity: Cover the pot with a clear plastic bag or a propagation dome. You can use stakes to keep the bag from touching the leaves. Place the pots in a bright location but out of direct, harsh sunlight.
- Be patient! Check the soil moisture regularly and mist the inside of the bag if it looks dry. Roots can take anywhere from 2 to 6 weeks to form. You’ll know they’ve rooted when you see new leaf growth.
2. Division: For Established Plants
If you have a mature Ruellia, you can simply divide it.
- Gently dig up the plant: In the spring or fall, carefully dig up your Ruellia plant.
- Separate the root ball: You should be able to see natural breaks in the root system. Gently pull the plant apart into smaller sections, each with a good amount of roots and some leafy growth. If the roots are really tangled, you might need to use a clean trowel or even a knife to help separate them.
- Replant immediately: Plant these divisions into fresh potting mix, watering them in well.
The “Secret Sauce” (Pro Tips)
Here are a few little tricks I’ve learned over the years that really boost success:
- Don’t let leaves touch the water… or the soil surface too much! This is especially true for stem cuttings. Any leaves below the soil surface are prone to rot. For water propagation, try to position your cuttings so the leaves are above the water level, only the cut stem is submerged.
- Bottom heat works wonders: If you’re struggling with rooting or just want to speed things up, placing your pots on a heat mat designed for seedlings can make a huge difference. It encourages root development from below.
- “Bruise” the stems lightly (optional): Before dipping in rooting hormone, some gardeners will lightly scrape or “bruise” the bottom half-inch of the stem. This can expose more of the cambium layer, which is where roots often form. Be gentle though, you don’t want to damage the stem!
Aftercare & Troubleshooting
Once you see signs of new growth on your cuttings, congratulations! You’ve officially made a new Ruellia.
- Gradually acclimate: If you used a plastic bag, start slowly removing it over a few days to let your new plant get used to the drier air.
- Watering: Water when the top inch of soil feels dry. Keep the soil consistently moist but not waterlogged.
- Light: Continue to provide bright, indirect light. As the plant gets stronger, you can gradually introduce it to more sunlight, but for young plants, it’s best to be cautious.
- Signs of trouble: The most common issue is rot. If your cuttings turn mushy or black, they’ve likely rotted. This is usually due to too much moisture and not enough air circulation. If you see this, discard the affected cutting and make sure your remaining ones have good drainage and aren’t sitting in soggy soil. Yellowing leaves can sometimes indicate too much or too little water, or not enough light, but with new cuttings, it’s often just the plant adjusting.
Propagating Ruellia pedunculata is such a satisfying way to expand your garden and share the joy of these lovely flowers. Don’t get discouraged if a few don’t make it – that’s all part of learning! Just keep at it, and soon you’ll have an abundance of cheerful blooms to enjoy. Happy gardening!
Resource:
https://identify.plantnet.org/k-world-flora/species/Ruellia%20pedunculata%20Torr.%20ex%20A.Gray/data