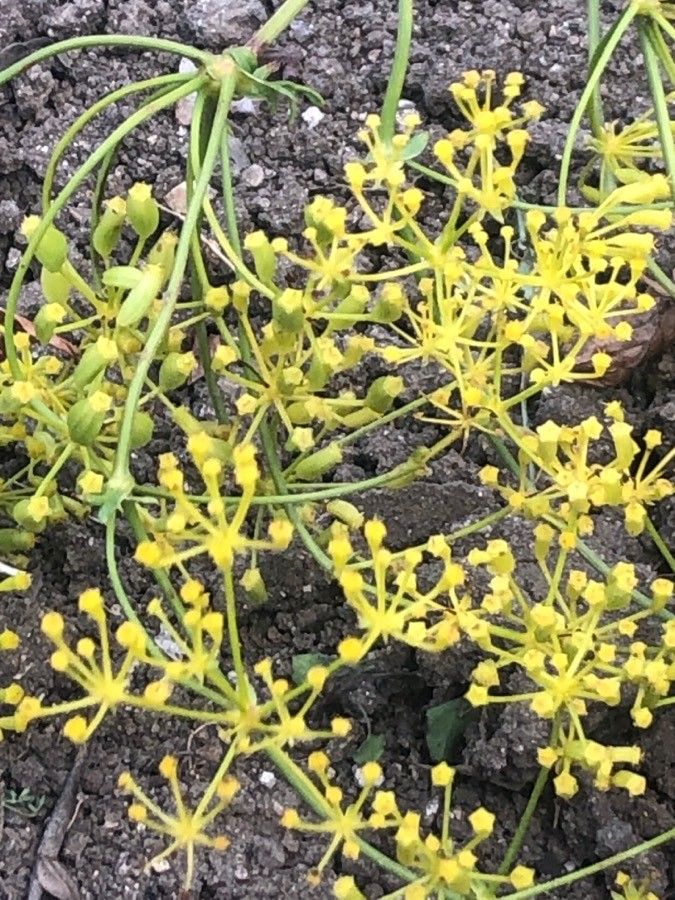
Oh, hello there! Pull up a chair. I’m so glad you’re curious about Ferulago brachyloba. This plant… well, it’s really something special, isn’t it? Those feathery, aromatic leaves and those charming umbrella-like flower clusters that attract all sorts of buzzing buddies. Growing them from scratch is incredibly satisfying. You get to witness that tiny spark of life transform into a beautiful, thriving plant. Now, is it a simple windowsill task? Honestly, for a complete beginner, it can be a little bit of a learning curve. But with a few pointers, you’ll be well on your way!
The Best Time to Start
For Ferulago brachyloba, spring is your golden ticket. Once the last frost has safely passed and the soil is warming up, you’ll find the plant is bursting with new energy. This is when it’s most receptive to propagation, whether you’re taking cuttings or thinking about dividing. Trying to do it too early, or when the plant is stressed, just makes things harder on everyone – including you!
Supplies You’ll Need
Here’s what I usually gather before I get my hands dirty:
- Clean, sharp pruning shears or a small knife. A dull tool can bruise stems, and we don’t want that.
- A well-draining potting mix. I like a blend of equal parts peat moss, perlite, and a little bit of compost. Or, you can buy a good quality seed-starting mix.
- Small pots or trays. Make sure they have drainage holes!
- Rooting hormone (optional but helpful). Available at most garden centers.
- A spray bottle. For misting.
- A clear plastic bag or a propagator. To create a humid environment.
- Labels. So you don’t forget what you planted where!
Propagation Methods
I’ve found that division is generally the most successful and straightforward method for Ferulago brachyloba for those looking to replicate an existing, mature plant.
- Prepare Your Tools: Make sure everything is clean. Wash your hands too!
- Gently Excavate: In spring, when the plant is starting to wake up, carefully dig around the base of your established Ferulago brachyloba. You want to expose the root ball without causing too much damage.
- Inspect for Divisions: Look for natural breaks in the root system, where new shoots or crowns are emerging. You should be able to see where the plant wants to separate.
- The Gentle Pull (or Cut): Using your hands as much as possible is best. Gently tease apart sections. If a division is stubborn, you can use your clean knife or shears to cut cleanly through the root mass, ensuring each new piece has roots and at least one good bud or shoot.
- Potting Up: Place each division into its own pot filled with your well-draining mix. Make sure the crown (where the shoots emerge from the roots) is just at the soil surface.
- Watering: Water gently but thoroughly. You want the soil to be moist but not waterlogged.
While stem cuttings can sometimes work, I’ve found Ferulago brachyloba to be a bit more reluctant with this method compared to division. If you want to try, take a non-flowering stem, dip the cut end in rooting hormone, and place it in moist potting mix. Cover with plastic to maintain humidity.
The “Secret Sauce” (Pro Tips)
Here are a few little tricks I’ve picked up over the years that can make a big difference with this plant:
- Don’t Overwater Newly Divided Plants: I know it seems counterintuitive, but too much moisture right after division can lead to rot. Keep the soil consistently moist, not soggy. Think of it as giving them a drink they can sip, not chug.
- Give Them a Little Warmth: Especially if you’re trying cuttings (though less critical for division if done in spring), placing your pots on a heating mat can really encourage root development. It mimics that spring soil warmth they love.
- Patience is Paramount: Ferulago brachyloba isn’t the fastest grower when it comes to establishing roots. Don’t panic if you don’t see immediate top growth. The roots are doing their work underground.
Aftercare & Troubleshooting
Once your divisions are potted, place them in a bright, indirect light location. Avoid direct, scorching sun, especially while they’re getting established. Continue to keep the soil consistently moist. You can slowly acclimate them to more direct sun as you see new growth appearing.
Now, what if things go wrong? The most common issue you’ll face is rot. This usually happens from overwatering. If you notice stems wilting dramatically, turning mushy, or developing brown, soft spots even though the soil is damp, it’s likely rot. Unfortunately, there’s not much you can do once rot sets in deeply. The best prevention is that good drainage and careful watering I’ve mentioned. If you catch it really early on a cutting, you might be able to trim away the rotted part and try again, but it’s tough.
Happy Planting!
Don’t get discouraged if your first attempt isn’t perfect. Gardening is all about learning and experimenting. Each time you try, you’ll get a better feel for your plants and their needs. Just enjoy the process of nurturing these bits of life. Happy propagating, and I can’t wait to hear about your beautiful Ferulago brachyloba!
Resource:
https://identify.plantnet.org/k-world-flora/species/Ferulago%20brachyloba%20Boiss.%20&%20Reut./data