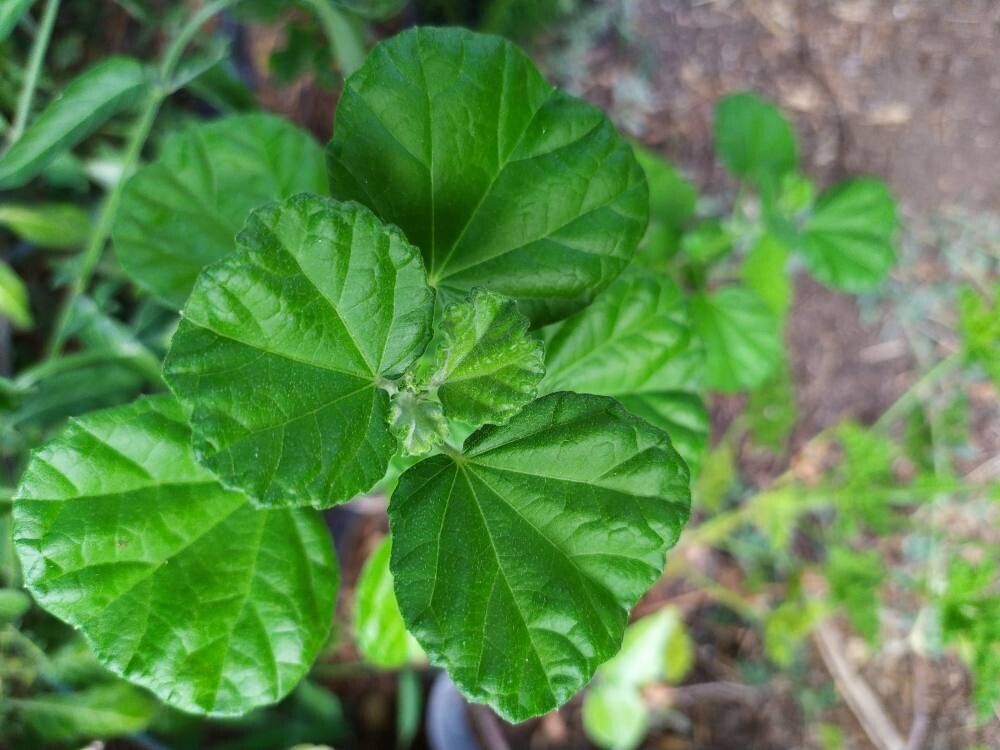
Oh, hello there! Grab your favorite mug, because we’re going to chat about a truly delightful plant that I just adore: Pavonia praemorsa. If you’ve seen this beauty in person, you know its appeal. Those lovely, cheerful yellow flowers and interesting, almost heart-shaped leaves bring such a sunny disposition to any garden. And the best news? It’s quite rewarding to propagate! I’d say for beginners, it’s definitely on the easier side. You’ll be sharing these beauties with friends before you know it.
The Best Time to Start
For the highest success rate with Pavonia praemorsa, spring and early summer are your golden ticket. This is when the plant is actively growing and has plenty of energy to put into establishing new roots. You want to be taking cuttings from healthy, vigorous stems that aren’t flowering or producing seed. Think of it as harvesting a bit of that youthful exuberance.
Supplies You’ll Need
Here’s what you’ll want to have on hand:
- Sharp pruning shears or a clean knife: For taking clean cuttings. We don’t want to crush those precious stems!
- Rooting hormone (optional but helpful): A little dip can encourage faster root development. I usually use a powder, but a gel works too.
- A good potting mix: I like a well-draining mix. A blend of peat moss, perlite, and a bit of compost works wonders. You can also buy a good quality general potting mix and add perlite to it.
- Small pots or seedling trays: Clean ones are important to prevent disease.
- A clear plastic bag or a propagation dome: To create a humid environment for your cuttings.
- Water: For misting and for water propagation if you choose that route.
Propagation Methods
Pavonia praemorsa is quite obliging and can be easily propagated by stem cuttings. This is my go-to method.
- Take Your Cuttings: On a bright, healthy stem, select a piece that’s about 4-6 inches long. Make your cut just below a leaf node (that little bump where a leaf emerges). Remove the lower leaves, leaving just a couple at the very tip.
- Apply Rooting Hormone (Optional): If you’re using rooting hormone, dip the cut end of the stem into the powder or gel. Tap off any excess.
- Plant Your Cuttings: Fill your small pots with your well-draining potting mix. Make a hole in the center with your finger or a pencil. Gently insert the cut end of the stem, ensuring the leaf nodes are below the soil surface. Firm the soil gently around the cutting.
- Create a Humid Environment: Water your cuttings thoroughly. Then, cover the pots loosely with a clear plastic bag or place them under a propagation dome. This traps moisture and creates that extra humidity cuttings crave. Make sure the leaves aren’t touching the plastic if possible.
- Placement: Place the pots in a warm spot with bright, indirect light. Avoid direct sun, which can scorch those tender new cuttings.
Water Propagation: You can also try rooting Pavonia praemorsa in water. Take your cuttings as described above, but instead of planting them, place the cut ends in a jar or glass of water. Make sure no leaves are submerged in the water, as this can lead to rot. Change the water every few days. You’ll see roots emerge from the nodes after a few weeks. Once the roots are about an inch long, you can carefully transplant them into your potting mix.
The “Secret Sauce” (Pro Tips)
Here are a couple of things I’ve learned over the years that really seem to help:
- Bottom Heat is Your Friend: If you have a seedling heat mat, placing your pots on it can significantly speed up root development. It mimics the warmth of the soil in summer and gives those roots a real boost.
- Don’t Be Afraid to Mist: Even with a plastic covering, giving your cuttings a light misting every few days keeps the humidity levels high, which is crucial for preventing them from drying out before they’ve made roots.
- Patience with the Poke Test: When you think your cuttings might be rooted, gently tug on a stem. If you feel a slight resistance, you likely have roots! Don’t be tempted to dig them up too soon; give them ample time to establish.
Aftercare & Troubleshooting
Once you see those roots developing (you might even see new growth!), it’s time to transition your little ones. Gradually introduce them to more light and less humidity. If they were in a plastic bag, start by opening the bag a little each day for a few days before removing it completely. Continue to water them when the top inch of soil feels dry.
The most common issue you might encounter is rot, which usually happens if the cuttings are too wet or in too low light for too long. If you see a cutting looking mushy or turning black, unfortunately, it’s best to discard it to prevent any spread of disease. Good drainage and airflow are your best defenses against rot.
A Encouraging Closing
Propagating plants is a wonderful way to connect with nature and to get more of the plants you love without spending a fortune. Don’t get discouraged if every single cutting doesn’t make it. Gardening is a journey of learning, and each attempt teaches you something new. Be patient with your new Pavonia praemorsa babies, cheer them on, and most importantly, enjoy the process! Happy growing!
Resource:
https://identify.plantnet.org/k-world-flora/species/Pavonia%20praemorsa%20(L.f.)%20Cav./data