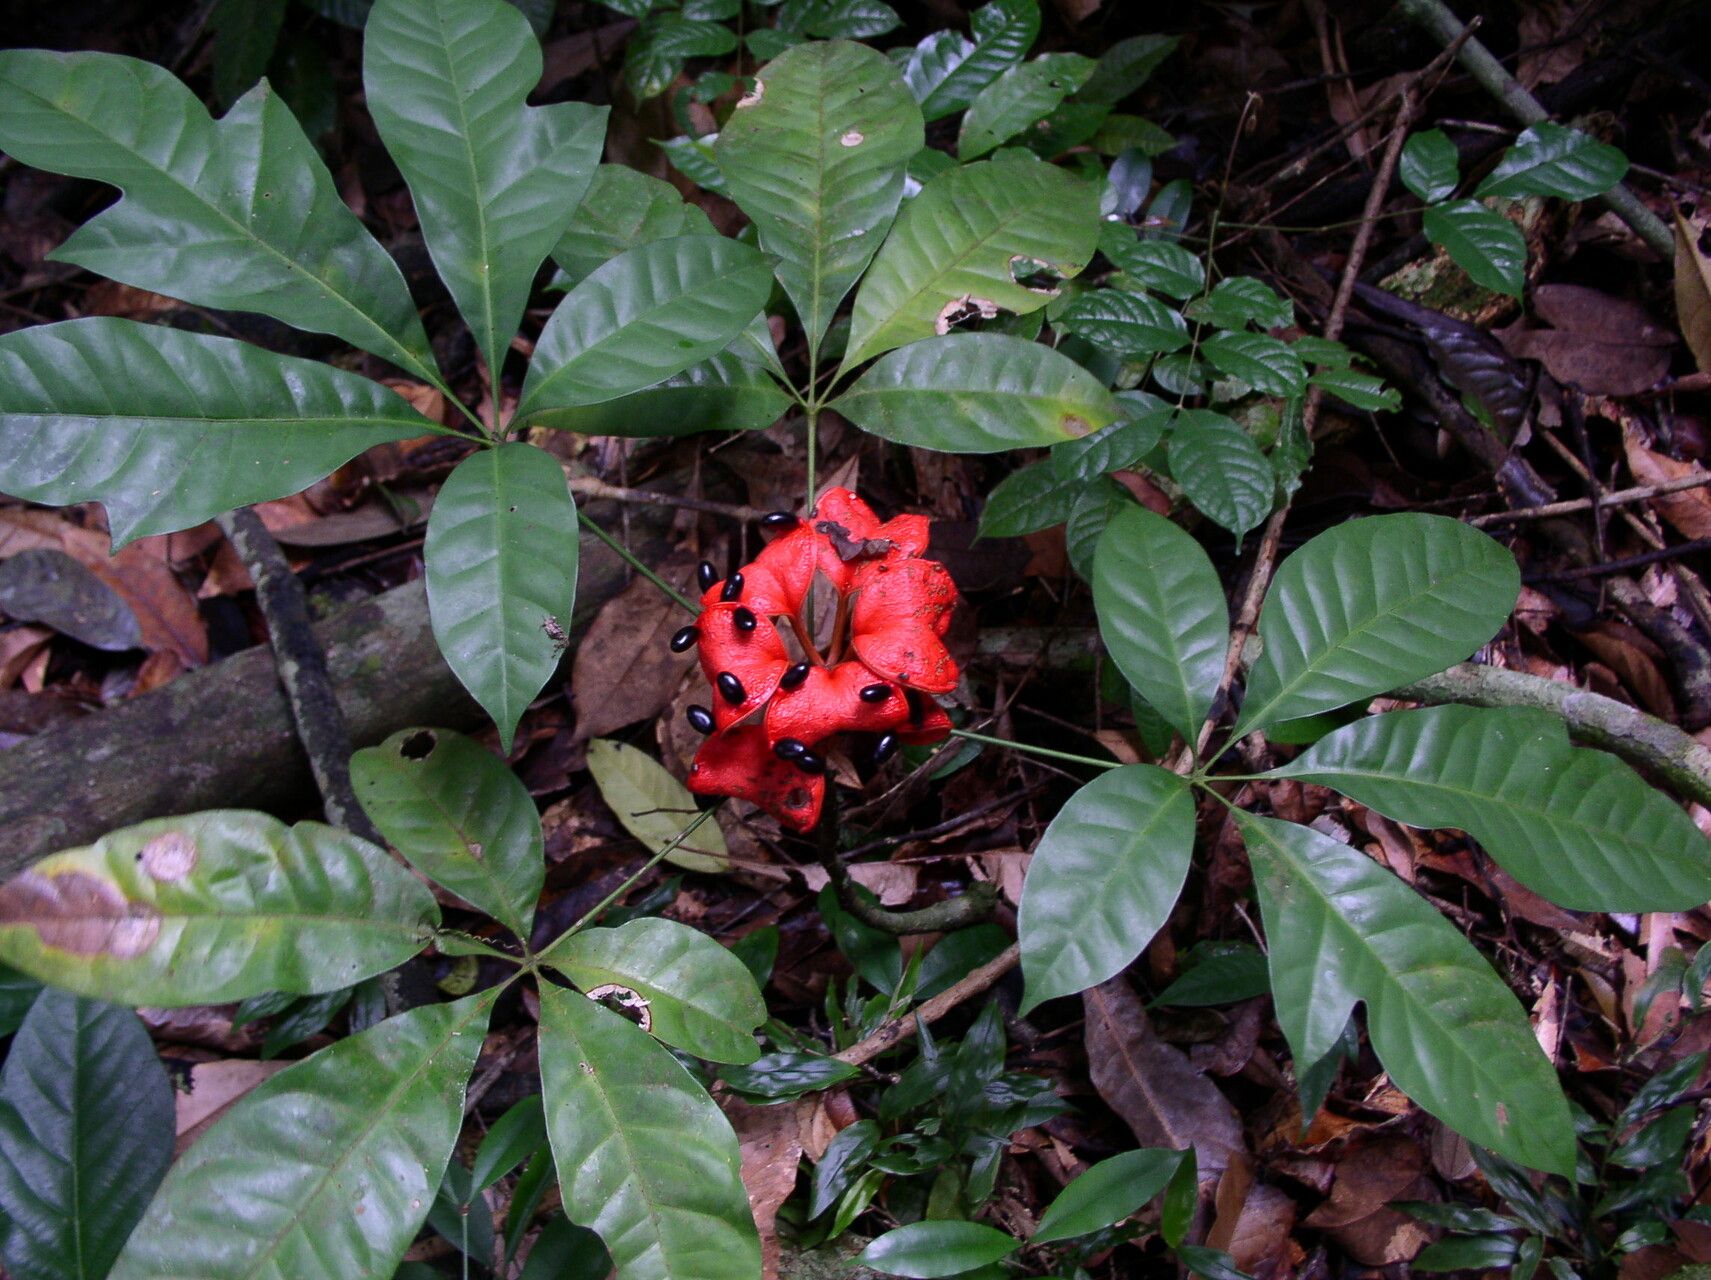
Oh, hello there! I’m so delighted you’re curious about Cola digitata. This plant, with its distinctive deeply lobed leaves arranged in lovely whorls, brings such a unique tropical flair to any collection. It’s a bit of a statement piece, really. And the best part? You can share that beauty with friends, or just double your own green joy, by propagating it. For those of you just dipping your toes into the wonderful world of plant propagation, I’d say Cola digitata is moderately easy. It requires a little attention to detail, but it’s definitely achievable and very rewarding. You’ll feel a real sense of accomplishment!
The Best Time to Start
When it comes to getting new baby Cola digitata plants, I’ve found the sweet spot is during active growth. Think late spring through summer. This is when the plant is naturally putting out new shoots and has plenty of energy to dedicate to rooting. Starting with a healthy, vigorous parent plant is key here. Avoid taking cuttings from a plant that looks stressed or is just waking up from dormancy.
Supplies You’ll Need
To give your Cola digitata cuttings the best chance of success, gather these essentials:
- Sharp Pruning Shears or a Clean Knife: For making clean cuts. Think of it as giving your plant a precise haircut, not a messy chop!
- Well-Draining Potting Mix: A good blend is crucial. I like to use a mix of peat moss, perlite, and some coarse sand. You can also buy a good quality houseplant mix and add extra perlite.
- Rooting Hormone (Optional but Recommended): This is your little secret weapon! It stimulates root development. Look for one with IBA (Indole-3-butyric acid).
- Small Pots or Seedling Trays: Clean ones, of course!
- Clear Plastic Bag or Dome: To create a humid mini-greenhouse.
- Watering Can or Spray Bottle: For gentle watering.
- Labels: So you don’t forget what you planted where!
Propagation Methods: Let’s Get Growing!
My favorite way to propagate Cola digitata is through stem cuttings. It’s straightforward and gives excellent results.
Stem Cuttings
- Select Your Cutting: Look for a healthy stem that’s actively growing but not flowering. You want a piece that’s about 4-6 inches long and has at least two to three sets of leaves.
- Make the Cut: Using your sharp shears or knife, make a clean cut just below a leaf node. This is where the magic of rooting often happens.
- Prepare the Cutting: Gently remove the lower leaves, leaving just one or two at the very top. This prevents them from rotting in the soil or water.
- Apply Rooting Hormone (if using): Dip the cut end of the stem into your rooting hormone powder, coating about an inch of the base. Tap off any excess.
- Plant Your Cutting: Make a small hole in your prepared potting mix with a pencil or your finger. Gently insert the cutting, ensuring the node where you removed the leaves is buried. Firm the soil gently around the base.
- Water Gently: Water the soil thoroughly until you see it drain from the bottom.
Water Propagation (An Alternative)
While I lean towards soil for Cola digitata, water propagation can work too:
- Prepare the Cutting: Follow steps 1-3 above.
- Place in Water: Put the cutting in a clean glass or jar of water. Crucially, make sure no leaves are submerged. They’ll rot quickly!
- Change Water Regularly: Refresh the water every few days to keep it clean and oxygenated.
The “Secret Sauce” (Pro Tips)
Here are a few things I’ve learned over the years that really help:
- Bottom Heat is Your Friend: If you can, place your pots on a heat mat designed for plants. This extra warmth from below encourages robust root development much faster than ambient room temperature alone. My cuttings seem to sigh with relief when they have that gentle warmth.
- Humidity is Key, But Not Too Much: Cover your potted cuttings with a clear plastic bag or a propagation dome. This creates a humid environment, preventing the leaves from drying out before roots form. However, open the bag for a few minutes each day to allow for air circulation and prevent fungal issues. Think of it as a refreshing spa treatment for your cuttings!
Aftercare & Troubleshooting
Once your cuttings have been planted and covered, place them in a warm spot with bright, indirect light. Think a bright windowsill, but not in direct, scorching sun.
Checking for Roots: After about 4-6 weeks, you can give your cuttings a gentle tug. If you feel resistance, congratulations – you have roots! You can also carefully peek at the drainage holes for any visible roots.
Transplanting: Once the roots are well-established, you can transplant your new Cola digitata into its own slightly larger pot with fresh potting mix.
Troubleshooting:
- Yellowing Leaves: This can happen with new cuttings. If the stem is still firm, give it a bit more time. If the leaves are limp and yellow, it might be overwatering.
- Rotting: This is the most common enemy. It’s usually caused by too much moisture, poor drainage, or leaves sitting in water (in the case of water propagation). If you see mushy, dark stems, it’s likely rot. Remove affected cuttings immediately to prevent it from spreading. Ensure your potting mix is airy and your watering is judicious.
A Little Patience Goes a Long Way
Watching a new plant sprout from a simple cutting is one of gardening’s purest joys. Don’t get discouraged if not every single cutting takes. Gardening is a journey, and sometimes it’s about learning what works best for you and your environment. Be patient, enjoy the process, and soon you’ll be surrounded by more of these gorgeous Cola digitata beauties! Happy propagating!
Resource:
https://identify.plantnet.org/k-world-flora/species/Cola%20digitata%20Mast./data