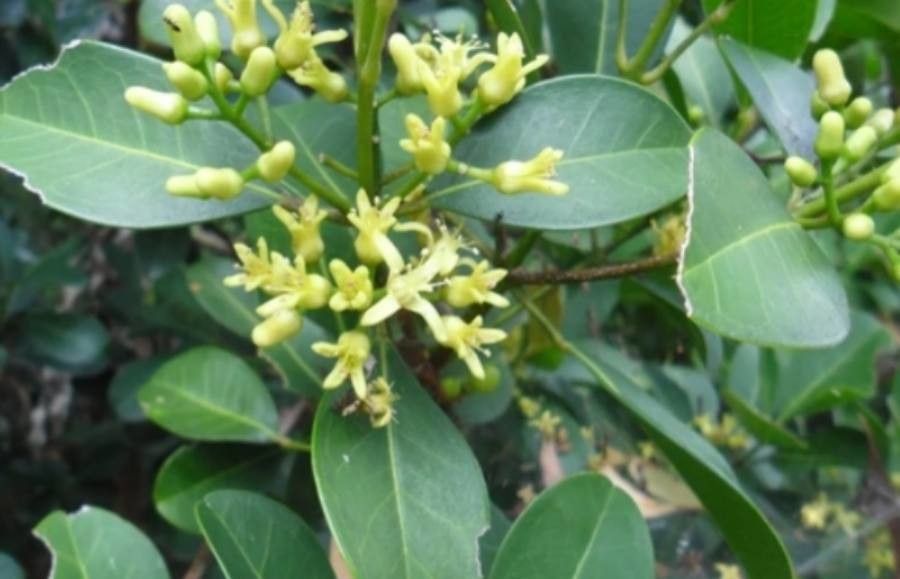
Oh, hello there! Grab yourself a cuppa, won’t you? I’m so excited to chat with you today about a plant that’s really captured my heart over the years: the beautiful Acronychia imperforata. You might know it by its common name, the Beach Acronychia or White Flower. Growing up along the coast here, it’s a sight for sore eyes with its glossy, dark green foliage and clusters of fragrant, star-like white flowers that attract all sorts of lovely pollinators.
There’s something incredibly special about coaxing a new life from an existing plant, don’t you think? It’s a connection to nature, a way to share the beauty you love. Propagating the Beach Acronychia is, I’d say, moderately easy. It’s not quite as straightforward as a spider plant, but with a little attention and the right approach, you’ll have a wonderful success rate. It’s a project that’s definitely worth the effort, and I promise, the reward of seeing those first tiny roots emerge is just brilliant.
The Best Time to Start
When it comes to Acronychia imperforata, spring is your golden ticket. That’s when the plant is bursting with new growth and has plenty of energy to put into establishing roots. You can also have good luck in early summer, as long as you provide consistent warmth and moisture. Avoid propagating in the dead of winter when everything is slowing down, or in the harsh heat of midsummer, which can stress out your cuttings. Look for stems that are actively growing but not flowery.
Supplies You’ll Need
Before we get our hands dirty, let’s gather our tools:
- Clean, sharp pruning shears or a craft knife: We need clean cuts to prevent disease.
- Rooting hormone (powder or gel): This is a fantastic booster for encouraging strong root development.
- Potting mix: A good blend is one part perlite to one part coco coir or peat moss. This provides drainage and aeration, which is crucial. You can also use a seed-starting mix.
- Small pots or trays: Ensure they have drainage holes. Yogurt pots with a few holes poked in the bottom work in a pinch!
- Plastic bags or a propagator: To create a humid environment for your cuttings.
- Watering can with a fine rose or a spray bottle: For gentle watering.
- Labels and a marker: So you don’t forget what you’ve planted!
Propagation Methods
I find stem cuttings to be the most reliable method for Acronychia imperforata. It’s tried and true, and you get a lovely little plant that’s genetically identical to the parent.
Here’s how we’ll do it:
- Take your cuttings: In the spring or early summer, select healthy, actively growing stems from your mature plant. Look for stems that are about 6-8 inches long. Make a clean cut just below a leaf node (where a leaf attaches to the stem). Remove any flowers or flower buds from the cutting.
- Prepare the cuttings: Gently strip off the lower leaves, leaving just a few at the top. This helps the cutting focus its energy on root production, not leaf maintenance.
- Apply rooting hormone: Dip the cut end of the stem into your rooting hormone, tapping off any excess. Make sure the end is coated.
- Plant your cuttings: Fill your pots with your prepared potting mix. Make a small hole in the center with your finger or a pencil. Insert the cutting into the hole, ensuring it’s firm in the soil.
- Water gently: Water the soil thoroughly but gently. You want it moist, not waterlogged.
- Create humidity: Place the pots inside a plastic bag or a propagator. Seal it loosely, or prop it open slightly to allow for some air circulation. This is vital to prevent the cuttings from drying out.
- Place in a good spot: Find a warm location with bright, indirect light. Avoid direct sunlight, which can scorch the delicate cuttings.
The “Secret Sauce” (Pro Tips)
Now for a few little tricks I’ve picked up along the way:
- Bottom heat is your best friend! If you can, place your pots on a heated propagator mat. This gentle warmth from below encourages root development much faster and more effectively. It’s like giving those nascent roots a cozy little incubator.
- Don’t let the leaves touch anything but air! When you’re trying to keep things humid with a plastic bag, make sure none of the leaves are pressed against the plastic. Condensation can sit on the leaves and lead to fungal diseases and rot. You can use stakes to prop up the bag if needed.
- A clean environment is everything. Make sure all your tools, pots, and even your hands are spotlessly clean. Any lingering bacteria or fungi can quickly doom your cuttings. It’s like giving them the cleanest start possible.
Aftercare & Troubleshooting
Once you’ve potted up your cuttings, patience is key! Keep the soil consistently moist but not soggy. Feel the soil almost daily, and mist the leaves if they look a bit droopy. You should start to see signs of new growth—tiny new leaves or a slight tug on the cutting when you gently pull—within 4-8 weeks.
Troubleshooting:
- Mushy stem, wilting: This is usually a sign of rot, often caused by overwatering or poor drainage. Your cutting has likely succumbed. Don’t be discouraged; learn from it and try again with drier soil and better ventilation next time.
- No signs of growth after several months: It might just be taking its sweet time, or it might not have taken. Sometimes, the conditions just aren’t quite right. Try moving it to a slightly warmer or brighter spot, or reassess your watering.
- Leaves turning yellow and dropping: This can happen if the cutting is drying out too much or if it’s getting too much direct sun. Check your humidity levels and move it accordingly.
A Encouraging Closing
You’ve got this! Propagating plants is a journey, and each attempt teaches you something new. Don’t be afraid to experiment and observe. Watch your little cuttings, learn their needs, and celebrate every tiny victory. The joy of growing your own beautiful Acronychia imperforata from scratch is truly a gift. Happy gardening!
Resource:
https://identify.plantnet.org/k-world-flora/species/Acronychia%20imperforata%20F.Muell./data