Oh, hello there! It’s lovely to have you join me. I’ve been spending my days with plants for two decades now, and one of my greatest joys is sharing that little piece of green magic with others. Today, we’re going to talk about a truly delightful little flower: Calendula tripterocarpa.
Your Own Sunshine Patch: Why Propagate Calendula tripterocarpa?
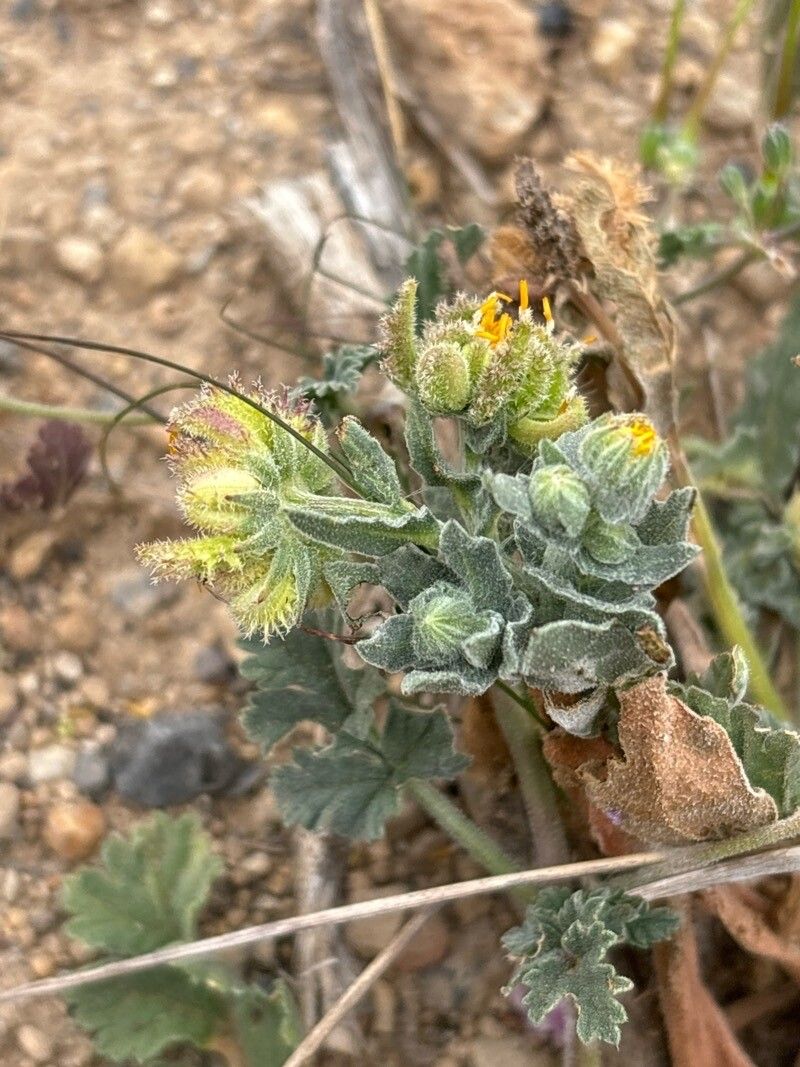
If you love cheerful, sunny blooms that practically radiate happiness, then Calendula tripterocarpa is for you. Often called the desert marigold, it brings a burst of vibrant yellow to even the driest spots. And the best part? You can easily create more of this joy for yourself! For a beginner, propagating calendulas is a wonderfully accessible project. You’ll feel such a sense of accomplishment as you watch these little sparks of life take hold. Let’s get our hands dirty!
The Perfect Moment: When to Get Started
Calendulas are pretty forgiving, but they do have a sweet spot. The ideal time to propagate Calendula tripterocarpa, especially from stem cuttings, is late spring to early summer. This is when the plant is actively growing. You’ll be taking cuttings from healthy, vigorous shoots that haven’t yet flowered. If you’ve missed that window, don’t fret! You can often get away with it in early autumn, as long as you can get the new plants established before a hard frost.
What You’ll Need for Your Propagation Station
Nothing fancy here! Just a few essentials to set you up for success:
- Clean Potting Mix: A well-draining mix is crucial. I like to use a blend of equal parts peat moss or coco coir, perlite, and a bit of compost.
- Sharp Pruning Shears or a Knife: For making clean cuts. Sterilize them with rubbing alcohol to prevent disease.
- Small Pots or Seed Trays: Clean, with drainage holes, of course.
- Watering Can with a Fine Rose: To water gently without disturbing your cuttings.
- Plastic Bag or Clear Dome: To create a humid environment for your cuttings.
- (Optional) Rooting Hormone: While not strictly necessary for calendulas, it can give your cuttings a little boost. Look for a powder or gel formula.
Bringing New Life: Propagation Methods
For Calendula tripterocarpa, my go-to method is stem cuttings. It’s straightforward and highly effective.
Stem Cuttings:
- Select Your Parent Plant: Find a healthy, happy Calendula tripterocarpa plant. Look for non-flowering stems that are about 4-6 inches long.
- Make the Cut: Using your sterilized shears, make a clean cut just below a leaf node (where the leaves attach to the stem).
- Prepare the Cuttings: Gently remove the lower leaves, leaving just a few sets at the very top. This prevents decay when they’re in the soil and redirects the plant’s energy to root development. If your cutting is particularly long, you can even cut it in half to make two shorter cuttings.
- Dip (Optional): If you’re using rooting hormone, dip the cut end into the powder or gel. Tap off any excess.
- Plant Them Up: Fill your pots with your prepared well-draining potting mix. Make a small hole with your finger (or a pencil) and gently insert the cutting, ensuring the leaf nodes that were buried are underground. Firm the soil gently around the stem.
- Water Gently: Water thoroughly until water drains from the bottom of the pot.
- Create Humidity: Cover the pot with a plastic bag or a clear plastic dome. Make sure the leaves don’t touch the sides of the bag if possible; it can encourage rot. You can prop the bag up with a few stakes if needed.
- Find a Bright Spot: Place the pots in a bright location with indirect sunlight. Avoid direct sun, which can scorch young cuttings.
The “Secret Sauce”: My Insider Tips
Here are a few little tricks I’ve learned over the years that can make a big difference:
- Bottom Heat is Your Friend: If you can, place your pots on a seedling heat mat. This gentle warmth encourages root development from below, really speeding things up and increasing your success rate. It mimics the conditions of a warm spring soil.
- Mist Regularly: Don’t let the soil dry out completely, but also don’t keep it waterlogged. I like to gently mist the leaves of the cuttings every day or two, especially if you’re using a plastic bag. This keeps them turgid and happy while they wait for roots.
- “Scratch Test” Patience: Resist the urge to constantly tug at your cuttings to see if they have roots! A better method is the “scratch test.” Gently scratch a tiny bit of the outer bark on the stem with your fingernail. If you see green underneath, the stem is still alive and working on roots. If it’s brown and dry, it’s likely not going to make it.
Aftercare and When Things Go Wrong
Once you start to see new growth appearing on your cuttings – tiny leaves unfurling! – that’s a great sign roots are forming. You can also gently tug on the cutting; if there’s resistance, it’s likely rooted.
- Acclimatize Gradually: Once roots are established, start slowly acclimatizing your new plants to normal conditions. This means gradually removing the plastic bag or dome for longer periods each day over a week.
- Pot Them Up: When they’re ready for their own homes, pot them up into larger containers with fresh potting mix.
- Water Wise: Continue to water them regularly, but always check the soil dryness first.
- Troubleshooting Rot: The most common issue is root rot. If your cuttings turn black and mushy at the base, or if you see mold on the soil surface, it’s usually a sign of too much moisture and poor air circulation. Make sure your soil drains well and your humidity isn’t excessive. Sometimes, you can save a waterlogged cutting by trimming away the rotted parts and repotting into dry, fresh soil.
Happy Growing, My Friend!
Creating new life from a simple cutting is one of the most rewarding aspects of gardening. Be patient, observe your little plants, and don’t be discouraged if not every cutting makes it. Gardening is a journey of learning and discovery, and with Calendula tripterocarpa, you’re bound to have a beautiful, sun-filled adventure. Happy propagating!
Resource:
https://identify.plantnet.org/k-world-flora/species/Calendula%20tripterocarpa%20Rupr./data