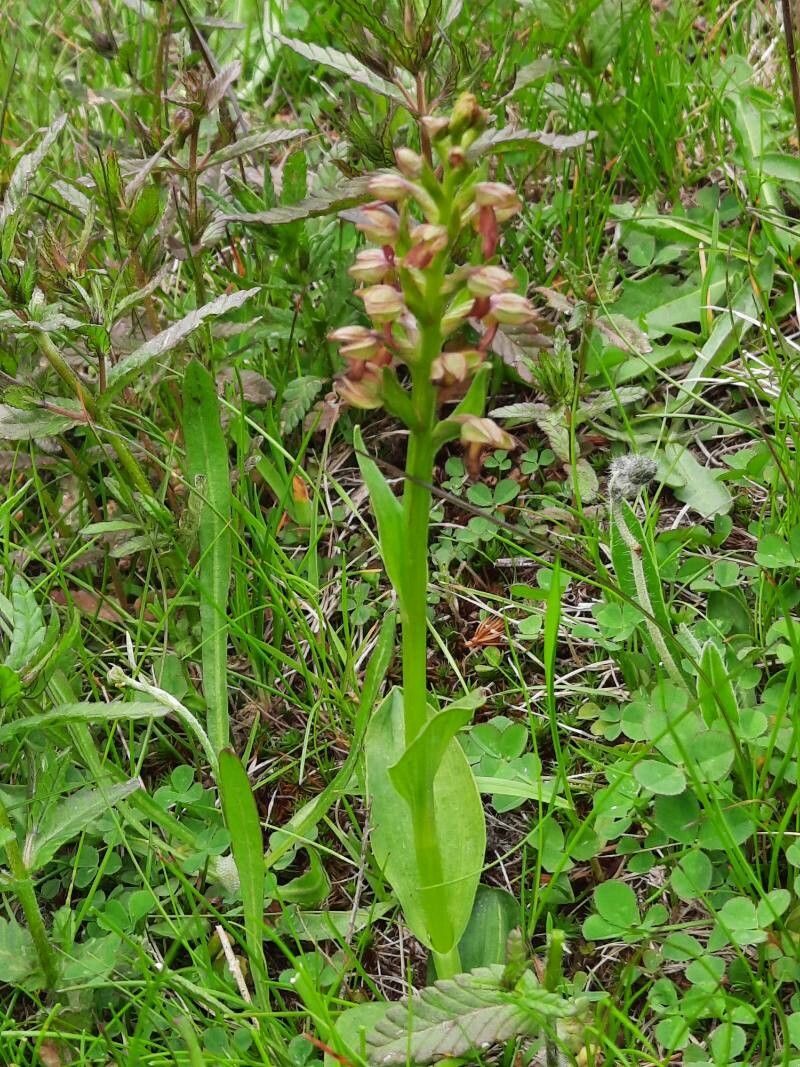
Oh, hello there! Pull up a chair. I’m so glad you stopped by. Today, we’re going to chat about a really special plant: the charming little Dactylorhiza viridis. If you’ve ever admired its delicate green flower and unique leaves, you’re in for a treat. Propagating this beauty is such a rewarding way to get more of them for your garden, or even to share with fellow plant lovers. Now, I won’t sugarcoat it – Dactylorhiza viridis isn’t typically a beginner’s first rodeo for propagation. It can be a tad pokey, but with a little patience and the right approach, you absolutely can be successful.
The Best Time to Start
Timing is everything in the garden, isn’t it? For Dactylorhiza viridis, the sweet spot for propagation is spring, right as the plant is waking up from its winter slumber. You’re looking for the emergence of new growth, often when the shoots are just a few inches tall. Trying to propagate from dormant material can be tricky. We want active, vibrant energy to fuel those new roots!
Supplies You’ll Need
Gathering your supplies ahead of time makes the whole process much smoother. Here’s what I always have on hand:
- Sharp, sterilized pruning shears or a clean craft knife: For precise cuts that won’t invite disease.
- A good propagation mix: I like a blend of peat moss, perlite, and coarse sand in roughly equal parts. It needs to be free-draining.
- Small pots or trays: Clean ones, of course!
- Perlite or grit: For top dressing and drainage.
- Soft water or rainwater: Plants can be fussy about tap water.
- A spray bottle: For gentle misting.
- Optional: Rooting hormone: While not always essential for Dactylorhiza, it can give you an extra boost. I prefer a powder form.
- Optional: A clear plastic bag or dome: To create a humid environment.
Propagation Methods: Division is Key!
For Dactylorhiza viridis, while some might experiment with other methods, division is truly the most reliable and recommended approach. Since they form tubers, it’s like gently teasing apart a family.
- The Gentle Excavation: Wait until the plant has finished flowering and the foliage is starting to yellow and die back a bit – typically late summer or early autumn. This is when the tubers are in a resting phase and will be easier to handle. Carefully dig around the plant, trying to loosen the soil. Gently lift the entire clump from the ground.
- Clean and Inspect: Gently brush away as much soil as you can from the tuberous roots. You’ll see the main tuberous root system. Inspect them for any signs of rot or damage.
- The Divide: With clean hands or a sterilized tool, gently separate the clump into smaller sections. Each section should have at least one healthy-looking tuber and a growth bud or two. Don’t be afraid to give it a good, firm tug, but if it’s really resistant, use your sterilized knife to make a clean cut. The goal is to cause as little damage as possible.
- Dry Off (Briefly): Let the divided sections sit for a few hours in a dry, shaded spot to allow any minor cuts to callous over. This helps prevent rot.
- Replant: Pot each division into your prepared, well-draining propagation mix. Plant them just deep enough so the tuber is covered, with the growth bud facing upwards. A good rule of thumb is to plant them about as deep as the tuber is wide.
The “Secret Sauce” (Pro Tips)
Here are a few things I’ve learned over the years that can really make a difference:
- Think Drainage, Drainage, Drainage! This is non-negotiable for Dactylorhiza. They absolutely hate sitting in soggy soil. I’ll often add an extra layer of grit or small gravel to the bottom of the pot before filling it with my mix.
- Don’t Overcrowd Your Pots: Give each division a bit of space. Trying to cram too many into one pot will just lead to competition and potential disease issues. It’s better to have a few healthy, well-spaced plants than a crowded mess.
- Patience with Watering: After dividing and replanting, I only water very lightly. They don’t need much while they’re settling in. You want the soil to be barely moist, not wet. Overwatering at this stage is a sure way to invite rot.
Aftercare & Troubleshooting
Once your newly divided Dactylorhiza are planted, they need a gentle touch. Keep them in a bright location, but out of direct, scorching sun. Water sparingly, allowing the soil surface to dry out between waterings. You’re aiming for a consistently slightly moist soil, not a swamp. Mist them occasionally if your air is particularly dry.
The most common enemy here is rot. If you see the tuber or the new shoots turning mushy and brown, it’s usually a sign of too much moisture. Sadly, there’s not much you can do once rot takes hold, but learning from it is key. If you’re consistently having rot issues, it’s a clear indicator your soil isn’t draining well enough, or you’re watering too much.
A Encouraging Closing
Propagating Dactylorhiza viridis is a journey, not a race. Be kind to yourself and to your new little plants. Celebrate every tiny sprout and every sign of new growth. The satisfaction of nurturing a new life from an existing one is truly special. Happy gardening, and enjoy the process!
Resource: