Hello there, fellow garden enthusiasts!
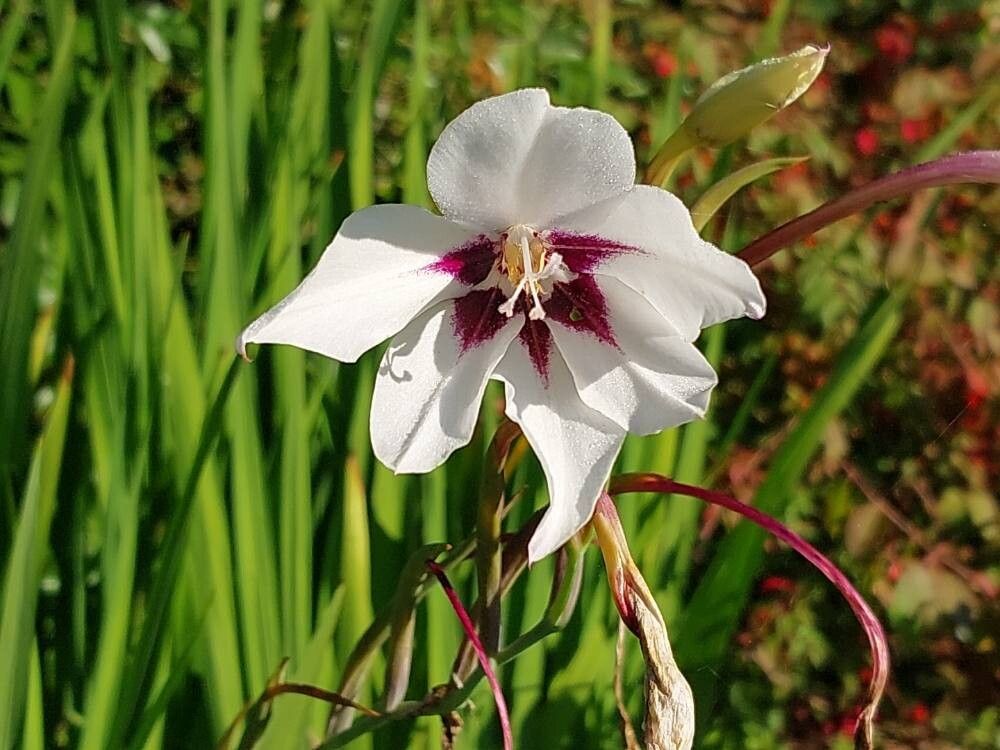
If you’ve ever been enchanted by the delicate, star-shaped white flowers of Gladiolus murielae, also known as the Abyssinian gladiolus or Midget gladiolus, you’re in for a treat. Their sweet, intoxicating fragrance on a summer evening is simply magical. And the best part? They’re surprisingly easy to multiply! If you’re new to the gardening world, propagating these beauties is a fantastic and rewarding project to sink your green thumb into.
The Best Time to Start
When it comes to Gladiolus murielae, patience is key, but so is timing! The absolute best time to propagate them is after the flowering season has ended, usually in late summer or early fall. This is when the parent plant has put its energy into producing new corms (those underground bulbs) and is naturally preparing to go dormant. You’ll find it easiest to spot and work with the new growth then.
Supplies You’ll Need
Gathering your tools beforehand makes the entire process smoother. Here’s what I always have on hand:
- Sharp pruning shears or a clean knife: For making clean cuts.
- A well-draining potting mix: I like a blend of equal parts compost, peat moss, and coarse sand.
- Small pots or trays: Enough to accommodate your divisions.
- Rooting hormone (optional but recommended): This gives your baby corms a little extra boost.
- Labels and a marker: To keep track of what you’ve planted and when.
- A watering can with a fine rose: For gentle watering.
Propagation Methods
For Gladiolus murielae, the most effective and straightforward method is division. They don’t really do well with stem cuttings or water propagation like some other bulbs.
Here’s how to divide them:
- Gently excavate the parent plant: Once the foliage has yellowed and died back, carefully dig around the base of the plant. You want to loosen the soil and lift the entire clump of corms. Be gentle to avoid damaging any of the new, smaller corms that have formed.
- Separate the corms: The large, original corm will likely be there, along with several smaller offsets, or “cormels,” that have sprouted from its sides. Gently break or cut these apart. You’re looking for individual corms, even the small ones. If a cormel has a tiny basal plate (where roots will grow from), it has a good chance of developing.
- Inspect and trim: Look for any damaged or diseased portions and trim them away with your clean shears. Remove any old, papery husks from the corms.
- Apply rooting hormone (optional): If you’re using rooting hormone, dip the basal end of each cormel into the powder, tapping off any excess. This really encourages good root development.
- Plant your new treasures: Fill your small pots with your prepared potting mix. Plant each cormel about 2-3 inches deep, with the pointed end facing upwards. If you have larger, well-established corms, you can plant them a bit deeper. Water them in gently.
The “Secret Sauce” (Pro Tips)
After years of coaxing these lovely blooms, I’ve picked up a few tricks that seem to make all the difference.
- Don’t discard the “babies”: Even the tiniest cormels, if they have a basal plate, are worth planting! They might take an extra season to mature, but I’ve had immense satisfaction growing a full clump from what looked like a speck.
- Think dormancy, not rescue: When you divide them in late fall, you are essentially giving them a head start in their natural dormancy period. They need this rest before they can put energy into growing new roots and shoots.
- Give them a gentle shake: When you’re separating the corms, if they’re sticking together, a gentle shake can often loosen them without causing damage. It’s like they’re just saying hello!
Aftercare & Troubleshooting
Once your new Gladiolus murielae corms are planted, the real waiting game begins.
Keep the soil lightly moist but never waterlogged. Too much water, especially in cool conditions, can lead to rot, which is the most common problem. You’ll want to keep them in a cool, dry place for the winter. Think of a garage, a cool basement, or even a frost-free shed. They need that chilling period to signal their spring growth.
If you see your corms turning mushy, black, or developing a foul smell, it’s a sign of rot. Unfortunately, there’s usually no coming back from that, so make sure your pots have good drainage and don’t overwater.
A Encouraging Closing
Propagating Gladiolus murielae is a joy. It’s a slow, rewarding process of nurturing new life from your existing plants. Be patient, observe, and enjoy the journey. Soon enough, you’ll be rewarded with not just one, but many of those fragrant, star-like blooms gracing your garden. Happy planting!
Resource:
https://identify.plantnet.org/k-world-flora/species/Gladiolus%20murielae%20Kelway/data