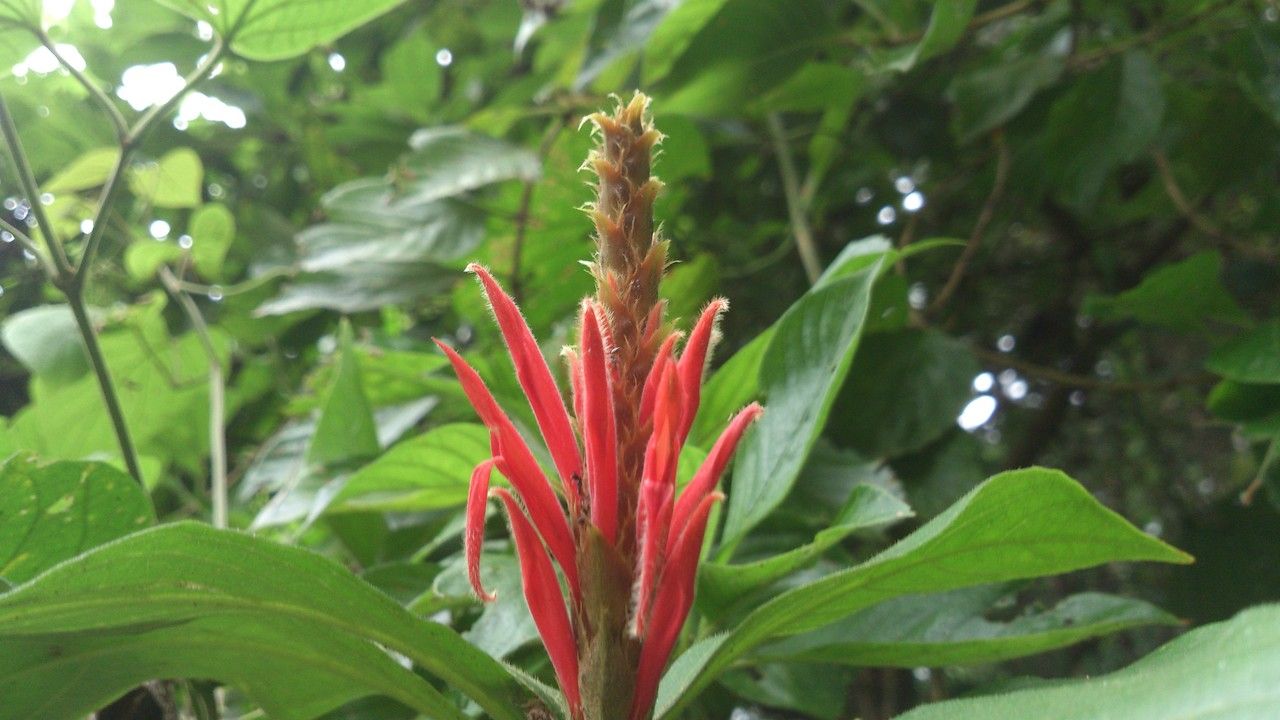
Oh, hello there! Come on in, grab a mug. Let’s chat about Aphelandra scabra, or as I affectionately call them, the “Snake Plant’s cousins with the show-stopping blooms.” These beauties, with their dramatic dark green, velvety leaves and those incredible spikes of bright orange-red flowers, can truly transform a room. Plus, the joy you get from nurturing a tiny new plant into a thriving specimen? It’s pure magic. Now, is propagating Aphelandra scabra a walk in the park for a total newbie? I’d say it’s a pleasant stroll with a few carefully placed stepping stones. It’s not the absolute easiest plant to multiply, but with a little patience and attention, you’ll be well on your way.
When Propagation Blooms Best
My experience tells me the absolute sweet spot for propagating Aphelandra scabra is late spring through summer. This is when the plant is in its prime growing season. The energy is high, the days are longer, and the warmth really encourages those cuttings to get their roots going. Trying it in the dead of winter? You’ll likely find things slow to a crawl, if they move at all. So, mark your calendars for those sunnier months!
Gather Your Garden Goodies
Before we dive in, let’s make sure you have your essentials ready. This isn’t a huge list, but having everything on hand makes the process smoother.
- Sharp Pruning Shears or a Clean Knife: For making those clean cuts.
- A Well-Draining Potting Mix: I love a 50/50 blend of peat moss or coco coir and perlite for superior drainage.
- Rooting Hormone (Optional, but Recommended): This little helper significantly boosts your chances of success. Look for one containing indole-3-butyric acid (IBA).
- Small Pots or Seedling Trays: For your new little plant babies.
- A Spray Bottle: For gentle misting.
- A Clear Plastic Bag or Dome: To create a humid microclimate around your cuttings.
- Labels: To remember what you’ve planted!
Getting New Aphelandras Started
Aphelandra scabra can be successfully propagated through stem cuttings. It’s my preferred method because it’s straightforward and usually yields good results.
- Take Your Cuttings: Select a healthy, mature stem. Using your sharp shears or knife, make a clean cut just below a leaf node. Aim for cuttings that are about 4-6 inches long. Remove the lower leaves, leaving just a few at the top.
- Apply Rooting Hormone (If Using): Dip the cut end of the stem into your rooting hormone powder, tapping off any excess.
- Plant Them Up: Fill your small pots with your prepared well-draining potting mix. Make a small hole in the center of the soil with your finger or a pencil. Gently insert the cut end of the stem into the hole.
- Firm the Soil: Gently firm the soil around the stem to ensure good contact.
- Water Gently: Water the soil thoroughly until you see moisture drain from the bottom of the pot.
- Create Humidity: Place a clear plastic bag loosely over the pot, or use a clear dome. This traps moisture and keeps the humidity high, which is crucial for root development. You can secure the bag with a rubber band or skewer.
My “Secret Sauce” Tips!
Alright, lean in. Here are a few little tricks I’ve picked up over the years that can really make a difference with Aphelandra.
- Don’t Let Leaves Touch Soil: When you’re preparing your cuttings, be ruthless about removing those lower leaves. Any leaf that gets buried or touches the surface of the soil is a prime spot for fungal issues and rot. Keep them up and away!
- Bottom Heat is Your Friend: If you have a propagation mat or can place your pots on a warm windowsill, that gentle bottom heat is like a comforting blanket for your cuttings. It speeds up root formation significantly. Just make sure it’s not too hot – we don’t want to cook those delicate roots before they’ve even formed!
Aftercare and Spotting Trouble
Once your cuttings are in their pots, give them a bright spot, but avoid direct, scorching sunlight. Keep the soil consistently moist, but not waterlogged. You’ll want to remove the plastic bag for about an hour each day to allow for air circulation and prevent mold.
You’ll know your cutting is rooting when you see new leaf growth. This can take anywhere from 4 to 8 weeks, sometimes even longer. Be patient!
So, what if things go wrong? The most common culprit is rot. If your stem starts to look mushy, black, or smells off, it’s usually a sign of too much moisture and not enough air. Unfortunately, rotten cuttings can’t be saved. If you see this, discard the damaged cutting and try again, making sure your soil is drier next time and that you’re airing them out regularly. Wilting can also happen if the cutting is drying out, so check that moisture level.
Happy Planting, My Friends!
Taking cuttings can feel a little daunting at first, but it’s one of the most rewarding gardening skills you can learn. With Aphelandra scabra, a little patience, the right conditions, and these tips, you’ll be celebrating new little plants in no time. Enjoy the journey, embrace any learning curves, and most importantly, savor that incredible feeling of creating life from a simple stem. Happy growing!
Resource:
https://identify.plantnet.org/k-world-flora/species/Aphelandra%20scabra%20(Vahl)%20Sm./data